
The best Bikepacking tent for the UK
- Nick
- Feb 14
- 12 min read
Much of the advice on choosing the best bikepacking tent focuses on weight, pack size and headline specifications. This guide takes a different approach. It’s written for bikepacking in the UK, where wind, rain, soft ground and poor pitches are common. Instead of chasing spec-sheet numbers, it focuses on reliability, durability, weather protection and real-world usability.

Who this article is for
This article is for riders who want a tent that works reliably in the UK, rather than one that only shines in ideal conditions. If you’re new to bikepacking and trying to cut through conflicting advice — or if you’ve already spent a few damp nights questioning past purchases — you’re probably in the right place.
It’s aimed at people who value comfort, durability and practicality over chasing the lightest possible setup. None of this advice assumes perfect weather, unlimited budgets or carefully curated campsites. It’s written with muddy shoes, late finishes and unpredictable forecasts in mind.
What defines camping in the UK
I'm guessing you've landed here because you're either looking to buy or upgrade a tent for bikepacking. Despite my popular article, Bike packing with a tarp, in my opinion, the tent is the most functional method for outdoor sleeping when out on an adventure. It provides great shelter from the elements, good privacy and affords space to spread out and sort your equipment.
Whether you choose a hammock, a tarp shelter or a tent, camping in the UK pretty much guarantees two things: mud and rain. Even in the middle of summer it's not unusual to find muddy patches on the groundsheet and a damp flysheet, either from condensation or a brief overnight shower. I can't emphasise enough the influence these two elements have on UK camping particularly as the overwhelming majority of tent reviews are from overseas users or manufacturers who's conditions are very different.
I’ve spent hundreds of nights in tents over the last forty years, camping under everything from modern synthetics to traditional canvas. I’ve had tents blow away, poles snap, pegs vanish and I’ve improvised a fix more times than I can count. I’ve camped in storms, snow, on mountain tops, and even on a tiny island mid-river, wild camping and staying on family sites alike. Along the way I’ve bought tents on tight budgets for Scout groups, advised Duke of Edinburgh expeditions and hiked, paddled and cycled with a tent — sometimes all on the same trip.
With that in mind, these are the five qualities I personally look for when buying a tent for adventures in the UK:
At the end of the article, I’ve also included some practical tips for actually using a tent while bikepacking. However, if you don't have time to read the full article, here's the summary:
Expect rain, mud, and condensation — even in summer. UK conditions matter.
A two-layer tent with a separate inner and flysheet is far more practical than a single-skin design.
Look for flysheet-first pitching so your inner stays dry when the weather turns.
Simple, robust pole structures (geodesic or semi-geodesic) cope best with wind and rough pitches.
A usable vestibule makes a big difference for storing wet gear and cooking in poor weather.
Muted colours (green or brown) help with discreet wild camping.
Aim for around 1- 1.5kg per person — a little extra weight is often worth it for comfort and durability.
Buy from a reputable brand with good warranty, spares and customer support.
Prioritise staying dry and sleeping well over chasing the lightest possible setup.
TENT CONSTRUCTION
Single or dual skin
I’m not a fan of single-skin tents. They tend to attract condensation, you can’t separate wet and dry components when packing and they’re often more expensive for what you get. Personally, I’ll always opt for a traditional two-layer tent, made up of a breathable inner sleeping compartment and a waterproof outer flysheet.
When I’m looking at construction details, I generally expect:
A flysheet with sealed seams and a hydrostatic head of at least 2000mm
A groundsheet that curves up at the edges to form a bathtub base, with a hydrostatic head of around 5000mm
Good quality YKK type zips and thoughtful design features that reduce unnecessary tension on the flysheet

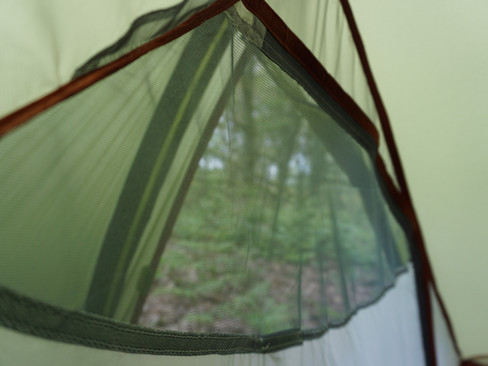
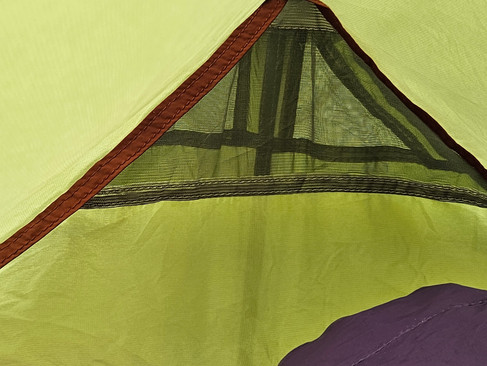
Discrete vents in the flysheet are also really helpful for reducing condensation. The inner tent should include panels of no-see-um mesh to aid ventilation while keeping insects out.


Seam Sealing
I was recently surprised to see a popular tent recommended within the wild camping community that wasn’t seam sealed. Seam sealing was one of the earliest developments after canvas and poly-cotton flysheets and it’s now such a fundamental part of tent manufacturing that most reputable brands back it with a warranty.
If a tent doesn’t come seam sealed, I’d strongly suggest avoiding it.

Pole structure
I tend to favour simple pole structures — ones that avoid complex multi-pole junctions (such as Y- or X-shaped interfaces) or extra poles that protrude to create more living space. In my experience, overly complex designs are more prone to failure in strong winds.
It’s also worth remembering that tents need to cope with bad weather while being pitched — which is often the time when things break. Simple hoop designs, crossing poles and geodesic or semi-geodesic structures tend to be the most robust and easiest to repair.
A full geodesic tent typically uses four poles that cross to form an octagonal structure. Semi-geodesic designs usually use three poles and form a hexagonal shape. Fewer poles generally mean lower weight, but also reduced stability in rough weather. This is why full four-season tents are often geodesic, while three- to four-season tents lean towards semi-geodesic designs.


Images courtesy of Terra Nova Tents
The Terra Nova Quasar (left) is a well-known example of a geodesic design, while the Wild Country Trident (right) uses a semi-geodesic structure.
Dedicated poles
Tents that rely on trekking poles or other equipment can be clever, but they do come with compromises. If your walking pole is holding up your tent, you can’t exactly use it for a stroll without collapsing your shelter. The same applies if you’re using bike wheels or forks as part of a shelter system.
For maximum flexibility, especially when bikepacking, I prefer tents with dedicated poles.

My tarp setup on my London to Brighton Cycle Adventure. It was a novel idea, but meant I had to walk to the pub!
Method of pitching - Flysheet first!
Some tents pitch inner-first, with the flysheet added afterwards. Others pitch flysheet-first, with the inner clipped in once the structure is up.
On the first day of my mountaineering leaders assessment, a group of us enjoyed a brilliant traverse of Snowdon, finishing near Pen-y-Gwryd just as the weather turned. As we unloaded our rucksacks, the rain arrived — hard and fast. Within minutes everything was soaked.
My friend and I were sharing a two-person Aztec Esquina that pitched flysheet-first. Keeping the inner safely stowed away, we unfurled the outer, keeping it low and out of the wind, threaded the poles and popped it up. In under three minutes we were sheltering underneath sorting the rest of our kit. The other pair had a Terra Nova Quasar, which pitches inner-first. Their inner tent filled with water before the flysheet could be secured, leaving them with half an hour of bailing and a damp night ahead.
There are some outstanding inner-first tents out there — robust, stable, and wonderful on dry nights. But for the realities of UK weather, I’ll always choose flysheet-first.


Left - The very same Aztec Esquina being used to demonstrate flysheet first tent pitching to a local Scout Group.
Right - Example of an inner pitch first tent - Image courtesy of Big Agnes
Colour
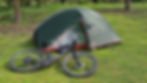
If you plan to wild camp, flysheet colour matters. Greens and browns blend far better into the landscape than bright colours. In the image below, I’m standing on a main path just fifty metres from where I’ve pitched. Despite the open ground, most people would walk straight past without noticing the tent unless they were actively looking for it.


SIZE AND LAYOUT
The obvious starting point is checking internal dimensions. A tent should be long enough to lie down comfortably, with enough room to move and store kit without brushing against the sides.

Vango Helium UL1 sizing. Image courtesy of Vango
I’m also a big advocate of being able to sit up properly inside a tent. It makes dressing, cooking, and general faffing about far more pleasant.

Entrance
I tend to avoid tents where the outer door opens directly over the inner tent floor — these are often end-entry designs with minimal vestibules. In the rain, water drips straight into the sleeping area as soon as you unzip the door, and cooking becomes awkward. Side-entry tents or those with a large porch usually offer easier access and a more usable vestibule, though they rely more heavily on good pole structure and pitching design. End-entry tents, however, can be more stable in exposed conditions, as you can pitch the rear into the wind and keep the door sheltered.


The images above show the angles of the inner tents. The outer door to the Alpkit Soloist (left) exposes the inner to the elements, whereas the Alpkit Tetri (right) doesn't. - Images courtesy of Alpkit
Vestibule
A vestibule is invaluable for storing wet gear and muddy items you’d rather not bring inside. Cooking in a porch can be risky — but we’ve all done it — so think carefully about space, ventilation and door design. Two-way zips or partial openings are particularly useful.


Accessories
Internal pockets are handy but not essential. A loop for hanging a torch is far more useful. My tent has two loops that allow me to rig a small drying line — perfect for airing clothes or damp socks.

Guy lines
Guy lines dramatically increase stability in poor weather. I put mine out every night, regardless of the forecast. It’s a small effort that buys a lot of peace of mind. Flysheet-first tents benefit particularly here, as guy lines act directly on the pole structure rather than just tensioning the fabric. Some tents also include internal tension bands, which further improve stability.
Footprint
A footprint really earns its keep when bikepacking. Pitches are often made late in the day, sometimes on ground that’s wetter or rougher than you’d ideally choose. A footprint protects the groundsheet from abrasion, grit, and sharp stones, helping to extend the life of the tent.
It also makes packing up far easier in poor conditions. If the ground is muddy, you can deal with the worst of it separately and keep dirt away from the rest of the fabric. I’ll often strap the footprint to the outside of a bag to dry while riding rather than packing it away wet.
In a pinch, a footprint can also double as a simple groundsheet for breaks, or even for a night under the stars if conditions allow.


WEIGHT
A good rule of thumb is around 1–1.2kg per person. It’s often easier to achieve this with a two-person tent shared between two riders. True sub-1kg solo tents that still tick all the boxes are very hard to find, and I’m usually happy to carry a little extra weight in exchange for comfort and usability.


The 1 person Vango F10 Helium UL1 on the left weighs just under 1.5kg. It includes the footprint and a couple of large sand pegs which I use to hold the ends taught in strong winds. The 2 person Vango F10 Nexus UL2 on the right weighs just over 2kg. Splitting the 2 person tent between two people minimises the weight per person. Manufacturer tent weights can be confusing. Tim Hunts article explains some of the weight phrases you might find. When comparing, you want to include all the parts of the tent - guy lines, pegs, poles and bags in order to make a fair comparison.
If your full setup comes in around 1.5kg, you're doing well.

POLES AND PEGS
Poles
Aim for poles that fold down to around 30- 35cm, especially if you’re carrying them on the bike. Aluminium alloy or carbon fibre poles are far stronger and more reliable than fibreglass or plastic.

Pegs
Carry a mix of peg types, plus spares. Wider pegs offer better holding power for key anchor points, while thinner pegs are easier to drive in for footprints and lighter loads. Around 150mm (6 inches) is a good minimum length.

REPUTABLE TENT BRANDS
Buy from a reputable manufacturer and spend as much as you comfortably can — without drifting into tent snobbery (yes, it’s a thing). Established brands show their experience in the small details: guy line geometry, peg placement, zip tension, seam sealing, and overall durability. They’re also far more likely to offer decent warranties, repairs, and customer support.
I’d also suggest that UK and European brands often design with our climate more firmly in mind.
At the risk of offending a few readers, I’d strongly advise avoiding very cheap, unbranded “Amazon-style” tents. These often mimic established designs but cut corners on materials, testing, and quality control. They may look great on paper, but the compromises usually reveal themselves when conditions turn poor.

USEFUL TIPS FOR BIKEPACKING WITH A TENT
Separate wet and dry bits
Wet and muddy tent components are something you’ll be dealing with sooner rather than later when bikepacking in the UK. Carry a couple of plastic bags, or better still, dry bags so you can separate wet parts from dry ones when packing up.
This is one of the main reasons I favour tents with separate inner and flysheet components. Even in summer, the outer is often wet with condensation. I’ll usually stuff the damp flysheet into one bag and pack the dry inner separately. If the opportunity arises during the day, the flysheet can be laid out to dry over lunch. If not, at least you still have a dry tent to climb into at the end of the day.
A simple emergency repair kit
You don’t need a full repair workshop, but a few lightweight items can save a trip if something fails. I always carry a short tent pole repair sleeve, a length of fabric repair tape (gaffa tape) and a couple of spare pegs. A few metres of paracord can serve as a guy line, clothesline or emergency fix.
It’s also worth familiarising yourself with how your tent goes together before you actually need to repair it. Making a fix at home in daylight is very different from doing one in the rain at the end of a long day.

Mud containment
Mud management is an unglamorous but important part of UK bikepacking. Once mud gets into or onto your tent, it has a habit of spreading everywhere. I try to be deliberate about where muddy items go: shoes live in the vestibule or inside a stuff sack. When packing the tent away, the muddy footprint or base of the tent gets wrapped before it comes near anything clean.
Packing order on the bike
How you pack your tent on the bike can make a surprising difference to how smoothly your days run. Fabric components — inner, flysheet and footprint — should be split between wet and dry bags accordingly. And stowed so they're easy to access at the end of the day, without having to unpack half the bike. If I'm using bike bags on the Gravel or Mountain Bike then I tend to favour the tent up-front. If I'm using panniers, then it's at the back.
Pack tent poles where they won’t rub against the frame, cables or bags over long, rough days. The safest options are inside a dedicated pole bag strapped to the handlebars or alongside the top tube using secure straps and a protective sleeve. Avoid placing bare poles directly against paintwork or fabric bags, as constant vibration can cause wear surprisingly quickly. If in doubt, add a layer of protection — an old inner tube or foam sleeve can save both your frame and your kit.


Managing condensation overnight
Condensation is a fact of life when camping in the UK, but it can usually be managed rather than eliminated. Ventilation is key. Even on cold nights, I’ll keep vents open and, if conditions allow, crack the door slightly to encourage airflow.
Where possible, avoid pitching in hollows where cold, damp air settles. Slightly raised ground or woodland edges tend to fare better. Cooking in the vestibule will also increase moisture inside the tent, particularly if ventilation is poor.
In the morning, I’ll often wipe down the inside of the flysheet with a small cloth or sponge before packing. It only takes a minute and reduces how much moisture you carry with you during the day.

Brother in the Wild 2025
So where do I put my money...
I’ve been sleeping in Vango tents since I was about twelve years old, and for me they strike a really good balance between performance, usability, customer support, innovation, and spares availability. That’s why I keep coming back to them — whether buying for myself or for Duke of Edinburgh groups.
There are certainly lighter tents, tougher tents and feature-packed tents out there, but they often come with a significant jump in price that doesn’t always feel justified.
Alongside a number of Vango family tents, I currently use a Vango F10 Helium UL1 and a Vango F10 Nexus UL2. Both are excellent shelters for adventures by foot, bike or boat. If I’m being picky, the Nexus UL2 just edges it in terms of overall usability — I only wish they made it in a one-person version.


Vango Vango F10 Helium UL1 (left) and a Vango F10 Nexus UL2 (right)
FINAL THOUGHTS
Choosing a bikepacking tent for the UK is less about finding the “best” model and more about understanding which features make sense for how and where you ride. Weight, space, stability and weather protection are all connected, and improving one usually means giving something else up.
For me, the priorities are simple: staying dry, enough space to sleep and stow gear, and having a shelter that’s quick to pitch when the weather turns. A tent that separates wet and dry components, copes with imperfect pitches, and shrugs off rough nights is worth far more than saving a few grams.
If this article helps you ask better questions before buying — or reassures you that prioritising practicality is no bad thing — then it’s done its job. The right tent is the one that lets you sleep well, wake up dry, and get back on the bike with minimal fuss, whatever the forecast throws at you.
Happy adventuring!
