Search
21 results found with an empty search
- Bikepacking with a Tarp
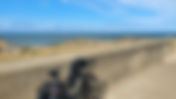
I think the first time I slept under a tarp I was on a Scout canoeing expedition when I was about fourteen. On that occasion the tarp was made of two orange survival bags, gaffa taped together and strung between the trees forming a weather-proof shelter above our bundle of sleeping bags. Since then, I’ve enjoyed a good number of nights away under some sort of rudimentary shelter, including the classic blue tarpaulin, army poncho, old groundsheets and a dining shelter canvas. For me, the simplicity of a tarp shelter invokes a feeling of being at one with nature but with the luxury of a roof over my head if the heavens open. So last year, as an experiment to reduce the weight of my sleeping shelter system, I thought I’d ditch the tent and see if a good old tarp could take its place. In order for the tarp system to challenge my tent, it had to fulfil a couple of key criteria. I wanted a proper shelter over my head and something to protect me from the bugs. The idea wasn’t to go super light or ultra minimalist, but the set-up still needed to provide decent functionality and comfort for an overnight stay with space for me, my gear and somewhere to cook under if it was raining. Also, the overall “shelter system” had to weigh less than a decent light-weight one person tent, say around 1.2kg, and cost significantly less as well. This was my selection: DD Hammocks Superlight Tarp S, 260g (305g), £45 Outdoor Research Bug Bivy, 365g, £115 Pegs, 135g, £15 Support poles (my bike) It came out at approximately 800g and £175. Not bad for a first go and definitely a viable contender as a lighter-than-a-tent replacement. DD Hammocks Superlight Tarp S (2.8m x 1.5m) There are plenty of great tarps on the market and before I bought this one I was using a standard 3m x 3m version from the same manufacturer. In practice the larger version is probably better for two people but at 800g it’s nearly tent weight. The Superlight version at 2.8m x 1.5m gives just about the right amount of coverage for one person and a minimal weight to boot. I attached eight Dyneema guy ropes to the key attachment points bringing the final weight to around 305g. Outdoor Research Bug Bivy With the shelter sorted I still needed the “anti-bug layer”. I already own a RAB Alpine Bivi bag which would have been the simple choice, however I wanted something I could seal up to keep the critters out but wouldn’t lead to condensation and a damp sleeping bag. The OR Bug Bivy is rather like a standard hooped bivi but made out of a fine "No-See-Um" mesh. It allows air to circulate avoiding condensation (although it’s surprisingly wind resistant) and it’s mosquito proof. It has a hoop to keep the netting off your face and a polyamide waterproof base. Pegs Four (gold) aluminium pegs came with the DD tarp (9 grams each) and I added a number of other lightweight aluminium pegs (red), made by Odoland, to make a set. This lot came in at 135g. Support poles Unless you’re camping in the woods or next to some kind of structure, it’s difficult to rig a tarp to form a decent shelter without some kind of pole(s). I didn’t want to carry poles or chance on finding two fixed points two meters apart every time I camped, so I started to experiment with my bike being the tarp structure therefore doing away with a separate structural element. The setup Using a bike as the frame for the tarp certainly isn’t my idea, or even a new one. I remember reading a 1950’s bicycle touring book at my Nan’s house when I was a kid and seeing images of the bike being used as the shelter structure. There are even specialist tents which are designed with this philosophy in mind. A couple of hours of up to date research gave me some ideas to try out in the back garden before committing to a set up for a bikepacking trip. And it wasn't until I started experimenting with different layouts, did I understand the particular nuances of each one. This one looked great, until... ...I realised I couldn't get in, and I only had about five feet of usable length. Turning the bike sideways, allowed for better access but now only had four feet of useable length and the tarp wasn't taught enough. I also tried a couple of permutations using the bike the right way up. This needed additional guys to hold the bike upright before tackling the tarp. With the front wheel off, but still the right way up, the bike was slightly more stable but was still prone to toppling so ultimately I ended up guying the bike out again. Inverting the bike made for a far more stable support structure. The width of the bars spread the load meaning the bike was pretty much stable without additional guy ropes and still allowed me to rig the tarp. It does come with a downside though. With flat bars at anywhere from 650mm to 800mm wide they significantly ate into the sleeping space, unless I positioned the bike in a way that placed the bars outside. Drop bars would be far better as they are much narrower but at the sacrifice of stability. I wanted to pitch the tarp low to the ground to block as much wind as possible and to avoid rain ingress. Again using a bike has its limitations as the ridge height is pretty much a fixed dimension according to the size of the bike. Adjusting the seat post up and down gave some height adjustability but not enough to make a significant difference. Due to the size and shape of my Bug Bivy, I elected to use the wheels to form part of the structure giving a nicely rounded roof shape at the ends. This worked well when employed on a single wheel but trying to form a shelter using both wheels removed from the bike (one at either end) required a feat of acrobatics to hold everything upright as I pegged it all out. I also avoided using the rear wheel whilst fitted to the bike as the tarp always rubbed on at least one drivetrain component and would have easily worn through the thin material. I eventually opted for a setup where the bike forks formed the rear support and the front wheel formed the head end arch. For the rear I ran the ridge guy line over the drop outs on the front fork and guyed it out at an angle. I found this setup maximized the stability of the bike as the wide bars were directly underneath the rear guy. The front wheel then formed the front arched shape support via the ridge guy and two side guys. I tried this setup (the one on the right) on an overnighter with some mates last summer and it appeared to work really well. However when I used it again two months later on my three-day London to Brighton round trip, the flaws started to appear... When you’re inside the bivi, all is well. The issue was getting in and out when the floor was damp or the underside of the tarp was wet with condensation - both of which are very much factors of our British weather. Because the tarp was pitched low, mainly dictated by the height of the bike, I had to assume a kind of snake like manoeuvre to post myself in through the corner while trying to open the Bug Bivy and avoid the underside of the wet roof! And if getting in was tricky, the reverse was even harder! I considered a number of different options whilst cycling along the Brighton seafront the next day and decided to see if I could simply find a way of raising the head end sufficiently to give me a little extra height. And this is exactly what I did courtesy of a picnic bench at the campsite on the second night. It allowed me to anchor the foot end to the bench, a fraction higher than normal, and use the front wheel still attached to the inverted bike to provide a higher front structure. And it worked well. There was just enough height to get in and out whilst taking off my muddy shoes. In practice Both the DD Hammocks Superlight S tarp and the Outdoor Research Bug Bivy work really well. The tarp is light, strong and waterproof and the Bug Bivy does a great job of keeping out the bugs whilst allowing for air circulation. I also like the internal straps inside the bivi which keep the sleeping mat in place. A larger tarp would help by offering a greater scope for pitching variants. But with the increase in size come an increase in weight which takes it into the light weight tent category. Perhaps a larger tarp shared between two people would allow for a central bike support with sleeping either side under the angle? I could have pitched the tarp bias to one side allowing better access along one length but this would have left the bivi quite exposed on one side. I also found that mud and condensation didn't help when trying to pack everything away. I had been rolling my sleeping bag, sleeping mat, pillow and Bug Bivy up as one for ease of packing into my front bar bag for transport but this didn't work when the base of the bivi was wet. There is something to be said for being able to pack your gear away inside a tent when it's raining outside, leaving only the wet tent to contend with. It's difficult to achieve this in a bivi setup. I ended up using benches and tables to pack my gear whilst waiting for my tarp and Bug Bivy base to semi dry. Design improvements I like the simplicity of rolling my sleeping kit up together in one bag but this only works when the base of the Bug Bivy is dry. So I’m in the process of making a Bug Bivy footprint, in a similar style to a tent footprint to protect the underside of the bivi and to also give me something extra to sit on when I'm under the tarp. This will allow me to pack up all my gear, whilst still under the shelter, leaving me with only a wet tarp and muddy footprint to deal with. These can easily be stowed in a separate bag away from my dry gear. However with an additional, say 200g, I may be increasing the system weight into the realms of a light weight tent? The other improvement would be to continue to try alternate layouts for the bike and tarp to gain a few extra inches head height. So is there a place for bikepacking with a tarp? Yes, I think so - for wild camping. I’ve wild camped in tents, under tarps and in bivi bags but I still feel slightly more comfortable under a “makeshift” tarp shelter than blatant tent if I’m somewhere I technically shouldn’t be. It’s also more flexible, I could just sleep in the Bug Bivy if I’m confident it won't rain or take shelter under the tarp for a few hours if it's chucking it down. I also like the fact the bike is part of the structure making the bike less likely to be stolen, although I think this is more of a psychological thing. The biggest game changer for me would be the location I choose for my overnight stay. Camping in the woods and having two trees to suspend the tarp from, without the limitations of the bike, would allow me to vary the height of the tarp almost negating the access and egress issues mentioned previously. As great as tarp shelters are, ultimately I still prefer a tent if I'm staying outdoors. It's more secure, allows for greater comfort, is easier to set up and affords more privacy - and all for only an extra couple of hundred grams. I'd would be happy with a one or two night tarp bikepacking trip with more of a wild camping bias, but you can't beat a tent and a campsite for for real world usability. So if this article hasn't ignited your passion for a tarp adventure, then how about checking out my blog on the best tents for bikepacking in the UK. Here's a couple of short YouTube videos showing some of my tarp set-up's I used on my adventures. Useful links Here's a link to my Pinterest page with loads of tarp bikepacking ideas: https://www.pinterest.co.uk/nick_adventuring/tarp-bikepacking/ DD Hammocks https://www.ddhammocks.com/ Outdoor Research https://www.outdoorresearch.com/us/
- The best Bikepacking tent for the UK
Much of the advice on choosing the best bikepacking tent focuses on weight, pack size and headline specifications. This guide takes a different approach. It’s written for bikepacking in the UK, where wind, rain, soft ground and poor pitches are common. Instead of chasing spec-sheet numbers, it focuses on reliability, durability, weather protection and real-world usability. Who this article is for This article is for riders who want a tent that works reliably in the UK, rather than one that only shines in ideal conditions. If you’re new to bikepacking and trying to cut through conflicting advice — or if you’ve already spent a few damp nights questioning past purchases — you’re probably in the right place. It’s aimed at people who value comfort, durability and practicality over chasing the lightest possible setup. None of this advice assumes perfect weather, unlimited budgets or carefully curated campsites. It’s written with muddy shoes, late finishes and unpredictable forecasts in mind. What defines camping in the UK I'm guessing you've landed here because you're either looking to buy or upgrade a tent for bikepacking. Despite my popular article, Bike packing with a tarp , in my opinion, the tent is the most functional method for outdoor sleeping when out on an adventure. It provides great shelter from the elements, good privacy and affords space to spread out and sort your equipment. Whether you choose a hammock, a tarp shelter or a tent, camping in the UK pretty much guarantees two things: mud and rain . Even in the middle of summer it's not unusual to find muddy patches on the groundsheet and a damp flysheet, either from condensation or a brief overnight shower. I can't emphasise enough the influence these two elements have on UK camping particularly as the overwhelming majority of tent reviews are from overseas users or manufacturers who's conditions are very different. I’ve spent hundreds of nights in tents over the last forty years, camping under everything from modern synthetics to traditional canvas. I’ve had tents blow away, poles snap, pegs vanish and I’ve improvised a fix more times than I can count. I’ve camped in storms, snow, on mountain tops, and even on a tiny island mid-river, wild camping and staying on family sites alike. Along the way I’ve bought tents on tight budgets for Scout groups, advised Duke of Edinburgh expeditions and hiked, paddled and cycled with a tent — sometimes all on the same trip. With that in mind, these are the five qualities I personally look for when buying a tent for adventures in the UK: Tent construction Size and layout Weight Poles and pegs Tent brand At the end of the article, I’ve also included some practical tips for actually using a tent while bikepacking. However, if you don't have time to read the full article, here's the summary: Expect rain, mud, and condensation — even in summer. UK conditions matter. A two-layer tent with a separate inner and flysheet is far more practical than a single-skin design. Look for flysheet-first pitching so your inner stays dry when the weather turns. Simple, robust pole structures (geodesic or semi-geodesic) cope best with wind and rough pitches. A usable vestibule makes a big difference for storing wet gear and cooking in poor weather. Muted colours (green or brown) help with discreet wild camping. Aim for around 1- 1.5kg per person — a little extra weight is often worth it for comfort and durability. Buy from a reputable brand with good warranty, spares and customer support. Prioritise staying dry and sleeping well over chasing the lightest possible setup. TENT CONSTRUCTION Single or dual skin I’m not a fan of single-skin tents. They tend to attract condensation, you can’t separate wet and dry components when packing and they’re often more expensive for what you get. Personally, I’ll always opt for a traditional two-layer tent, made up of a breathable inner sleeping compartment and a waterproof outer flysheet. When I’m looking at construction details, I generally expect: A flysheet with sealed seams and a hydrostatic head of at least 2000mm A groundsheet that curves up at the edges to form a bathtub base, with a hydrostatic head of around 5000mm Good quality YKK type zips and thoughtful design features that reduce unnecessary tension on the flysheet Discrete vents in the flysheet are also really helpful for reducing condensation. The inner tent should include panels of no-see-um mesh to aid ventilation while keeping insects out. Seam Sealing I was recently surprised to see a popular tent recommended within the wild camping community that wasn’t seam sealed. Seam sealing was one of the earliest developments after canvas and poly-cotton flysheets and it’s now such a fundamental part of tent manufacturing that most reputable brands back it with a warranty. If a tent doesn’t come seam sealed, I’d strongly suggest avoiding it. Pole structure I tend to favour simple pole structures — ones that avoid complex multi-pole junctions (such as Y- or X-shaped interfaces) or extra poles that protrude to create more living space. In my experience, overly complex designs are more prone to failure in strong winds. It’s also worth remembering that tents need to cope with bad weather while being pitched — which is often the time when things break. Simple hoop designs, crossing poles and geodesic or semi-geodesic structures tend to be the most robust and easiest to repair. A full geodesic tent typically uses four poles that cross to form an octagonal structure. Semi-geodesic designs usually use three poles and form a hexagonal shape. Fewer poles generally mean lower weight, but also reduced stability in rough weather. This is why full four-season tents are often geodesic, while three- to four-season tents lean towards semi-geodesic designs. Images courtesy of Terra Nova Tents The Terra Nova Quasar (left) is a well-known example of a geodesic design, while the Wild Country Trident (right) uses a semi-geodesic structure. Dedicated poles Tents that rely on trekking poles or other equipment can be clever, but they do come with compromises. If your walking pole is holding up your tent, you can’t exactly use it for a stroll without collapsing your shelter. The same applies if you’re using bike wheels or forks as part of a shelter system. For maximum flexibility, especially when bikepacking, I prefer tents with dedicated poles. My tarp setup on my London to Brighton Cycle Adventure. It was a novel idea, but meant I had to walk to the pub! Method of pitching - Flysheet first! Some tents pitch inner-first, with the flysheet added afterwards. Others pitch flysheet-first, with the inner clipped in once the structure is up. On the first day of my mountaineering leaders assessment, a group of us enjoyed a brilliant traverse of Snowdon, finishing near Pen-y-Gwryd just as the weather turned. As we unloaded our rucksacks, the rain arrived — hard and fast. Within minutes everything was soaked. My friend and I were sharing a two-person Aztec Esquina that pitched flysheet-first. Keeping the inner safely stowed away, we unfurled the outer, keeping it low and out of the wind, threaded the poles and popped it up. In under three minutes we were sheltering underneath sorting the rest of our kit. The other pair had a Terra Nova Quasar, which pitches inner-first. Their inner tent filled with water before the flysheet could be secured, leaving them with half an hour of bailing and a damp night ahead. There are some outstanding inner-first tents out there — robust, stable, and wonderful on dry nights. But for the realities of UK weather, I’ll always choose flysheet-first . Left - The very same Aztec Esquina being used to demonstrate flysheet first tent pitching to a local Scout Group. Right - Example of an inner pitch first tent - Image courtesy of Big Agnes Colour If you plan to wild camp, flysheet colour matters. Greens and browns blend far better into the landscape than bright colours. In the image below, I’m standing on a main path just fifty metres from where I’ve pitched. Despite the open ground, most people would walk straight past without noticing the tent unless they were actively looking for it. SIZE AND LAYOUT The obvious starting point is checking internal dimensions. A tent should be long enough to lie down comfortably, with enough room to move and store kit without brushing against the sides. Vango Helium UL1 sizing. Image courtesy of Vango I’m also a big advocate of being able to sit up properly inside a tent. It makes dressing, cooking, and general faffing about far more pleasant. Entrance I tend to avoid tents where the outer door opens directly over the inner tent floor — these are often end-entry designs with minimal vestibules. In the rain, water drips straight into the sleeping area as soon as you unzip the door, and cooking becomes awkward. Side-entry tents or those with a large porch usually offer easier access and a more usable vestibule, though they rely more heavily on good pole structure and pitching design. End-entry tents, however, can be more stable in exposed conditions, as you can pitch the rear into the wind and keep the door sheltered. The images above show the angles of the inner tents. The outer door to the Alpkit Soloist (left) exposes the inner to the elements, whereas the Alpkit Tetri (right) doesn't. - Images courtesy of Alpkit Vestibule A vestibule is invaluable for storing wet gear and muddy items you’d rather not bring inside. Cooking in a porch can be risky — but we’ve all done it — so think carefully about space, ventilation and door design. Two-way zips or partial openings are particularly useful. Accessories Internal pockets are handy but not essential. A loop for hanging a torch is far more useful. My tent has two loops that allow me to rig a small drying line — perfect for airing clothes or damp socks. Guy lines Guy lines dramatically increase stability in poor weather. I put mine out every night, regardless of the forecast. It’s a small effort that buys a lot of peace of mind. Flysheet-first tents benefit particularly here, as guy lines act directly on the pole structure rather than just tensioning the fabric. Some tents also include internal tension bands, which further improve stability. Footprint A footprint really earns its keep when bikepacking. Pitches are often made late in the day, sometimes on ground that’s wetter or rougher than you’d ideally choose. A footprint protects the groundsheet from abrasion, grit, and sharp stones, helping to extend the life of the tent. It also makes packing up far easier in poor conditions. If the ground is muddy, you can deal with the worst of it separately and keep dirt away from the rest of the fabric. I’ll often strap the footprint to the outside of a bag to dry while riding rather than packing it away wet. In a pinch, a footprint can also double as a simple groundsheet for breaks, or even for a night under the stars if conditions allow. WEIGHT A good rule of thumb is around 1–1.2kg per person. It’s often easier to achieve this with a two-person tent shared between two riders. True sub-1kg solo tents that still tick all the boxes are very hard to find, and I’m usually happy to carry a little extra weight in exchange for comfort and usability. The 1 person Vango F10 Helium UL1 on the left weighs just under 1.5kg. It includes the footprint and a couple of large sand pegs which I use to hold the ends taught in strong winds. The 2 person Vango F10 Nexus UL2 on the right weighs just over 2kg. Splitting the 2 person tent between two people minimises the weight per person. Manufacturer tent weights can be confusing. Tim Hunts article explains some of the weight phrases you might find. When comparing, you want to include all the parts of the tent - guy lines, pegs, poles and bags in order to make a fair comparison. If your full setup comes in around 1.5kg, you're doing well. POLES AND PEGS Poles Aim for poles that fold down to around 30- 35cm, especially if you’re carrying them on the bike. Aluminium alloy or carbon fibre poles are far stronger and more reliable than fibreglass or plastic. Pegs Carry a mix of peg types, plus spares. Wider pegs offer better holding power for key anchor points, while thinner pegs are easier to drive in for footprints and lighter loads. Around 150mm (6 inches) is a good minimum length. REPUTABLE TENT BRANDS Buy from a reputable manufacturer and spend as much as you comfortably can — without drifting into tent snobbery (yes, it’s a thing). Established brands show their experience in the small details: guy line geometry, peg placement, zip tension, seam sealing, and overall durability. They’re also far more likely to offer decent warranties, repairs, and customer support. I’d also suggest that UK and European brands often design with our climate more firmly in mind. At the risk of offending a few readers, I’d strongly advise avoiding very cheap, unbranded “Amazon-style” tents. These often mimic established designs but cut corners on materials, testing, and quality control. They may look great on paper, but the compromises usually reveal themselves when conditions turn poor. USEFUL TIPS FOR BIKEPACKING WITH A TENT Separate wet and dry bits Wet and muddy tent components are something you’ll be dealing with sooner rather than later when bikepacking in the UK. Carry a couple of plastic bags, or better still, dry bags so you can separate wet parts from dry ones when packing up. This is one of the main reasons I favour tents with separate inner and flysheet components. Even in summer, the outer is often wet with condensation. I’ll usually stuff the damp flysheet into one bag and pack the dry inner separately. If the opportunity arises during the day, the flysheet can be laid out to dry over lunch. If not, at least you still have a dry tent to climb into at the end of the day. A simple emergency repair kit You don’t need a full repair workshop, but a few lightweight items can save a trip if something fails. I always carry a short tent pole repair sleeve, a length of fabric repair tape (gaffa tape) and a couple of spare pegs. A few metres of paracord can serve as a guy line, clothesline or emergency fix. It’s also worth familiarising yourself with how your tent goes together before you actually need to repair it. Making a fix at home in daylight is very different from doing one in the rain at the end of a long day. Mud containment Mud management is an unglamorous but important part of UK bikepacking. Once mud gets into or onto your tent, it has a habit of spreading everywhere. I try to be deliberate about where muddy items go: shoes live in the vestibule or inside a stuff sack. When packing the tent away, the muddy footprint or base of the tent gets wrapped before it comes near anything clean. Packing order on the bike How you pack your tent on the bike can make a surprising difference to how smoothly your days run. Fabric components — inner, flysheet and footprint — should be split between wet and dry bags accordingly. And stowed so they're easy to access at the end of the day, without having to unpack half the bike. If I'm using bike bags on the Gravel or Mountain Bike then I tend to favour the tent up-front. If I'm using panniers, then it's at the back. Pack tent poles where they won’t rub against the frame, cables or bags over long, rough days. The safest options are inside a dedicated pole bag strapped to the handlebars or alongside the top tube using secure straps and a protective sleeve. Avoid placing bare poles directly against paintwork or fabric bags, as constant vibration can cause wear surprisingly quickly. If in doubt, add a layer of protection — an old inner tube or foam sleeve can save both your frame and your kit. Managing condensation overnight Condensation is a fact of life when camping in the UK, but it can usually be managed rather than eliminated. Ventilation is key. Even on cold nights, I’ll keep vents open and, if conditions allow, crack the door slightly to encourage airflow. Where possible, avoid pitching in hollows where cold, damp air settles. Slightly raised ground or woodland edges tend to fare better. Cooking in the vestibule will also increase moisture inside the tent, particularly if ventilation is poor. In the morning, I’ll often wipe down the inside of the flysheet with a small cloth or sponge before packing. It only takes a minute and reduces how much moisture you carry with you during the day. Brother in the Wild 2025 So where do I put my money... I’ve been sleeping in Vango tents since I was about twelve years old, and for me they strike a really good balance between performance, usability, customer support, innovation, and spares availability. That’s why I keep coming back to them — whether buying for myself or for Duke of Edinburgh groups. There are certainly lighter tents, tougher tents and feature-packed tents out there, but they often come with a significant jump in price that doesn’t always feel justified. Alongside a number of Vango family tents, I currently use a Vango F10 Helium UL1 and a Vango F10 Nexus UL2 . Both are excellent shelters for adventures by foot, bike or boat. If I’m being picky, the Nexus UL2 just edges it in terms of overall usability — I only wish they made it in a one-person version. Vango Vango F10 Helium UL1 (left) and a Vango F10 Nexus UL2 (right) FINAL THOUGHTS Choosing a bikepacking tent for the UK is less about finding the “best” model and more about understanding which features make sense for how and where you ride. Weight, space, stability and weather protection are all connected, and improving one usually means giving something else up. For me, the priorities are simple: staying dry, enough space to sleep and stow gear, and having a shelter that’s quick to pitch when the weather turns. A tent that separates wet and dry components, copes with imperfect pitches, and shrugs off rough nights is worth far more than saving a few grams. If this article helps you ask better questions before buying — or reassures you that prioritising practicality is no bad thing — then it’s done its job. The right tent is the one that lets you sleep well, wake up dry, and get back on the bike with minimal fuss, whatever the forecast throws at you. Happy adventuring! DISCLAMER
- The Seaside Divide
COMING SOON - The Seaside Divide: A coast-to-coast adventure linking two of Britain’s historic seaside towns. When finished, Adventuring.co.uk's Seaside Divide will be a coast-to-coast cycling route stretching from Margate on the North Sea to Aberystwyth on the Irish Sea, linking two historic seaside towns that once drew holidaymakers from across Britain. Spanning roughly 475 miles, the route threads through to London then Birmingham before cutting west into quieter borderlands and the heart of Wales. Following canals, rivers, old railways, and remote lanes, it offers a long, varied journey across changing landscapes and layered histories. OVERVIEW Start: Margate, Kent Finish: Aberystwyth, Wales Direction: East to West Distance: ~475 miles / 765 km Sections: Margate to London, London to Birmingham, Birmingham to Aberystwyth. Terrain: Mixed — canals, riverside paths, quiet lanes, hill roads, gravel tracks Surface: Tarmac, towpath, compact gravel, occasional off-road Climbing: Mainly flat or undulating, increasing to moderate towards the west Highlights: Historic seaside towns, River Thames, London, Birmingham, Canals, Welsh borderlands, Elan Valley reservoirs, Cambrian Mountains Best ridden: Late spring to early autumn Navigation: National Cycle Routes, Lôn Cambria, local lanes, GPX recommended Style: Endurance touring / light bikepacking Bike: Touring / Hybrid / Gravel Resupply: Frequent in cities and towns, limited in mid-Wales Accommodation: Mix of pubs, B&Bs, small hotels, and campsites This route is for you if: You enjoy long-distance cycling as a journey, not a race You’re happy mixing surfaces — tarmac, canals, gravel, and the odd rough track You like linking cities, landscapes, and history in one continuous ride You’re comfortable riding self-supported with basic navigation skills You enjoy quiet lanes, slow miles, and letting a route unfold over time This route may not be for you if: You’re looking for a fully signposted or traffic-free route throughout You prefer fast, uninterrupted road riding You’re avoiding hills — especially through mid-Wales You want guaranteed cafés, shops, or accommodation every few miles You’re chasing minimal distance rather than depth of experience We've ridden parts 2 & 3, London through to Aberystwyth, and when finished the full route will be recounted over three separate cycling adventures as listed below. They not only include our adventures, but full route guides, including gpx routes, where to stay and what to take. Part 1 - Margate to London (Coming soon in 2026) Part 2 - London to Birmingham on NCN4 & NCN5 Part 3 - NCN81 Lon Cambria ROUTE 476 miles (766km) | 5,565m ascent | 17 climbs | max grade 11% (19%) With so many brilliant cycle routes already covering the UK it made obvious sense to join a number of these proven cycle ways together to form an epic journey. All-in-all the route uses either all or part of well known National Cycle Network routes to cross the 476 miles between Margate in Kent to Aberystwyth in Mid Wales. The sections between London and Aberystwyth have been tried and tested and our adventures are recounted via the links in the section above. Although we've ridden most of the first part, Margate to London, there's still tweaks and changes we need to incorporate. The full route below is only in draft at present so we can't vouch for its full validity at present. As we complete the route this year, this page will be fully updated with a summary of each of the three parts, a complete audax card with key waypoints along the routes entire length, thoughts on kit and equipment for a nine day ride and much more. Happy Adventuring! DISCLAIMER
- NCN81 Lon Cambria
In early autumn 2025, my brother and I cycled from Birmingham to Aberystwyth over three days, following National Cycle Route 81 and Lon Cambria. At 165 miles, the route carried us steadily west from the Midlands’ canals through quiet border country and deep into the Welsh mountains. Cold starts, long climbs, and striking scenery defined the days, with the reward of reaching the coast by bike making every effort feel worthwhile. Click here if you want to navigate straight to the section on How we cycled NCN 81 Lon Cambria . The Seaside Divi de - A coast-to-coast adventure linking two of Britain’s historic seaside towns. This adventure is part of a bigger mission to complete a 460 mile, coast-to-coast route from Margate in Kent to Aberystwyth in Wales. We're undertaking the whole route in three sections, stitching together established cycle routes and sections of the National Cycle Network. This blog article recounts our adventure on section 3: Birmingham to Aberystwyth. Our previous journey on section 2: London to Birmingham, found here . With luck, section 1: Margate to London, will be tackled in early 2026. Day 1 - Birmingham to Shrewsbury Our trip started beneath the glass canopy of Birmingham New Street Station, in keeping with the end of our previous London to Birmingham ride. It was mid-October, and autumn was very much present — damp air, muted light, and leaves already turning red and gold. The forecast had promised sunshine, but we set off to grey skies and a fine drizzle, the city was busy and slick with rain. The Birmingham Canal led us west — once the beating heart of the Industrial Revolution, when narrowboats carried coal and iron through a dense maze of waterways to power the “Workshop of the World.” Today, the route felt almost forgotten. Reflections of autumn shimmered in still water alongside derelict cranes, brick warehouses and rusting ironwork, all softened by a faint mist. Just outside Smethwick, bankside repairs had closed a short section of the canal towpath. The rerouting signage wasn't great and we found ourselves taking a wrong turn into an old derelict yard. Crumbling walls, puddles, a dead end and a naval gun were all encountered within a few hundred metres before rejoining the towpath beneath the looming concrete of the M5. What struck us most was how far the waterways carried us without seeing the city. Mile after mile slipped by quietly, the canal threading its way through the urban sprawl all the way to Wolverhampton, leaving us amazed at the distance covered almost unnoticed. Passing through Wolverhampton brought a reminder that this wasn’t just an industrial town, but a cultural one too. In the late 20th century it became an important centre of the UK Black Arts Movement, home to the BLK Art Group, whose artists challenged racism and reshaped British contemporary art. Layered with histories of labour, migration, and creativity, it felt fitting to move through the city at bicycle pace . Beyond Wolverhampton, we joined the Staffordshire & Worcestershire Canal, where the clouds began to thin and the grey slowly lifted. Our first stop came at Codsall, still with a chunky 32 miles to go and already 2pm. Our pace along the canal had been steady but not particularly quick. Then it was on past the RAF base at Cosford, a glimpse of hangars, history, and a Hunter fighter jet, before the route wound into Telford, where a new housing development confused the GPS and briefly convinced us we’d strayed off course. By mid-afternoon the light had changed completely — clouds thinning, warmth breaking through. A quick coffee stop outside Wellington, and then the best stretch of the day: open lanes, soft air, hedgerows turning amber, that quiet that only arrives once the city is far behind. We met the River Severn at Uffington, following its curves as the evening light deepened, the water turning silver beneath the trees. The path led us right into Shrewsbury, a town steeped in history with half-timbered buildings, cobbled streets. and low-ceilinged pubs. And also our rest stop at the end of the first day west. Day 2 - Shrewsbury to Llanidloes It was a misty, cold start leaving Shrewsbury, the kind of morning where you wonder if thicker gloves and knee warmers would’ve been a good idea. The town was quiet as we rolled out, but a few miles in — with the legs turning over — the chill faded and the day began to open up. We crossed into the Welsh Borders, following quiet lanes through old villages — empty roads, stone cottages, and the faint smell of woodsmoke drifting from chimneys. It felt like a gentler world from yesterday’s industrial past, steady miles through soft greens all the way to the base of Long Mountain. Once a natural border defence between England and Wales — dotted with Iron Age hillforts — today it was simply our first proper climb: a long, steady haul up and over, rewarded with wide views down towards Welshpool and a rather spritely descent down the other side. Welshpool has long been a gateway town between England and mid-Wales, shaped by its position on the border and overlooked by Powis Castle, which has watched over the Severn valley for centuries. We stopped there for coffee, cakes and sausage rolls at Coco Café — exactly what we needed and highly recommended. Setting off again, the temperature dropped sharply. The comforting warmth of the town fading quickly provoking Tim to pull on his rather snazzy colour coordinated gloves. From Welshpool we joined the Montgomery Canal, which runs loosely parallel to the River Severn almost all the way to Newtown. Built in the early 19th century to move limestone and agricultural goods, much of it fell into disuse and disrepair after the arrival of the railways. The towpath was good fast gravel, but the old canal itself often looked barely navigable — dark, still water often dense with reeds. It didn’t feel forgotten though. Instead, it felt reclaimed and renewed: alive with birds and movement, a quiet haven for wildlife beneath the changing colour of the trees. At Abermule, just before Newtown, the waterways reached a kind of paradoxical perfection — the Severn on our left, fast and noisy with white water and smooth rock and the canal on our right, dark and motionless. One restless, one completely still. From Newtown, the easy miles were over. The final leg to Llanidloes was pure mid-Wales — quiet hills, sheep-dotted fields and short, steep climbs that found every bit of weariness in our legs. The light dropped, the air cooled and we switched on our lights to roll into Llanidloes, the first proper stop in the Cambrian Mountains. We checked into The Mount Inn where the food was excellent and the beer even better. Day 3 - LLanidloes to Aberystwyth We stared out of the pub window at another cold, misty morning while tucking into a full Welsh breakfast. It was tricky deciding what to wear in these conditions — we’d sweat on the uphills and chill on the downhills and riding on the flat wasn’t the answer, we were in Wales after all! We mentally divided the day into three sections, with obligatory coffee stops to match. The first was to Rhayader, the second through the Elan Valley and the final leg — the long run from the Cambrian Mountains down to the sea. Straight after breakfast came a steep climb to Llangurig, following the Wye Valley Walk, a mix of neat hedge lined farm roads, open fields and dedicated cycle trails. Our legs were heavy from two long days hauling panniers, but the scenery made up for it and the descent that followed into Rhayader was reward enough. The town itself has long been a gateway to mid-Wales, historically linked to sheep droving and mining, and a place I had enjoyed the hospitality of on one of my previous adventure. After Rhayader, we continued into the Elan Valley, a landscape shaped as much by human endeavour as by nature. The series of reservoirs and dams, built between 1893 and 1904 to supply water to Birmingham, were engineering marvels of their time, blending Victorian ambition with spectacular natural scenery. We stopped for tea and cake at the Elan Valley Visitor Centre, almost missing it entirely, as the trail runs high above the river while the centre sits tucked in the valley below. By then, the clouds were beginning to break, and halfway up the valley the sun finally came through properly — warm, golden and long overdue. The Elan Valley trail wound through woodland and open hillsides, the reservoirs edged with trees just starting to turn. Birch and oak leaned over the path and higher up the slopes it opened out to bracken, grass, and bare rock. Dark bands of pine cut across the hillsides and with each bend the valley opened a little more, until between Garreg-ddu Reservoir and Penygarreg Reservoir the dark stone dam, pine forests and a tumbling river looked more like Bavaria than mid-Wales. We took our time, stopping to chat with cyclists and walkers who were just as taken by the surroundings. The sun and gentle climb had us shedding layers as we eased up the gravel track. At barely five miles an hour, we were happy to slow the pace and savour the scenery, not in any rush for it to end. After crossing a small bridge at the head of the reservoir, the landscape immediately opened out into rolling Welsh hills, bare on either side but kept well manicured by flocks of blue spray-painted sheep. After a rather punchy twelve per cent incline, which felt more like twenty, we stopped for lunch on a grassy bank next to the A470, just past the northern end of Craig Goch Reservoir. We were only a couple of miles from our highest point of the day, after that, the much anticipated 25-mile descent to the coast would begin. The route to the sea flits between on-and off-road sections, some of the latter quite rough. After a quick stop in "The Tea Shed" to refill our water bottles we pressed on down the valley. The stretch that winds along the Afon Ystwyth at Pont-rhyd-y-groes was particularly striking — shallow, fast-flowing white water bordered by tall pines, almost Canadian in feel. Although warm in the sun, every dip into the shade of trees or hillsides brought the cold rushing back, downhill speed forcing us to zip up our jackets and tuck our fingers behind the brake levers for added protection. But the skies were blue, the colours vivid and morale high as we pressed on into the final stretch. Around LLanafan, after a ridiculously steep twenty meter bike push, we picked up another disused railway. It began as a moss- and fern-covered cutting, with a distinctly prehistoric feel before opening to a long gravel track, arched with oak and birch, their leaves glowing gold in the low sun. From there, the final miles continued to trace the River Ystwyth, weaving through woodland and isolated homesteads, switching between smooth tarmac and rough gravel before rolling into Aberystwyth. The town, steeped in Victorian seaside architecture and centuries of maritime history, welcomed us with the sun dipping toward the horizon and the promise of a pint waiting somewhere along the seafront. 165 miles over three days. From Birmingham’s industrial canals to the monumental reservoirs of the Elan Valley — both feats of engineering on a grand scale. One woven through a city, the other carved deep into wild Welsh landscapes. A route that takes in mountains, forests and rivers all the way to the sea at Aberystwyth. Wales once again at its finest. Every climb, bend and descent well worth the effort. How we cycled NCN81 / Lon Cambria Route 165 miles (265km) | 2,725m ascent | 11 climbs | max grade 19% The route is comprised of three main sections: Birmingham to Shrewsbury, Shrewsbury to Llanidloes and Llanidloes to Aberystwyth. We undertook the route over three days of just over 50 miles per day to align with this split. The latter two sections - Shrewsbury to Aberystwyth - are the route titled " Lon Cambria ". Lon Cambria is mainly formed of the western end of NCN81 , aside for a short section from Llanidloes to Rhayader where it shares the superb NCN8 , Lon Las Cymru. Interestingly, the Walk Wheel Cycle Trust suggest the route is ridden from Aberystwyth to Shrewsbury, presumably in the traditional west / east direction to suit the UK's prevailing wind, however many (including cycle.travel ) advocate the east / west direction which makes for a far more satisfying adventure. Given our overall " Seaside Divide " ambitions and the fact our last ride finished in Birmingham, we added an extra day to the Lon Cambria route to start where we left off. NCN 5 took us out of Birmingham New Street station to Smethwick where it then changed to NCN81. As advised by the Walk Wheel Cycle Trust, the cycleway signage isn't technically complete between Wolverhampton & Telford and Shrewsbury & Welshpool but the .gpx route exists, so is easy enough to follow on a GPS head unit. There were a few short sections of the canals that were undergoing bankside repairs at the time of our ride. Finding a way round was either signposted or simple enough to work out when on the ground. We also switched sides of the canal on a few occasions, in particular just above Dudley, where the path appeared better on the other side. A new housing development at Priorslee, to the east of Telford, had us scratching our heads for a few minutes. Hopefully by the time you ride this, the route will be re-instated and signed accordingly. The route into Wolverhampton was a little tricky as the cycle route along the canal to the south of Wolverhampton was closed for repair forcing us up onto the Horseley Fields Road. The actual route here is slightly convoluted, passing under a series of bridges at canal level, past the turning into the city, then doubling back to bring you up to street level to enter via Railway Drive. Clicking on the map (title) above takes you to the Ride with GPS route we used for this adventure. It follows the NCN routes mentioned above, plus fills in the gaps where the route isn't complete. Feel free to download the route to use as the basis for your own adventure. Terrain Surfaces: 82% paved | 18% unpaved The terrain is classic National Cycle Network and any gravel, hybrid or touring bike with around a 35mm touring tyre would suit. The early section next to the canals are flat, as you'd expect, with a small hill to scale when going through Telford. The paths next to the canals vary in width but do get quite narrow in places, particularly when passing under the numerous bridges on the Montgomery Canal. Take care or plan alternatives if you are uncomfortable cycling close to open water. Long Mountain, just before Welshpool, is fairly chunky but it's a tarmac road is easy cycling even if you'll wish you had an extra low gear or two. There's another hill just after Newtown and then a few more lumps as you climb into Llanidloes. After this the Welsh undulation starts, but the cycleways are surprisingly good. Arriving at the Elan Valley, the terrain turns to good quality gravel tracks. After this it's on and off-road all the way to the main spine of the Cambrian Mountains, then more of the same all the way to coast. There is a rather unexpected bike push up a 33% incline through the woods to meet the old railway line at Pen-y-bont, just below Llanafan. I thought I'd tackled the steep incline as I arrived at an old bridge gasping for breath, until I realised that I had reached a false summit. The path scrabbled up to the right at over 30% for a further 10 meters or so! This whole section is very short, perhaps only a few hundred meters, so a short bike push won't materially affect your riding time and can be by-passed by taking the road. Audax Card Day 1 - Birmingham to Shrewsbury. 55 miles (88.5km) | 565m ascent | max grade 12% Birmingham, Smethwick (4), Tipton (10), Wolverhampton (15), Codsall (22), Albrighton (25.5), Cosford Airstrip (27), Shifnal (31), Telford east (34), Telford west (41), Wrockwardine (42), Withington (46), Upton Magna (48), Uffington (50), Shrewsbury (55). Day 2 - Shrewsbury to Llanidloes. 57 miles (92km) | 1230m ascent | max grade 19% Shrewsbury, Montford Bridge (5), Wilcott (10), Crewgreen (15), Long Mountain (21), Welshpool (27), Berriew / Aberriw (33), * Abermule (37), Newtown (42), Caersws (49), Llanidloes (57) Day 3 - Llanidloes to Aberystwyth. 56 miles (90km) | 1060m ascent | max grade 19% (33%) Llanidloes, LLangurig (5), Rhayader (15), Elan Village (18), Penygarreg Dam (22), Craig yr Allt-goch Dam (23.5), Pont ar Elan (northern end of the reservoirs) (26.5), Pont-rhyd-y-groes (40), Bike push up 33% track through woods at Pen-y-bont (43.5), LLanilar (49), Rhydyfelin (53), Aberystwyth (55.6) * indicates locations just off the main route Getting to the start Birmingham New Street train station is well connected and makes travel to the start easy enough. If you are driving, parking here may be a little more tricky and certainly quite expensive. Parking slightly out of town, perhaps at Smethwick, may be easier in order to find cheap parking and is on the same train route back from the coast. Due to our particular circumstances we chose to drive to Shrewsbury, where we parked the car and spent a night before commencing our adventure. On the first day of the ride, we caught the train to Birmingham New Street station and rode back to Shrewsbury to complete Day one of the trip. This meant we didn't have to carry panniers on the first day and significantly shortened the train journey back from the coast at the end of the trip. We also chose to stop over in Aberystwyth on our last day to enjoy a relaxing meal and drink, without the pressure of having to catch a late train or drive home after a long days cycling. When to go Given the 'four-seasons-in-one-day' Welsh weather, and the fact you're in the mountains for the third day, I'd definitely suggest opting for the better weather months. We undertook our adventure in early October, which provided us with cool riding temperatures but beautiful Autumn colours. I wouldn't leave it much later in the year, so opt for late April to early October. Accommodation Day 1 - Premier Inn Shrewsbury Town Centre , Smithfield Rd, Shrewsbury SY1 1PG. Day 2 - The Mount Inn , China St, Llanidloes SY18 6AB. 01686 412 247 Day 3 - Premier Inn Aberystwyth Hotel , 36-37 Marine Terrace, Aberystwyth SY23 2NN. We've been using Premier Inn hotels as part of our adventures for years. They're great value, offer superb facilities and are bike friendly. Our stop over in the Premier Inn in Shrewsbury was actually an extension of a business trip and suited us well but if we stayed in Shrewsbury again, it would be great to try and sample something with a little more character and more in keeping with the olde-worlde town. At the end of our trip we decided to stay over in Aberystwyth to avoid the rush home after a long days cycling. Eating Food and drink was never really too far away during the first couple of days, albeit requiring a slight deviation off route to get it. Shrewsbury had a vast selection of olde-worlde pubs and well worth sampling a few if you have the time. As mentioned above, due to the fact we stayed in Shrewsbury for a couple of nights, we got to sample a double share of pubs and restaurants! Stock up well in Rhayader for the second part of day 3, as beyond the Elan Valley visitor centre the route becomes remote pretty much all the way to Aberystwyth some 35 miles away. Starbucks Coffee , Hadley, Telford, TF1 6SZ The Three Fishes (Pub), 3-4 Fish St, Shrewsbury SY1 1UR. 01743 344 793 The Beefy Boys , 39 High St, Shrewsbury SY1 1ST. 01743 535 047 Ask Italian , 23 High St, Shrewsbury SY1 1SJ. 01743 384 245 Premier Inn Shrewsbury Town Centre , Smithfield Rd, Shrewsbury SY1 1PG. Coco Coffee House , 34 Broad St, Welshpool SY21 7RR. 01938 552 366 The Mount Inn , China St, Llanidloes SY18 6AB. 01686 412 247 Elan Valley Visitor Centre , Elan Valley, Rhayader LD6 5HP. 01597 810 880 The Tea S hed, Ysbyty Ystwyth, Wales, United Kingdom Aber Dining (Indian Restaurant), 20 N Parade, Aberystwyth SY23 2NF. 01970210289 Comfort and Convenience stuff The route has a good mix of urban and remote trails. On the whole you'll find yourself fairly close to some form of toilet facilities however as the route moves into the Welsh mountains, these get trickier to find. In the mountains there are plenty of secluded areas for a quick stop if you're comfortable with an outdoor view. There are a number of convenience stores in the towns and villages the route passes through, supplying food, drink and essentials. Bike repair and maintenance are relatively well catered for given the large towns and cities the route passes in its early stages; however the mountains present very limited options. Equipment Bike: The route is best suited to a touring, hybrid or grave l bike. Nat ional Cycle Network routes always seem to feature a slightly rough section of trail so a fast rolling tyre, with a reasonable width and degree of tread, would be ideal. A hardtail MTB with reasonably fast rolling tyres would also be ok. The route is not suitable for a road bike. A good selection of essential bike repair tools and spare parts would be handy due to the remoteness of the route in the Welsh mountains. Kit: We both carried a variation on the list below; this being my personal kit: Fairlight Secan 2.5, running Schwalbe Marathon Mondial 700 x 35 tyres; a 2x 30/46T x 11-36t Shimano GRX mechanical drivetrain. Ortlieb "Quick Rack" pannier rack, with Ortlieb Sport Roller Core (2 x 14.5ltr) panniers, Tailfin top tube bag (0.8ltr), Tailfin Half Frame Bag (3.8ltr) and a no-brand bar dump pouch (0.8ltr) Cycling clothes: Helmet, gloves x 2, glasses, cycling shoes, cycling bib shorts x 3, wool cycle jersey x 3, cycle gilet, arm warmers, neck buff, overshoes and waterproof jacket. Casual clothes: Down jacket, light weight fleece, zip off trousers, socks, underwear, light weight trainers. Wash kit, towel and first aid / medical items. Inc. chamois cream and sun cream Mobile phone, Garmin 830 GPS, GoPro Hero 10, charger, cables. Comprehensive set of bike tools, including: innertubes, pump, CO2 gas, chain lubricant, spare bike parts (derailleur hanger, bolts, cables etc.) Front and rear lights, bike lock, bell. 1.5 ltrs (2 x water bottles) carried on the bike Snacks. Final thoughts Lôn Cambria had been on the list for a while, and linking it with the Birmingham stretch of NCN81 worked exceptionally well. It also served as a reminder that there are countless great cycling adventures already waiting in the UK, without the need to chase the latest, more vogue “bikepacking” routes. The journey stitched together places that felt worlds apart: industrial canals and forgotten towpaths, border towns and empty lanes, engineered valleys and open mountains. The section through the Elan Valley was simply stunning and brought back memories of my ride along Lôn Las Cymru — a reminder of just how good cycling in Wales can be. As a three-day ride, this adventure stands comfortably alongside some of the finest routes out there. And as the final leg of the Seaside Divide , it feels like a fitting way to finish — rolling steadily from sea to sea, having experienced all that is possible on a modern bike packing route. Happy Adventuring!
- London to Birmingham on NCN4 and NCN5
Cycling from London to Birmingham may not have instant appeal but considering it encompasses the Thames Valley Cycle Route, Shakespeare Cycleway and parts of National Cycle Network routes 4 and 5, it all adds up to be a cracking multi-day adventure. Click here if you want to navigate straight to the section on How we tackled our London to Birmingham Adventure . The Seaside Divi de - A coast-to-coast adventure linking two of Britain’s historic seaside towns The adventure featured in this London to Birmingham blog is part of a bigger mission to complete a 475 mile, coast-to-coast route from Margate in Kent to Aberystwyth in Wales. We're undertaking the whole route in three sections, stitching together established cycle routes and sections of the National Cycle Network. This blog article recounts our adventure on section 2: London to Birmingham. The third part of this adventure, section 3: Birmingham to Aberystwyth will be published shortly. With luck, section 1: Margate to London, will be ridden in early 2026. Day 1 - London to Maidenhead Living near the Thames, it’s been the backdrop to countless adventures over the years. My wife and I are currently walking its entire length, from source to sea. It was also the setting for our Lidl canoe adventure with my mates. I’ve crossed it daily on my commute into central London and fished its waters at Cricklade with my grandad during my early teens. This time, the Thames was to play a starring role in the first two days of our four-day cycling journey from London to Birmingham. Tim and I set off on National Cycle Network Route 4 —more specifically, the Thames Valley Cycle Route —from Putney Bridge on a Thursday morning in late July. It was warm enough for short sleeves, though the lingering grey coolness in the air had us packing the full UK summer kit: waterproofs, arm warmers, sunscreen, and a trusty neck buff. The first few miles hugged the south bank of the Thames, winding past an array of prestigious boat clubs—no doubt the training grounds of countless champions, past and present. Then the trail swung south, carrying us into Richmond Park, famed as much for its roaming deer and ancient trees as for hot laps on a Pinarello Dogma. We crossed the park diagonally and reconnected with the Thames at Teddington Lock, where the river becomes tidal heading east. Here, we joined the well-traveled riverside paths, popular routes used by thousands annually for walking, cycling, rollerblading, or simply enjoying the view of boats and swans from a riverside café. Heading east, we crossed the Thames at Kingston Bridge, then again at Hampton Court Palace, winding our way onward to the Shepperton Ferry six miles later. This crossing was similar to those on my South Coast NCN2 adventure : ring the bell to summon the boatman, navigate our bikes down the narrow stepped ramp to hop aboard for a short ride across the river to the slipway on the far side. With twenty of our forty miles already behind us, it was the perfect excuse for a well-earned break—coffee and cake at the aptly named Ferry Coffee Shop, perched conveniently on the northern shore. A brief summer shower had us taking cover under the canopied entrance of a Sainsburys supermarket, just after crossing back to the south side of the river at Staines. It was also where we left the Thames behind for the next ten miles, heading toward Windsor and its expansive 4,800-acre Royal Park. We pressed on to Cooper’s Hill, having been warned that its incline would get the heart pumping after the mostly flat riding we’d enjoyed so far. The route was described as “off-road,” but as seasoned National Cycle Network travellers, our 35mm touring tyres had just enough grip and volume to haul our loaded bikes up the steep, gravelly climb—though with a bit more heavy breathing than we’d have preferred. The next five miles carried us through the stately Windsor Great Park—a grander, less touristy version of Richmond Park. We made a quick stop for tea and cake at Auntie Janis’s coffee wagon before continuing on quiet back roads into Windsor itself, passing the nearly 1,000-year-old Windsor Castle standing proudly to our right. Another bridge crossing returned us to the north side of the Thames, leading into Eton, home of one of the most prestigious and historic boarding schools in the world. A sharp left turn then guided us toward Eton College’s Dorney Lake. If you’ve ever watched a river-based sporting event in England, chances are Dorney Lake featured at some point. My last visit was back in the early 2000s, during a three-person triathlon event. My task? Ride the lake’s three-mile rectangular circuit four times as quickly as possible. At a more leisurely pace this time, we skirted its northern edge and passed through the small but affluent village of Bray, home to two of the UK’s five Michelin three-star restaurants. In stark contrast to the last few miles, o ur accommodation was a slightly more modest Travelodge and beer and burgers in the Maiden's Head... in Maidenhead... Day 2 - Maidenhead to Oxford We left the Maidenhead Travelodge heading east toward Reading, fueled by a full English breakfast and accompanied by a slight chill in the morning air. The first three miles were a stop-start affair, weaving through urban sprawl on fragmented cycle lanes and dodging curbside rubbish collections. But once we crossed the mainline railway out of Paddington, the city fell behind, and we were back in open countryside once more. In order to avoid the Bath Road, the route turned onto gravelly woodland trails up and over Knowl Hill. It would have been great to see the Thames again between Wargrave and Newtown but with no road or cycle path available, the tranquility of the early morning forest quickly disappeared as the route rejoined the Bath Road for a rather tedious and noisy three miles. Reading is a vibrant town blending rich history, modern business hubs, a thriving arts scene, and scenic riverside living along the Thames and Kennet. And, as we joined its outskirts, we recognised the picturesque parks and riverside paths as the route out of Reading on Cycling UK's the King Alfred's Way . At seventeen miles in, we crossed the Thames and decided Warings Bakery on the busy pavement of Caversham High Street would do for elevenses and to take stock of the next section of our route. The Thames winds its own leisurely path to Wallingford, cutting through the Chiltern Hills at Goring. Our route, true to form, took us up and over. Trading NCN 4 for NCN 5 , we began a steady eight-mile climb through the scenic back lanes and wooded beauty of Wyfold and Checkendon. At first, it seemed the thick tree cover would deny us any sweeping views from the top of the Chilterns. But as we descended the north side of the ridge, the trees parted, revealing golden fields of crops and a stunning view across the valley below. We skipped our 25 mile suggested stop at Stoke Row, pausing to enjoy the aerial acrobatics of five or six Red Kites, gracefully circling above the crop fields as they scanned and dived for their prey below. Wallingford was a pretty town, full of old buildings, tea shops and bunting. Our entertainment for the fifteen minutes it took to devour our filled rolls was watching the local taxi, bus and car drivers vie for the only three parking spaces in the market square. As our journey progressed, we checked off more charming back roads, thatched cottages, an incredibly steep railway bridge crossing, and a detour around Didcot power station. We didn't see much of the Thames beyond Reading, but we reconnected with its flat towpaths and varied bankside life for the final few miles leading into Oxford. The riding conditions had been spot on today—sunny and warm with just a whisper of a breeze to keep us cool. Our well-earned reward for knocking out 52 miles? A hearty Bhuna for me and a spicy Balti for Tim. The perfect way to refuel after a day in the saddle. Day 3 - Oxford to Stratford-upon-Avon Over fish and chips at The Crown Pub at the end of day 3, our conversation turned to the average distance between rural towns and villages. We reckoned it must have been determined by how far a horse could travel before needing food and water. With absolutely no scientific basis, we settled on fifty miles—coincidentally, also what we agreed was the sweet spot for a solid day’s cycling. National Cycle Network Route 5, however, had other ideas. Its somewhat meandering path between Oxford and Stratford-upon-Avon stretched just under seventy miles—about twenty too many for day-three legs pedalling bikes that felt twice their usual weight... Some twelve hours earlier, and well ahead of this revelation, we were carefully threading our bikes through the Travelodge corridors using a combination of foot jams and elbow holds to get our loaded bikes to the front foyer undamaged. We emerged blinking into the bright sunlight, paused to allow our GPS's to find their satellites, then set off to pick up the Thames once again. Barely a mile in, we left behind the early morning calm of riverside wildlife and the gentle rhythm of a coxless four gliding by, trading it for the architectural grandeur of Oxford city. Famous for its prestigious university and iconic limestone buildings, Oxford is also home to a lively cultural scene and a thriving cycling community, thanks to its web of bike-friendly streets. And it was those very streets that carried us from the city’s southern edge to its northern outskirts. At the north end of Oxford we left the Thames for the final time, its route west to its source in Kemble, ours north to Stratford-upon-Avon. We passed Oxford airport and Blenheim Palace all from a hedge lined cycle track along the busy A44 dual carriageway. Then it was into Woodstock where we left the security of the populated environment and dived into a landscape of tiny villages, country lanes and well manicured crop fields. The next forty miles took us along quiet single-lane roads and rolling hills, skirting the northeastern fringes of the beautiful Cotswolds and just a stone’s throw from the well-heeled haunts of the Chipping Norton Set. Now and then, a car would rumble past, its tyres echoing like a jet engine against the otherwise peaceful backdrop. We kept a steady pace northwest, passing through Middle Barton, Over Worton, Nether Worton, and Barford St. Michael—ancient names so common in this part of the world; to us a pleasant ticklist, each one bringing us a little closer to our destination. Just after we turned west on the outskirts of Banbury, we caught the Cross Cotswold Pathway, leading us towards Madmarston Hill—once an ancient Iron Age hill fort from around 200 BC. From our vantage point, the world below unfolded like a living toy set, with life-sized Britains farm figures—the same ones we once played with as kids—hustling through the golden fields in a well choreographed flurry of harvest-time action. As we cycled past the yellow wheeled farm vehicles we came upon a sea of vibrant blue star-shaped flowers atop soft, fuzzy green stems, thrumming with the low buzz of bee's going about their work. A quick Google search named the plant as Borage, used for culinary, medicinal, and cosmetic purposes. Medicinally, it's used to reduce inflammation, promote healthy skin, and support hormonal balance and the leaves and flowers have a mild cucumber flavour which are often added to salads, teas, and (my favourite) gin! We stopped for a late lunch, perched on the grassy verge of someone’s (very long) driveway, before climbing back into the saddle for the final thirty miles. The next twenty passed in a pleasant rhythm of undulating terrain, golden-stoned thatched cottages, and perfectly trimmed lawns dotting the landscape. The rural villages of Sutton-under-Brailes, Shipston-on-Stour, Darlingscott, and Ilmington all rolled by in a blur of countryside beauty. The sky had gradually darkened over the latter part of the afternoon and as we reached the Stratford Greenway, another well recycled rail line, the first rain drops began to fall. Thankfully it was only a brief shower which in turn cleared the grey cloud for the sun to break through once more. Coming to the end of our energy reserves, we passed through Stratford-upon-Avon, Shakespeare's birthplace, not really having enough time to savour its delights on our way to our YHA accommodation. And so we sat in the pub that evening, reflecting over distances, horses and villages and deciding fifty miles a day cycling is far more civilised than seventy. Day 4 - Stratford-upon-Avon to Birmingham We were racing the clock today, with just seven hours to cover 47 miles before our non-refundable 3:45 p.m. train home. It sounded easy enough on paper—until the first stretch turned out to be more suited for a boat than a bike… Before that, we had rolled through Stratford-upon-Avon, soaking up as much of its charming Tudor architecture and rich cultural history as one can in a mile and a half at ten miles an hour. To be fair, we were already familiar with the town—our first visit was on a family canal boat holiday, where Dad managed to ram the dock wall and snap the wooden mop we’d been using as a makeshift mast... good times! We’d already covered two-thirds of the canal path before discovering the river had practically swallowed the trail ahead. Rather than turning back, we stubbornly pushed on, lugging the bikes through the muddy final stretch to our bridge exit. By the time we escaped Stratford’s grasp and its genteel charm, an hour had passed—average speed: six miles an hour. The next ten miles to Studley led us along peaceful back roads once more, tracing the meandering River Arrow and skirting ancient field boundaries. Skirting Redditch, we passed through Ipsley Meadow—a wild green haven preserved by the local community against encroaching urban sprawl. We had initially planned to have lunch in Redditch, but after thoroughly searching the nearby cafes by St. Stephens Church, we found nothing. As time was pressing, we decided on a quick stop at a Tesco Express on the way out of town to grab sandwiches, bars, and crisps to sustain us for the upcoming miles. After choosing instead, pork pies and sausage rolls, we continued on, aware of the ticking clock. As we approached Birmingham, the countryside areas became less frequent. The greenery between Bromsgrove and Rubery was only as large as the towns. Country lanes transformed into urban parks, and urban parks into urban sprawl. Nevertheless, there were still sanctuaries for trees and wildlife. The Rea Valley route led us directly into the centre of Birmingham, leaving us with just one mile of city traffic to navigate before we arrived at Birmingham New Street station with thirty minutes to spare. Today seemed like a connecting segment within a broader journey, similar to the stretch between the Yorkshire Dales and the North York Moors on Wainwrights Coast-to-Coast . It was enjoyable cycling through beautiful countryside but truth be told, we'd been spoilt on the first three days. With half an hour to spare, we loaded up on carbs and boarded the train, sliding our bikes into their racks and collapsing into the designated cyclist seats. As the train whisked us swiftly south, the reality of the trip began to sink in. Four days and £300 on food and accommodation to cycle from London to Birmingham—only to return home in an hour and a half on a £15 train ticket. Perhaps there isn't always a logic to cycling, but it's always an adventure! How we cycled from London to Birmingham on NCN4 & NCN5 Route The route primarily consists of a number of National Cycle Network routes, parts of which are named as part of a more local trail. The route out of London follows NCN 4 / EV2 (Eurovelo 2) all the way to Reading. Just before the town centre, the route switches to NCN 5 which ultimately takes you right the way to Birmingham. Oxford, at the end of day two, marks the split from the River Thames, its course continuing westwards as this route turns north. The route also encompasses the Thames Valley Cycle Route , Shakespeare Cycleway , Cross Cotswold Pathway and the Rea Valley Route . The route is just over 200 miles (320km) long and has around 2,100m of climbing (6,800 ft). We chose to split the trip into four equal days with a slightly shorter first and last day to allow for travelling. As usual the brilliant cycle.travel provided a wealth of information, the following links capturing the majority of the route and make for excellent pre-ride reading: https://cycle.travel/route/thames_valley https://cycle.travel/route/oxford_to_birmingham Clicking on the map (title) above takes you to the Ride with GPS route we used for this adventure. Please feel free to download and modify to suit. Day 1 - Putney to Maidenhead. 42 miles (68km) | 330m ascent | max grade 9% Putney, Teddington (8), Kingston (10), Hampton Court (12), Shepperton Lock (19), Staines (25), Coopers Hill (27), Windsor Great Park (30), Windsor Castle (35), Maidenhead (42). Day 2 - Maidenhead to Oxford. 52 miles (84km) | 55om ascent | max grade 6.5% Maidenhead, Holly Cross (7), Charvil (11), Reading Bridge (17), Kidmore End (20), Stoke Row, (24), Wallingford (31), Didcot Power Station (41), Abingdon (45), Oxford (52) Day 3 - Oxford to Stratford-upon-Avon. 63 miles (100km) | 725m ascent | max grade 4.6% Oxford, Woodstock (9), Middle Barton (18), Barford St. Michael (23), Bloxham (25), Bodicote / Banbury (29), Sibford Ferris (37), Shipston-on-Stour (46), Ilmington (50), Lower Quinton (54), Stratford-upon-Avon (63) Day 4 - Stratford-upon-Avon to Birmingham. 44 miles (100km) | 725m ascent | max grade 4.6% Stratford-upon-Avon, Wilmcote (3), Coughton (10), Studley (13), Redditch (18), Bromsgrove (26), Rubery (33), Kings Norton (39), Moor Green (41), Birmingham New Street Train Station (44) Getting to the start This is a one-way trip so using public transport to get to the start, and to travel home at the end, is probably the easiest. Tim and I both chose to cycle to Putney for the start, given we don't live too far away. Public transport into London is good from any direction. Likewise at Birmingham, so travel at both ends should be fairly easy to organise. Just be wary of travelling into London at peak times with a full-size bike as there will be restrictions on timings depending on the train operator. Terrain Approximately 82% paved & 18% unpaved The terrain is classic National Cycle Network. Gentle undulation, backroad tarmac, town and city cycle lanes and a few stretches of gravelly byways. Any gravel, hybrid or touring bike with around a 35mm touring tyre would suit this route perfectly. When to go Aside from the prime cycling months of May to September, this route could be ridden pretty much all year round. While there may be slightly less amenities open, choosing to ride this route in the shoulder months of March/April or October/November would be feasible given the frequency of towns and villages the route passes through. Check for the ferry service across the Thames at Shepperton and pack suitable warm clothing. Accommodation Day 1 - Travelodge Maidenhead Centr al . 99 King St, Maidenhead SL6 1DP Day 2 - Travelodge Abingdon Road. Abingdon Road, Oxford, OX1 4XG Day 3 - YHA Stratford-upon-Avon . Hemmingford House, Wellesbourne Rd, Alveston, Stratford-upon-Avon CV37 7RG Eating One of the attractions of this route is its fluctuation between urban and countryside environments. There's always a place to stop either at a cafe, to enjoy a slice of cake, or a convenience store to gather supplies. For the first couple of days, in and around the River Thames, we were spoilt for choice for snack stops, pubs, restaurants and shops. On the latter two days, things were slightly more sparse given we were well into rural countryside. We stopped for food at the following places, outside of what our accommodation provided: The Ferry Coffee Shop . The Ferry Point, Ferry Ln, Shepperton TW17 9LQ Auntie Janis's. St. Leonards Rd, Windsor SL4 3DR The Maidens Head , 34 High St, Maidenhead SL6 1QE Warings Bakery, Caversham. 32D Church St, Reading RG4 8AU Greggs, 5/6 Market Pl, Wallingford OX10 0EG The Old Delhi , 4 Park End St, Oxford OX1 1HH Co-operative Food , High St, Bloxham, Banbury OX15 4LU The Crown Inn at Tiddington , 14 Main St, Tiddington, Stratford-upon-Avon CV37 7AZ Tesco Express, Willow Way, Redditch B97 6PH Birmingham New Street Train Station, East Mews, Birmingham B2 4PY Convenience stuff A quick Google search at any point along the route should bring up public conveniences within a reasonable riding distance. Check for opening times if possible, as toilets sometimes get locked up overnight and for the winter as soon as the main summer season has ended. Bike shops are reasonably frequent for the first couple of days, one even being next to the Ferry Inn at Shepperton. Thereafter, you'll probably be limited to the bigger towns and cities. Equipment The route is best suited to a touring, hybrid or gravel bike. National Cycle Network routes always seem to feature a slightly rough section of trail so a fast rolling tyre with a reasonable width and degree of tread would be ideal. We both carried a variation on the list below; this being my personal kit: Fairlight Secan 2.5, running Schwalbe Marathon Mondial 700 x 35 tyres; a 2x 30/46T x 11-36t GRX drivetrain. Ortlieb pannier rack, with Axiom (2x12ltr) panniers, Topeak top tube bag (1ltr) and a Straight cut Designs Aon frame bag (2ltr). Cycling clothes: Helmet, gloves, glasses, cycling shoes, cycling shorts (bibs), wool cycle jersey, cycle gilet, arm warmers, neck buff, overshoes and waterproof jacket. Spare set of bib shorts and cycle jersey. Casual clothes: Down jacket, light weight fleece, zip off trousers, socks, underwear, light weight trainers. Wash kit, towel and first aid / medical items. Inc. chamois cream and sun cream Mobile phone, Garmin 830 GPS, GoPro Hero 10, charger, cables. Bike tools, innertube, pump Front and rear lights, bike lock, bell. 1.5 ltrs (2 x water bottles) carried on the bike, snacks. Final thoughts We thoroughly enjoyed this adventure for several reasons. Point-to-point journeys, in my opinion, offer a stronger sense of purpose—you’ve physically travelled from one destination to another. While round trips have their own appeal, there’s something especially satisfying and rewarding about reaching a far-flung place, particularly by bike. The diverse terrain added to the experience, taking us through bustling cities, around well-tended fields and along the River Thames; a landscape shaped over thousands of years. The stretch from Oxford to Stratford-upon-Avon was a highlight, reminding us that the kind of idyllic cycling we read about in old books, the ones with those amazing pen and ink sketches, is still very much alive and waiting to be enjoyed, even today. There was also something special about travelling between two major cities along forgotten lanes, far from the roar of motorways and the hurried pace of modern life. While others would be undertaking the journey in their speedy cars, covering the same distance in just a few hours, we were making our own way—undetected, almost in secret—slipping through the countryside as though hidden from modern life. It was a chance to connect with the landscape on a far more intimate level and for a while, it felt like we had found a parallel world all of our own. Happy Adventuring!
- A South Coast Cycle Adventure along NCN 2
National Cycle Network route 2 runs between Dover in Kent to Dawlish, just west of Exmouth. In March 2020, literally a week before national lockdown, I decided to pack my panniers and ride 240 miles over 5 days from London to Exmouth along NCN2. Day 1 - Sutton to Chichester Muscle memory? For some reason I hadn’t been out on the bike that much over the previous six months. So, much of the first twenty miles were spent pondering whether my legs and perhaps more importantly my derriere were ready for the next two hundred plus miles. I chose to start the adventure at Sutton train station and ride cross country to pick up NCN 2 in Chichester, purely because I had another ride in mind that would take me along the Brighton stretch later in the year. The initial part of the route was mainly on roads, passing through a number of Green Belt towns and was pleasant enough just to get the legs working. After two months of almost continuous rain the sun had finally asserted its authority with bright skies, puffy clouds and the temperature just warm enough for cycling. As I weaved my way across the North Downs and descended into Shere, I felt a touch guilty when I elected to stop for a coffee in the Dabbling Duck and their lunch time menu relegated my packed lunch to a mid-afternoon snack. My route turned west for a while, onto NCN route 22, an off-road trail taking me cross country to Shamley Green where I’d turn due south again. An unhurried road route scooted me through the wooded lanes of Haslemere, Dunsfold (the home of the old Top Gear test track) and my first glimpse of the South Downs. Overall the route was quite undulating, perhaps not surprising as I had to cross the North and South Downs, so by the time I trundled into Singleton I was pretty tired. Thankfully, Regional Cycle Route 88, the New Lipchis Way / Emperor Way, took pity on me and rolled out a few miles of smooth tarmac all the way to Chichester. At the south west corner of Chichester I finally connected with NCN route 2, my guide for the next four days and an easy cruise into Bosham for an overnight stay at The Boat House B&B. Gammon, eggs and chips was courtesy of the White Swan, a ten minute walk away, then it was into bed for a well-earned first nights sleep. Thankfully my legs had woken up to the fact that they were going to be the engine house for the next four days, unfortunately the same positivity couldn't be said for the saddle sores I could feel brewing. Day 2 - Chichester to New Forest Messing about in boats I suffered a slight delay to my departure after the Boathouse owners, Jane and Hamish, asked if I’d feature on their new website. Vanity getting the better of me, I adopted various poses with my bike for the next few minutes as photos were duly taken. It’s a great B&B, spotlessly clean with well-appointed rooms and caters for cyclists with secure bike storage and the route literally passing the front door. The flat roads out of Chichester, albeit slightly busy, allowed me to catch up the lost time. I passed through Emsworth, onto Hayling Island and enjoyed a beautiful ride along the nature reserve on the western edge, arriving with five minutes to spare for the scheduled 10:45am Hayling Island ferry departure. This was to be the first of five ferry crossings I’d make on this journey each one with its own quirks and peculiarities. It was also the only one I’d arrive at on time. An easy ride round the sea front, past South Parade Pier and numerous war and naval memorials brought me into Portsmouth. After taking a few wrong turns through a cluster of newly developed water front properties, I arrived at the Gosport ferry. Somehow I’d managed to forget to make allowance for the ferry crossing times into my route plan, so I’d ended up with only twenty minutes to cycle seven miles from the Hayling Island ferry to Portsmouth! Thankfully the ferry departed every fifteen minutes so only my pride was damaged and I made a mental note to alter the times on my route plan for the rest of the day. The “Millennium Town” of Gosport was looking a little tired round the edges as I arrived on the other side of the harbour. But a few miles west the coastal cycle way opened out to horizon bending views of the dark brown sea meeting the pale grey sky as I looked across to the Isle of Wight. The previous days bright sunshine had continued to around eleven o’clock this morning but was now struggling to fight its way out from behind a thickening layer of clouds. Coupled with an inshore headwind, it had me zipping up my jacket and tucking in my neck scarf. Lunch was a quick affair courtesy of shop bought sandwiches and eaten on a sea view bench at Lee-on-the-Solent. Another short ride took me to the River Hamble and the Wasash ferry. It’s difficult to miss in its barbie pink livery and thankfully I didn’t have to wait long for it to arrive. I was carrying all my gear in my two rear panniers, plus the tent on my rack which made the bike a little off balance and challenging to manoeuvre. Lifting it onto the ferry was a sorry affair and almost necessitated removing the panniers in order to get it onboard! The trip across the Hamble was only five minutes but it’s a pretty crossing point full of sailing boats and has great views up the river and out to sea. The Solent Way provided the route for the next stretch, linking the River Hamble to Southampton. Royal Victoria Park still has a slight regal feel to it with its open grass and wind swept Scots pines surrounding the gravel paths and brick built chapel. But the Itchen Bridge at Southampton with its exposed height and a gusty wind makes for a nervous ride next to the speeding traffic. Crossing the River Test is a functional activity and with its hourly crossings, timing your arrival is beneficial otherwise be prepared to make use of the motorway service style waiting room. Arriving at Hythe is a polar opposite. It’s a quaint if somewhat weather beaten green wooden building and six hundred metre long wooden pier served by a train which takes passengers from one end to the other. Unfortunately cycles are not allowed on the train and you can’t ride down the pier so I had a long walk overlooking the sea and watching the little train disappear into the distance. A ride through Hythe town, including a short stop to pick up some extras for my evening meal, saw me cross the A326 and into the New Forest. I’ve been visiting the New Forest for years but crossing the boundary cattle bridge never fails to humble me. It’s like two worlds; on the outside the hustle and bustle of every day life, urban sprawl and development; and inside, the calm serenity of unspoiled open rolling heathland, small pockets of woodland and the pony’s roaming free and easy where ever they please. My campsite was a few miles down the road where a hot shower awaited. Tent pitched and dinner on, I watched the sun go down as I sorted my kit and caught up with general admin. The temperature had been just the wrong side of cold today, I never really built up enough effort to warm up my extremities but sitting in my down jacket eating Pasta Bolognese washed down with a mini bottle of red wine, I was now warm and content. Day 3 - New Forest to Dorchester Blame i t on the campsite manager With all good intentions I’d planned to set off at 8am today. I had a long ride ahead and I was just leaving when a slightly over enthusiastic campsite manager got chatting. An hour later I wound my way up the camp site drive and out onto the road, cursing my inability to cut the (albeit interesting) conversation short. I felt like I had the whole of the forest to myself this morning. Aside from the odd car, I don’t think I saw a single person until I reached Brockenhurst. It felt slightly surreal, but I was enjoying the peaceful calmness as I trundled along the forest tracks singing out loud to myself. At one point I glanced back to find a mountain biker on my tail, the only person I’d seen for miles. The illusive figure stayed at a small distance off my rear wheel for around four or five miles until I made efforts to loose them as I snaked my way down towards Christchurch. For a brief moment I felt like Richard Hannay in the novel The Thirty Nine Steps being chased across the open moorland not knowing whether the follower was friend or foe. Christchurch is an interesting town, and if I had more time I would have stopped for longer. It’s a perfect blend of bustling activity, medieval ruins and pretty houses. But, with time pressing I passed through and onto the eastern end of Bournemouth beach. The route was a flat ride along the beach promenade and although I had the advantage of very few pedestrians being out, the headwind had picked up and the sand had been blown into a thick layer covering the path. I made it to Bournemouth pier, grabbed a bite to eat and took shelter. The headwind was relentless and the sand too loose to ride at any speed, so I made the decision to break from my flat route and head inland for some shelter and less treacherous surface. A steep climb up over Canford Cliffs followed by a long descent down the other side took me away from the headwind and brought me to the chainlink ferry at Sandbanks. My legs still felt good at this point but the same couldn’t be said for my rear end. A quick application of chamois cream in the toilets on the ferry would help me through the next few hours but I knew the sores were only going to get worse as I continued. Studland on the Isle of Purbeck is beautiful, rather like a cousin of the New Forest and the route was equally as good. It wound its way off-road on almost single track type trails, weaving in between the gorse and heather, and was quite muddy in sections as well. By the time I picked up smooth tarmac on the western edge I felt like I’d ridden for a day already. Unfortunately, I was only half way… The route west continued on country lanes, reasonably flat, passing through East Stoke, Wool and Moreton. I think the high hedged country lanes would be quite cheerful in the summer, but now, in March with the cold wind and the prospect of another twenty miles still to go it just seemed a little bleak. I rolled into Dorchester and skirted south of the main high street as dusk approached and I felt the first drops of rain. Lights and water proofs donned and a raisin Yorkie and a cup of tea still in reserve I pressed on. There was a fairly chunky hill ahead and I’d decided to chose whether to go over or round it when I arrived at the junction. Somehow I’d managed to pass the “go round it” turning so I was committed to an off road route taking me up and over. Darkness fell as I came off the hill. I pressed on, fog now settling in the valley and enveloping my silent journey. One final hill loomed, one of those with a number of false summits made worse by the fact I couldn’t see any more than fifty meters in front of me. I crested the hill top, the Hardy Monument looming out of the darkness and began a brake squealing decent down into Portesham. There was a distinct lack of street lights in the village and I had to use my GPS to locate the campsite entrance but it appeared soon enough allowing me to trundle in, straight into the middle of a bunch of caravans. I found a decent spot for my lonesome tent, locked my bike up, dived into the shower then headed over to the Kings Arms pub for dinner and a pint. Whilst I sipped my beer waiting for my home-made burger I wrote my diary and wondered how much easier this last leg would have been if I’d set off one hour earlier… Day 4 - Dorchester to Exmouth Horsey, hor sey, don’t you stop… At the pub the previous night I had been dragged out of my cosy corner seat (where I was drying my clothes and charging my various electronic devices) to join the locals at the bar. One too many beers later I crawled into my tent only to wake at 6am, bladder at bursting point. Deciding to go for the early start I hadn’t managed the day before, I packed up my wet tent, gobbled down a cold Wayfayrer breakfast and a carbohydrate drink. All not very appealing, but a kind lady offered me coffee for my flask as I was securing my panniers, which I gratefully accepted before setting off into the morning drizzle. And not three minutes later I was back off the bike pushing it up the first of many, very steep Devon hills. Despite it being a grey, cold, drizzly day, the scenery was trying its best to cheer me up. Swathes of green rolling hills, all very Devonish with low stone walls lining the narrow roads and the daffodils just coming into bloom along the hedgerows. But even this didn’t detract from my painfully cold hands and feet and the mud rivers washing across the road covering me and all my gear. I found some brief respite from the rain and cold outside an old telephone box which had been converted into a medley of hill walker's paraphernalia. "Please leave a comment in the visitor book" it said. At this point I thought it would be more useful to burn it to warm up! Despite the hills, they were actually a welcome distraction. Stomping up them gave me the opportunity to warm my feet up at the expense of making clipperty clop - horsey noises as my cycle cleats struck the tarmac. And so the cycle loop continued, down hill - freeze. Uphill - "clipperty clop" - thaw. To be honest most of the section from Portesham and through Bridport my head was down just battling the cold, potholes, mud and rain so lunch on the forecourt of a Tesco's petrol station in Axminster was a blissful haven for ten minutes. Thankfully the sky cleared a little after that and by about 3pm the sun was just peeking out of the clouds making the ride along the coast past the seaside towns of Seaton and Sidmouth quite picturesque. As I approached Budleigh Salterton I knew it wasn't that much further and also that the last leg was on a disused railway. However, as if to remind me that I was still firmly in Devon even the old railway line was steep! Thankfully it was only a short climb, giving way to a long straight descent, dodging evening runners and cyclists, leading me into Exmouth just as the sun was setting. Day 5 - Exmouth to Exeter A distinct lack of planned preventative maintenance A well-deserved overnight stay at Premier Inn Exmouth was topped off with an "all you can eat" breakfast before setting off on today's leisurely ride up the river Exe. The sun was back out again, although it was still cold, it was bright and cheery and a welcome change from yesterday’s grim conditions. Now I wasn't worried about mud, hills or the cold, I was suddenly in tune to the awful sound of my gears grinding and chain squeaking; every turn of the pedals had me wincing in sympathy. It hadn't seemed appropriate maintaining my filthy bike in the hotel conference room last night. And anyway a glass of wine and a chicken pie was much more appealing. Should I stop and put some lube on now? No, it's stuffed in my spare shoes which are at the bottom of my left pannier, and it's only a few more miles to go anyway. It’s a delightful ride along the Exe, following the train line past the Commando training ground at Lympstone and the dog leg through Exton and on to Topsham. The boardwalks over the water also make for an interesting thrumming sound as my tyres rolled across the semi smooth surface. And it’s at this point that I departed NCN route 2, my friend for the last three days, and made a brief acquaintance with NCN 34 along the Exe Valley Way for the last few miles into Exeter City. I found I was taking it more and more slowly at this point. Was it perhaps because I had an hour to kill before the train departed, or perhaps it was because my legs were tired? I had a feeling it was probably because this mini adventure was coming to a close and I really didn’t want it to. Exeter St. Davids train station appeared on the left as my GPS predicted and it was journeys end to a great ride. But now both my bike and I needed a long rest and some much needed maintenance. And perhaps a saddle fitting session booked up as soon as possible. How I cycled NCN 2 Route: 240miles (385km), 4230m total ascent. The route starts at Sutton Station, SM1 1DE, which has plenty of great rail connections. Day 1 – Sutton to Bosham (Chichester) - 57 miles (92km), 1020m ascent. Leatherhead, Shere, Dunsfold, Lodsworth, Singleton. Day 2 – Bosham (Chichester) to Beaulieu (New Forest) - 45 miles (72km), 335m ascent. Havant, Hayling Ferry, Portsmouth (Gosport ferry), (Hamble ferry), Southampton (Hythe ferry), Beaulieu. Day 3 - Beaulieu (New Forest) to Portesham (nr. Dorchester) - 68 miles (109km), 837m ascent. Christchurch, Bournemouth, Sandbanks (ferry), Wareham, Dorchester. Day 4 - Portesham (nr. Dorchester) to Exmouth - 59 miles (95km), 1798m ascent. Pymore, Axminster, Brainscombe, Sidmouth. Day 5 – Exmouth to Exeter (Exeter St. David’s train station) - 12 miles (19km), 238m ascent. Topsham (Maps and images courtesy of cycle.travel) The attachment below is a .gpx file for the entire 5 day route from Sutton in Surrey to Exmouth. Please feel free to download the route and modify it to suit your own adventure accordingly. NCN route 2 can be viewed on the Sustrans website https://www.sustrans.org.uk/find-a-route-on-the-national-cycle-network/route-2 , which if you haven’t visited before is an excellent source of cycling information. You can also purchase the paper maps of the route here as well. My return journey was via GWR trains from Exeter St. David’s to London Paddington and took 2hrs 15 mins. They have dedicated bike storage on board but you do need to book your cycle in advance. Ferries: Hayling Island – The Hayling Ferry - https://www.haylingferry.net/ Portsmouth – Gosport Ferry - https://www.gosportferry.co.uk/ Hamble – Hamble Warsash Ferry - https://www.hambleferry.co.uk/ Southampton - Hythe Ferry (Blue Funnel Ferries) - https://hytheferry.co.uk/ Sandbanks / Poole - Bournemouth-Swanage Motor Road and Ferry Co. - http://www.sandbanksferry.co.uk/ Accommodation: Day 1 – The Bosham Boat House. Main Road, Bosham, Chichester, PO18 8EH https://www.theboshamboathouse.co.uk/ Day 2 – Ferny Crofts Scout Activity Centre, New Forest (not open to general public) Day 3 – Portesham Dairy Farm Campsite. 7 Bramdon Lane, Portesham, Weymouth, Dorset, DT3 4HG. https://www.porteshamdairyfarm.co.uk/ Day 4 – Premier Inn. Exmouth Seafront, The Esplanade, Devon. EX8 2AZ https://www.premierinn.com/gb/en/hotels/england/devon/exmouth/exmouth-seafront.html Eating: The Dabbling Duck. Middle Street, Shere, Guildford GU5 9HF. https://www.thedabblingduck.uk.com/ The White Swan. Station Rd, Bosham, Chichester PO18 8NG. https://whiteswanbosham.co.uk/ The Kings Arms. 2 Front Street, Portesham, Weymouth DT3 4ET. https://www.kingsarmsportesham.co.uk/ Premier Inn. Exmouth Seafront, The Esplanade, Devon. EX8 2AZ Equipment: Specialized CrossTrail “Adventure Bike” running Schwalbe Marathon Mondial 35c tyres 40 ltr rear pannier set + 5 ltr bar bag Sleeping: 1 person tent, sleeping bag, inflatable mattress and pillow Cycling clothes: Helmet, gloves, glasses, cycling shoes, overshoes, padded cycling shorts, cycling jersey, cycling gilet, arm warmers, windproof smock, neck warmer Spare clothes: 2nd set of cycling kit – gloves, jersey, shorts. Plus down jacket, zip off trousers, short sleeved shirt, socks, underwear, thermal top and leggings, waterproof jacket, trainers Wash kit and first aid items Collapsible seat and sit mat Stove, pot, gas, food 2 x 1ltr water bottles, thermal flask/mug Head torch, multitool GoPro, GPS, mobile phone, battery, cables Bike tools, innertube, pump, bike lock, lights Notes: The majority of this route is on tarmac roads, however some parts are off-road and across some fairly rough terrain. Any good gravel, hybrid or mountain bike would be suitable for this route, something with a reasonably wide tyre with some off-road grip. I wouldn’t personally take a road bike with slick tyres as the terrain is really not suitable. My route starts at Sutton train station in Surrey, however there is a good train service which runs from London Victoria to Brighton which takes just under one hour. It’s possible therefore to start cycling a whole section further back along NCN route 2 and ride along the coast from Brighton (Ovingdean) to Bosham, then onto Exmouth (Dawlish) as follows: Day 1 – Ovingdean to Bosham – 44 miles Day 2 – Bosham to Brockenhurst – 53 miles Day 3 – Brockenhurst to Moreton – 45 miles Day 4 – Moreton to Axminster – 43 miles Day 5 – Axminster to Dawlish – 47 miles
- How to create your own bikepacking route
So you've ridden a whole bunch of well worn routes and have a good idea of what kind of adventure floats your boat. Why not have a go at creating your own bikepacking route? This post is split into two sections. The first section provides a background into what makes a good route. It covers how to calculate distances and timings and a number of excellent resources you can use for inspiration. The second section is a step-by-step guide, gathering all the information and piecing it together to create your route. If you've landed here looking for how to plan a bikepacking trip and already have a route planned, then why not head over to my previous post, how to plan a bikepacking adventure , for hints and tips about how to prepare an awesome trip. What's behind a good Bikepacking route? Building a good route is an iterative process. For me, it normally starts with a simple thought; perhaps a stunning clifftop campsite I want to visit, a part of the country I haven't explored or maybe I just want to get away and de-stress after a busy week at work. Whatever it may be, it helps shape the route and influences where I stay and the paths I take. There’s nothing quite like sitting round the kitchen table with a cup of tea in hand and an Ordnance Survey map spread out, stitching a path through the landscape to get from one place to another. Digital mapping platforms are great but it's far easier to see good routes through the surrounding landscape when it’s all laid out in front of you in infinite detail. Where exactly can I cycle? In the UK cycles are not allowed on public footpaths or Motorways, so look for a combination of the following: Public bridleways Public by-ways Permissive bridleways Dedicated cycling trails (National, Regional or Local cycle ways) Quiet B or C roads. I would definitely avoiding using a digital route planning app as your sole tool for creating a route. Some are notorious for plotting routes across private land, down public footpaths or on busy roads. Many are not UK centred and don't use relevant path terminology leaving you bemused when a landowner is giving you grief for being on a "Path" or wasting time looking for an elusive "State Road." Having said that, these apps are great tools if used in the right way and I regularly use them in the later stages of the planning process to get the route into a digital format for my GPS. Understanding the terrain is also important on a cycle ride. On a road bike, routes around quiet C roads are more pleasant than battling it out with speeding traffic on an A road. A low geared mountain bike will be better if you’re looking to venture solely off road on rugged bridleways. National Cycle Network routes cover mixed terrain so a hybrid, touring or gravel bike would be a great all round choice that will pretty much take you anywhere in the UK. Ordnance Survey maps As old school as it might sound, an Ordnance Survey map is an excellent place to start. They contain a wealth of information about the surrounding landscape and have easy to follow symbols for roads and trails making it quick to identify good quality routes. They are also as close as you can get for representing definitive rights of way in the UK. As far as I know there isn't any other resource that has this level of accurate information contained in one place. For about the equivalent cost of four paper maps, you can download the Ordnance Survey app and subscribe (yearly) to the full suite of 1:50,000 and 1:25,000 maps across the entire UK. Apart from being incredibly good value, it's extremely useful for carrying on your phone as a back up to your GPS. I normally have my route running on my GPS for primary navigation and the same route downloaded onto the Ordnance Survey app, so I can quickly refer to it if I'm struggling to find the correct paths. I can't really emphasis enough the importance of using Ordnance Survey maps as part of your route making process. Although we commonly enjoy using terminology such as: Trail, Single Track, Double Track, Gravel Trail, Dirt Road and so on, these don't exist when it comes to looking for Rights of Way in the UK. The National Cycle Network The Walk Wheel Cycle Trust (formerly Sustrans), manages a network of approximately 16,000 miles (21,000km) of signed cycle routes. The criteria for a National Cycle route is that 50% of the total mileage should be away from a road and all sections should be suitable for an unsupervised 12 year old to ride on. The National Cycle Network can be found as a map overlay accessed via both the Ordnance Survey and Sustrans websites. (Image courtesy of Walk Wheel Cycle Trust) These cycle trails can form the basis of a really great adventure. Cycle UK's Cantii Way follows the best part of five National Cycle routes to form its loop of the Kent coast and the utterly brilliant Lon Las Cymru is in fact National Cycle route #8. My long way round to Brighton and back , stitched together National Cycle routes #21, 2, 223 & 22 to form a excellent three day adventure from London to the south coast. And the London to Birmingham adventure I shared with my brother followed NCN 4 & NCN 5 . Route planning inspiration There are oodles of fantastic resources that offer great ideas for routes. The selection below are by no means exhaustive, but I've found they're a great place to start. Travel guides, books, magazines, web articles, social media These provide a plethora of inspiration, normally accompanied by stunning photos and evocative descriptions. This is probably where I get the first seeds of a cycle adventure. Below are just a few of my favourites: Pannier.cc a cool and funky UK site dedicated to the art of Bikepacking. Just looking at the photos will have you strapping on your bike bags and heading off for an adventure. Bikepacking.com An American website, YouTube channel and glossy publication. Heaps of useful information and plenty of UK route inspiration as well. Lost Lanes Beautifully produced cycling guide books, now covering most of England and Wales, written by The Bike Show's , Jack Thurston. Although primarily single day rides, they celebrate scenic cycling with detailed ride descriptions and evocative photography. I sometimes incorporate parts of Jack's routes into longer point-to-point multi-day rides. They also come with access to downloadable gpx routes. Keep Smiling Adventures A YouTube channel featuring the ever happy Josh Parsons, a long distance cyclist who appears to be on a mission to ride all the UK bikepacking routes (along with creating his own). Inspiring bike rides Down to earth people who just enjoy cycle touring without the accompanying marketing hype. It was this site that got me back into multi-day cycling. (Unfortunately their site is down at present but hopefully will return soon) The Walk Wheel Cycle Trust (formerly Sustrans) As well as offering access to the National Cycle Network and some great information about using the trails, The Walk Wheel Cycle Trust also have a ' Find a route ' function on their website allowing you to select a location, ideal distance/length of ride, and route type. For the latter you can select: "all road", "traffic free" or anywhere in between. The routes are printable but they also offer digital and paper cycle route maps, plus a whole host of other useful cycling information. Cycling UK Formerly the Cyclist Tourist Club (CTC), Cycling UK has set about reinvigorating UK touring and bikepacking by releasing a steady stream of new routes, such as the King Alfred's Way, the West Kernow Way and the Cantii Way. Whilst these are great routes in themselves, they also have accompanying guide books with numerous route variations making a good basis for understanding cycling around a location if you didn't fancy following the prescribed route. Cycle.travel In my opinion cycle.travel is one of the best route resources, and certainly the most intuitive route planning software on the internet. Created by Richard Fairhurst, a Cartographer, Sustrans volunteer and an early pioneer of Open Street Map, cycle.travel is the route planners secret weapon for creating brilliant routes anywhere across the UK. 'Heat mapping', as commonly used by other mapping companies, is great for seeing where other cyclists ride, but it doesn't necessarily mean to say its a good route. Cycle.travel's software uses a clever algorithm to derive point to point routes, not just by the correct UK specific path type but by analysing traffic density and choosing roads that are less frequented by other vehicles. In addition to its clever mapping tool, it has a huge selection of route guides which include detailed descriptions, overnight stops, suggested leg distances and so on. In terms of a route mapping tool it beats all the mainstream sites hands down! However you go about planning your route, it’s advisable to be a little flexible at first so you can tailor the route to encompass the best views, stopping points and accommodation. It’s not uncommon for me to tweak the route a couple of times before it finally fits the bill, so don't just plump for the shortest line between destinations. How far should I make my route? For me, this is dependent on three factors: the terrain, and therefore what type of bike I'll be riding, stoppages and how many hours per day I want to ride. Terrain A rough trail on a mountain bike with wider tyres will take more effort to pedal than a road bike on smooth tarmac. Therefore, you'll travel slower and cover less distance on a MTB than a road bike for the same given time. It’s also important to take into account how hilly the route is and the added weight you'll be carrying on the bike, as these will also have a significant effect on the amount of miles coverable in one day. (Image courtesy of cycle.travel) One of the great features of a digital route planning tool is the ability to quickly display the terrain type across the entire route. The example above is from Lon Las Cymru in Wales and at a glance shows that 93% of the route will be on road or cycle path. It made it an easy choice to take my gravel bike with low gearing fitted with touring tyres. Duration I like to set off relatively early in the morning and get to my destination by late afternoon giving me plenty of time to put up my tent, cook and wind down. This also gives me a small buffer if the route is taking longer than expected, Building in time to stop on route for photo's, breaks and lunch all means that I may only be physically riding for around 6 hours . Unless your planning your trips around the middle of the year, it's also worth checking the times for sunrise and sunset. Late Autumn, Winter and early Spring have short daylight hours so factor this in or bring good quality lights! Taking a break You'll want to stop at some point on your ride even just for a toilet break. I'll generally stop for food a few times, take photos, need a couple of toilet breaks, adjust my clothing depending on the weather and possibly (although not hopefully) have a mechanical issue to attend to. My brother recently observed that it always took us around 40 minutes for a coffee break. No matter how much we tried to speed up the process, by the time we'd ordered, payed, consumed and cleared up, forty minutes had elapsed. Factor this in twice and its already an hour and a half on top of your cycling time. Be realistic and generous with the time you build in for stoppages and breaks. Distance 50 miles per day is a great place to start. By analysing thousands of miles of bike trips undertaken either on my own or with friends and we consistently average a riding speed of 10mph . In fact its become so reliable, I ignore what the mapping software states as this figure is far more realistic. Obviously you will have your own cycling speed, but this for me and the others I cycle with, is a great benchmark. I find the ascents generally cancel themselves out as long as the ascent and descent figures are pretty much the same. This doesn't mean I can ignore the climbs though as they do contribute to slowing the overall pace. I'll add on another 5 minutes for crossing a single gradient arrow (14%+) on the OS Map and possibly 10 minutes for a double arrow (20%). If you are using mapping / route building software, then look to see what the maximum gradient is on each climb as the average can be misleading. Ordnance Survey Map symbols - Note: The arrows point down the hill. Add time if cycling up the hill! Hike-a-bike sections also add time which is generally not recovered by a corresponding downhill. Therefore to simply calculate how far you should ride, first think about how long you want to be out on the bike for. This is how I estimate my day: I'd like to be out and about for around 8 hours, so; 6 hours riding @ 10 mph = 60 miles Now add steep ascents and a possible hike-a-bike, so say 1 hr, therefore riding time is up to 7 hrs. Now add in at least 2 hours for stoppage. Equalls 9 hrs total riding time, which is over my target. In reality I want to start riding between 8am and 9am and finish between 4pm and 5pm, so with the ascent (1 hr), and the stoppage time (2 hrs) it leaves me with 5 hrs riding so at 10 mph that's 50 miles programmed for the day. Do the calculation for yourself, balancing your own preference for overall riding time. Be realistic with your average riding speed and give yourself plenty of stoppage time. Your adventure will be all the better for it! Flow Putting aside landscape and scenery, flow is the single biggest aspect that differentiates a good route from a satisfactory one. A good cycle route should flow from start to finish. It should to take you from valley to mountain, road to rugged track all within the limits of the bike you've chosen to ride. A journey in a beautiful part of the country that doesn't flow could potentially spoil the experience. What does this mean in practice though? In essence, any route that better suits a different type of bike, or a route that flits between extremes of terrain types, is one with poor flow. Cycling the Welsh National Trail, Lon Las Cymru , with a detour over Snowdon might seem appealing on paper but try it with a pannier loaded touring bike and a pair of smooth soled cycling shoes and you may not live to regret the day... Use an 80% - 20% terrain ratio and the Terrain-o-meter below. By biasing a minimum of 80% of the route to suit the type of bike and terrain you're planning the trip around, the remaining 20% (or less) should fall into either of the adjacent boxes. Eg. For a route based around a touring or hybrid bike, ensure that 80% is on general roads and the remaining 20% is either smooth tarmac or easy gravel tracks. Naturally, the ends of the scale are for illustrative purposes and don't necessarily reflect a bike packing trip. However, Alee from Cycling About used an Enduro bike for his bikepacking set-up which perfectly matched the terrain he was riding and is an excellent example of how the scale can be applied for a route. He perhaps could get away with part of his route on a Down Country / X Country bike but a Gravel bike wouldn't be sufficient. Hike-a-bike sections (pushing a bike along the route rather than cycling) and trails with multitudes of gates also have a detrimental effect on the flow of the route. A mile of hike-a-bike could take half an hour. Cycling for the same duration would cover around 5 miles. All in all, the overall average speed and distance the bike type dictates, as suggested in the Ready Reckoner , shouldn't be overly affected by the type of terrain the route covers. The UK's National Cycle Network regularly encompasses sections of semi rugged off-road track along their length, making touring, hybrid or gravel bikes the ideal choice. It's interesting to see that the middle three categories in the terrain-o-meter encompass the majority of bikepacking journeys and perhaps the Gravel / Adventure bike is the "jack-of-all-trades"? I felt that CyclingUK's, West Kernow Way , suffered from poor flow. Billed as an off-road route, around 70% was on roads. Of the remaining off-road sections, an MTB was only just sufficient and a number of stretches involved hike-a-bike along public footpaths. Cornwall is a beautiful part of the world and the trip was a fantastic adventure but the overall route itself was spoiled by poor flow. Digital route planning tools Navigating with a map and compass in the hills is pretty easy but on a bike the GPS is the tool of choice. In order to get a route into a format for use on a GPS, it will need to be built on a digital route planning app which outputs a .gpx file. There are plenty of good tools around, these are just a handful of the most popular. Ride with GPS I've recently switched from Map my Ride over to Ride with GPS. Over the years this tool has got better and better and now offers most of the features needed in a route planning tool. It still has its quirks. It's not UK specific so the terrain feature needs some interpretation and it doesn't fully define which type of paths you are allowed on so you'll still have to check with the OS map as you plan. Map my Ride A really basic but superbly functioning tool. Because of its simplicity it's very quick to build good routes. There's no guidance on path, legitimate access or road type so you'll need the OS map open at the same time as you plot your route. Cycle.travel I've already waxed lyrical about this site, so please use and support it. Unfortunately, as it lacks the backing of the marketing departments of Komoot or Ride with GPS, it doesn't quite have the extras that make for a great all round tool, such as an app based version (although it is in development) and the process of plotting the route is not quite as slick. Ordnance Survey While this is still the definitive route identification resource, it's route planning tool works on an older straight line, waypoint to waypoint format and doesn't follow the curves in the route. Good for hiking but not great for GPS based cycling. (NB: this has just been upgraded and routes now bend to follow the paths as in many other route planning tools. I've had a quick go, but will add some comments here as I use the feature more thoroughly.) These next two are great for recording your trips, analysing data and sharing on social media but I avoid using them for route planning. Komoot This platform works on a place to place route building process, but its base map and supporting route selection programming is poor in my opinion. When you want to modify the route avoiding the private path that it has taken you down, you'll have to add points and bend the route to hold it in place, all the while it's re-routing former unfixed points and taking you down yet more paths with no right of way. That said, it's actually great if you are just looking to plot a simple road route as it can handle this quite well. There are also plenty of good routes on Komoot and I cover this on my how to plan a bikepacking adventure article. Strava The original social media cycling app, which it does supremely well. Just don't bother using it to try and plan a route from scratch, stick with the others at the top of this list. Most of the good route planning tools allow you to create and shape the route as you see fit and offer a plethora of route export options to suit your GPS. Check your GPS model to see which file types work best. A .gpx file is generally the standard, but there are also .fit and .tcx files which may work better with your device. If you're using turn-by-turn directions, make sure you have reviewed the cue sheet before you export the route to ensure the direction instructions match the planned direction of travel. (Image courtesy of Ride with GPS) Route planning tools allow you to see the terrain and distance evolve as you create your route. It's a good idea to keep an eye on these as you select each waypoint to avoid carving out large sections of the route if the terrain or distance don't match your expectations. Image courtesy of cycle.travel. Note the route summary terrain types on the left. At 68% paved paths and just over 1% of busy road, this was brilliant for planning the Red Squirrel Trail route on our kids 2-day cycle trip in 2022. Pulling it all together - four steps to planning a good route In reality these steps are a series of tasks that you'll cover off a number of times, each occasion refining the distance, points of interest, choice of path and so on, until you end up with something you're happy to go and ride. Establish points of interest Establish a realistic distance Get the route down digitally Tweak the route Step 1 - Establish points of interest Begin with at least a fixed start or end point to the journey. After this try and incorporate a number of things to see on the way. Having intermediate points of interest helps to provide a natural break or check points that can be ticked off towards the destination. Mark these on the map to get a general feel for where they are in relation to one another. Factor in getting to the start or finish, can you ride there, catch a train or park your car if you're driving? Try to see if there is a natural route between the points and what type of tracks it uses. How much is on road, are there bridleways or cycle network trails that get you from point to point. Is there a river that can only be crossed at a certain point? Also consider adding in stopping points en-route for things like food and water or lunch / dinner if you're not planning on cooking for yourself. If you're planning on wild camping check to see there is somewhere off the beaten track for a stealthy tarp pitch . Alternatively, is there a cosy B&B in a quiet village that you'd really like to stay at? Step 2 - Establish a realistic distance Having established where to go or what to see, consider how far you can realistically travel in a day or how much time you'd like to be in the saddle. 50 miles a day is a great place to start for an average rider. The route planning tool on Google Maps is really handy for establishing very rough distances from place to place at this stage, just remember to set the mode of transport to "cycle"! Step 3 - Get the route down digitally When you're happy you've included all your points of interest and you're comfortable with your rough distance, start to get the route plotted on a digital route making platform. A digital route plan will facilitate the creation of a .gpx file which can be uploaded to a GPS (and phone for back-up). Currently I create and store my routes on Ride with GPS but I'll also have the Ordnance Survey online mapping app open alongside for double checking road and path types. Tips for creating a good digital route: Place waypoints / control points (picking a point on the map for the route to include) at a significant point. This could be a junction, a feature you want to include or a hazard to be aware of. Some tools will permit added descriptions to the points to help when navigating. It's important to place sufficient waypoints in order to anchor the route along the selected paths. When placing a waypoint try to place it just before or just after a turning. Placing on the turning can sometimes confuse the route. Try to be as accurate as possible when placing a waypoint. When using turn-by-turn guidance on a GPS, a poorly placed waypoint at a junction may create confusing or contradictory directions. Also, pay attention to the direction of traffic on major roads or roads where a cycle lane is adjacent to ensure you stay on the right side of the carriageway. Turn-by-turn directions Turn-by-turn directions add another layer of navigational ease but also added complexity when creating the route. Most apps provide access to a number of navigable lines on the map. These could be Google (default) maps, Google satellite view, Open Cycle Map and so on. These are digital lines under the map image overlay on which you place your waypoint to create the route. In coding terms they are defined as: route=bicycle . Sometimes it's worth toggling between the different maps to get the best route for turn-by-turn directions. For example, you may be confident to cross a junction using the general road layout rather than the surrounding cycle lanes. The digital line for the cycle lane may suggest a number of confusing left and right turns over a very short distance as it takes you over a pedestrian / cycle crossing, whereas you may just want to stay with the traffic and take a single right turn. Judge each of these on an individual basis. Routing off-road sections may not be possible by using the selectable roads or paths. Firstly try toggling between the map types as above to see if it provides you with a selectable option, if this doesn't work you may need to use a 'free-hand' function. These can generally be found within the menu or tool bar options. Remember to place a waypoint as close to the end of the 'selectable' road / path, before switching to freehand mode to avoid any 'undo' corrections re-routing previously uncontrolled path selection. Close the free-hand section as soon as possible by placing a waypoint on a 'selectable' section of the road or path. Elevation During this whole step, it's important to take note of the daily mileage and elevation. The more jagged the elevation profile, the more hilly the route will be and the more time it will take to cover the distance. The West Kernow Way elevation profile - Cornwall is very hilly! (Images courtesy of Ride with GPS) Step 4 - Tweak the route Nine times out of ten, after creating a first pass of a digital route, it'll need a good tweaking. The route may have become particularly twisty and the overall mileage has increased or the elevation profile is so jagged that it might be worth going round some of the hills. Go back through the steps above a number of times to alter the route to make it more achievable. Consider elevation in the previous section to add time for ascent accordingly. Check for flow to make sure the bike you're planning to use won't leave you frustrated for half the journey. If you're really looking to refine the route as best as possible from behind a desk, try the Satellite View and Street View functions on Google Maps to look at parts of the route that might be unclear. Even with an off-road route, you can normally stand your blue person at the start and end of a bridleway to see what it looks like, giving you a pretty good idea of the overall trail. Sometimes 360 degree images can be found at points down the trail as well. Some platforms can also provide a .kml file, which can be imported into Google Earth for a fly-through of the entire route! Ordnance Survey allows this feature straight from the route view tool bar. When you're happy with the route, download a .gpx file ready for use on your GPS / Phone. Realistic expectations It’s far more pleasant to travel at an easy pace than be chasing your tail the whole way, arriving after dark and missing your pre-booked meal (all said from bitter experience!). The weather is a big factor in the UK and can make even the shortest distances arduous. Lower your distance expectations and don’t be too over ambitious. I know I've mentioned bike weight before but don't underestimate the weight of the extra kit you will be carrying. In general my raw bike weigh is around 10kg. When loaded for a bikepacking trip it will double when kit and water is added. This makes the handling very different and achievable daily distances much shorter. If you’re new to this, a short route fairly close to home just to get used to being in the saddle for more than a couple of hours, is a perfect start. If it all goes wrong, you don’t have too far to limp home. Final thoughts... On my last few trips I've taken a paper map. Navigating by GPS is excellent for cycling but sometimes the small screen doesn't really give you a sense of place. Occasionally referring to a large area map is not only great for seeing where you are relative to your surroundings, it's also good for showing others the route if you're in a group and the only one with the GPS. Again, on my more recent trips, I've stored a handful of en-route cycle shops onto my GPS across each of the days and twice we've had to use them! One for a snapped rear derailleur and the other for a loose cassette. If, having read this far, creating a new route still seems too daunting then just stick with tried and tested, well documented cycle routes. The main thing is to just get out and have fun! Happy adventuring!
- How to plan a bikepacking adventure
There’s a great sense of anticipation and excitement in planning a bikepacking adventure. Each element of the planning has its own little pleasures. Perhaps it's the satisfaction of creating a perfect route stopping by all your bucket list places, or maybe it's the thought of an evening meal in a cosy pub just round the corner from your campsite. What ever it is, there's nothing that quite beats planning your very own adventure. Contrary to Enid Blyton's Famous Five, "falling into adventure" doesn’t really happen. It takes a little bit of planning and some prior preparation, but it’s easy enough to do, and pretty much guarantees an epic and memorable time away. In this article I've described how I go about planning and executing a cycling adventure in the UK. The basics When to go I find the best months for really enjoying a cycle adventure are April to October. The weather is generally better which certainly alleviates the requirement for more expensive specialist winter riding gear, the days are longer and there's generally more accommodation available. Where to go Rolling hills, coastal routes overlooking the sea, quiet country back roads, national parks, old cities, you can pretty much cycle the whole of the UK. Personally, I avoid anything too mountainous, leaving that for walking and scrambling adventures, and stick to routes I know I can get up and down with a bike loaded with equipment. Who to go with I’ve travelled solo and with groups of friends. No party size is better than the other, it’s just a different riding dynamic. If this is going to be your first trip then I would suggest going with at least one other person. It’s handy for sharing gear, having a friend to talk to and if you get into trouble, having two brains to figure out a problem is better than struggling on your own. How long to go for Again, if this is your first time then how about a short ride and an overnight at a B&B? If you like it then go for a longer trip or try camping. People have cycled around the world so there really isn’t any maximum duration. If you can cycle for a week then you can probably cycle for a month. If you are planning a longer trip then do remember to plan for rest days. Your legs will thank you for them! What to take You'll need a bike and for it to be in good working order. Gravel, Hybrid or Mountain Bike's are all great choices. Don't underestimate how much slower a fully loaded bike is when covering distances, so do consider comfort over speed. On the same theme, cycle clothing should be comfortable, practical and with a degree of weather resistance. I mix cycle clothing and mountaineering equipment to get the right balance. Keep it simple and use what you already have, or can borrow, before considering buying equipment. How to plan a successful bikepacking adventure These are my six tried and tested steps for planning a bikepacking trip. Establish a goal Plan a route Book accommodation Plan a menu Select kit and equipment Double check the itinerary Establish a goal Having a goal gives an adventure a sense of purpose. It doesn’t need to be anything life changing or dramatic, it may be to get away and de-stress, or perhaps there’s a new cycle trail that you want to explore or a cliff top campsite overlooking the sea that would make a great Instagram photo. Whatever it may be, I feel having a goal in mind helps shape the route and influences where to stay. Josh at Keep Smiling Adventures bikepacked 200 miles just to get himself a traditional Cornish Pasty! Planning a route If this is your first trip, I would strongly recommend following a tried and tested route. There are oodles of fantastic resources that offer great ideas for routes. The selection below are by no means exhaustive, but I've found they're are a great place to start. Walk Wheel Cycle Trust The UK charity Walk Wheel Cycle (formerly Sustrans), manages a network of approximately 15,000 miles (21,000km) of signed cycle routes. The criteria for a National Cycle route is that 50% of the miles should be away from a road and all sections should be suitable for an unsupervised 12 year old to ride on. These cycle trails can form the basis of a really great adventure. Routes like Lon Las Cymru (NCN 8), Lon Cambria (NCN 81), The South Coast route ( NCN 2 ) and my recent adventure along NCN 4 & 5 are all cracking routes and so easy to follow. As well as offering access to the National Cycle Network and some great information about using the trails, Walk Wheel Cycle also have a 'Find a route' function on their website allowing you to select a location, ideal distance/length of ride, and route type. For the latter you can select: "all road", "traffic free" or anywhere in between. The routes are printable but they also offer digital and paper cycle route maps, plus a whole host of other useful cycling information. Cycling UK Formerly the Cyclist Tourist Club (CTC), Cycling UK has set about reinvigorating UK touring and bikepacking by releasing a steady stream of new routes, such as the King Alfred's Way , the West Kernow Way and the Cantii Way . These are great routes with an accompanying guide book explaining the route, typical stop over points and the history behind the local area. Cycle.travel In my opinion cycle.travel is one of the best route resources, and certainly the most intuitive route planning software on the internet. Created by Richard Fairhurst, a Cartographer, Sustrans volunteer and an early pioneer of Open Street Map, cycle.travel has a huge selection of route guides which include detailed descriptions, overnight stops, suggested leg distances and so on. Travel guides, books, magazines, web articles, social media These offer a plethora of inspiration, normally accompanied by stunning photos and evocative descriptions. This is probably where I get the first seeds of a cycle adventure before looking into some of the more dedicated cycle resources above. These are just a few of my favourites: Pannier.cc a cool and funky UK site dedicated to the art of Bikepacking. Just looking at the photos, will have you strapping on your bike bags and heading off for an adventure. Bikepacking.com An American website, YouTube channel and glossy publication. Heaps of useful information and plenty of UK route inspiration as well. Keep Smiling Adventures A YouTube channel featuring the ever happy Josh Parsons, a long distance cyclist who appears to be on a mission to ride all the UK bikepacking routes (along with creating his own). Inspiring bike rides Down to earth people who just enjoy cycle touring without the accompanying marketing hype. It was this site that got me back into into multi-day cycling. (The link is to their Instagram page as the website appears to be down...) Navigating by map and compass in the hills is pretty easy but on a bike I'd go for a GPS (Global Positioning System). In order to use a GPS, you'll need a .gpx file of the route, Most of the resources listed above provide the ability to download a .gpx file and they'll be reliable and thoroughly tested. If you don't have a GPS you can use your smart phone. Just watch your battery as these apps will drain power very quickly. Plan to take a portable battery pack with you if this is your only navigational device. Other sources for routes The sites below are household names within the cycling community and are used by millions of cyclists for route planning. They hold a plethora of readily available routes from half hour local rides to full blown multi-day adventures. The routes are available for download or alternately, by installing the relevant app, can be used straight from your phone. Ride with GPS Komoot Strava Map my Ride However, I'd steer clear of these platforms if it's your first trip. Not all the contributors are as thorough when it comes to creating routes for navigational suitability or access rights. Their 'easy' level of ride might be 'difficult' to you or they may enjoy facing the wrath of irate walkers by cycling down a Foot Path, not what you want for your first Bikepacking adventure! If you are going to use these resources, look for star rated contributors such as Katherine Moore on Komoot or any of the Brand Ambassadors on Ride with GPS. And when you've ridden everyone else's routes, how about having a go at creating your own route ? Booking accommodation Booking accommodation is pretty easy these days and with such a vast amount of places to stay, it really isn't that difficult finding something suitable. These are probably the top types of accommodation available to cyclists. Campsites Bothies (Originally Scottish camping barn but there are now a number in England and Wales) Wild camp spots (Legal in Scotland and parts of Dartmoor only) Youth Hostels (YHA). Although membership is not needed in order to stay at their hostels, you do get a discount on accommodation and your membership fee goes into supporting this amazing network of facilities. B&B’s Hotels - Premier Inn, Travelodge etc. Warm Showers This is a growing community of touring cyclists providing reciprocal hospitality for cyclists and hosts. I haven't used the network but it gets great reviews. Distance and budget are all influences on my choice of accommodation. Two or three nights wild camping is perfectly doable but there comes a point when you really need a decent shower or to sort out your washing. I tend to mix up the accommodation with perhaps a few days camping then a B&B and a pub meal. It’s also nice to sometimes treat yourself to either of these for the last night of a long trip! I find it easy to find and book accommodation on the internet, although I still like to try and book in person if at all possible, especially if you want to find out if they have secure storage for a muddy bike. I organised a Brighton to London charity cycle ride in 2014 for a large group, and I rang to book the Brighton Premier Inn for our overnight stay before we set off. They happily accommodated us and all of our 25 bikes without question! Communication is key and a friendly note or request via a personal email or telephone call goes a long way. For wild camping trips where the luxury of a shower has been absent for a few days, why not try a spot of wild swimming? If that’s not your thing then how about stopping at a leisure centre and using their facilities for a small charge. Check in with your accommodation on the morning of your planned arrival Unless your wild camping, I find it a good idea to give my planned overnight destination a quick courtesy call to advise them of my approximate time of arrival. It’s not uncommon for people to book accommodation and fail to turn up. The last thing I want is for a campsite to close its check in if I’m running late on the presumption that I’m one of those people who have failed to turn up. I find this particularly important if I haven’t had the opportunity to book in person and it’s only been an automated web-booking system. It’s also comforting to know that someone is looking out for you when you finally arrive bedraggled and tired after a long day in the saddle. Many years ago, my wife and I enjoyed a two day walk in the Lake District. On the second day we got absolutely drenched and arrived late at our camp site. I’d called the owners to advise of our slightly delayed arrival time and when we finally reached our campsite we were greeted with warm towels and a piping hot cup of tea! Travel arrangements Whilst I’m securing my accommodation, I’ll also check my travel arrangements at the same time. If I’m driving to a start point, I’ll want to make sure I can park my car securely and if I’m travelling by train I’ll check the train operators cycle policy. Many train operators require you to book your bike on the day to avoid too many bikes on any one train. There may also be a supplementary fee to pay. Wild Camping Wild camping is not permitted anywhere other than Scotland and parts of Dartmoor. If you do wish to camp somewhere other than a public campsite then always seek the landowner’s permission before hand. That said, there are a plenty of guidelines on how to wild camp anywhere if you choose. Being discrete and respectful, setting up after dusk and departing at dawn and leaving no trace have always put me in good stead whenever I've wild camped. Planning what to eat If your goal is to travel well off the beaten track, then carrying your own stove, water and food is the best option. Conversely if you’re planning more of a lightweight trip, or an adventure that will take you through pretty villages or bustling towns, then utilising food stops on the way will be more practical. Evening meals If you're staying in a hostel, B&B, or hotel etc. then I'd definitely take advantage of whatever they’re offering on the menu. Camping is slightly more involved but again not too much of a challenge. A cheap and easy option is to cook up some pasta/rice/noodles and combine with a sauce, veg or meat. If you're happy to spend a bit more money and feel space and weight isn’t an issue then the 'boil in the bag' type foods such as Wayfayrer meals , are delicious, pre-cooked food. They simply require heating in their sealed pouch in boiling water for a few minutes or at a pinch they’re even safe to be eaten cold. They weigh more compared to dehydrated meals as they already contain the necessary liquid, so if you’re looking for something lighter, particularly if you’re carrying food for 3 or 4 days then I’ve found Adventure Food to be a great alternate. Just remember to have enough fresh water to boil your meal at the end of the day. Lunch This is an easy meal and can either be a packed lunch or purchased en-route, (first ensuring I planned the route through a town or village…) More often than not, lunch consists of whatever I can find on the way. Which could be this... Or better still, this... Breakfast Not a problem if you are staying in a B&B or hostel. If I’m wild camping then I’ll get up with the sunrise, pack up my kit and cook up or buy breakfast away from my camping area some time later. If I’m on a campsite then I prefer something simple. Museli with powdered milk and perhaps a cup of tea or coffee will still allow me to get on my way quickly without worrying about cleaning my pots and pans or waiting for my stove to cool down. Or similarly, I'll eat something small like a trail bar then stop for a decent breakfast where there’s a bit more civilisation a little later. Wayfayrer and Adventure Foods both have a number of meals in their breakfast range. Water I always carry 2 x one litre bottles of water on my bike. It’s important to stay hydrated so I’ll probably drink this throughout the day. If I’m at a campsite for the evening then there’s normally a ready supply of water for cooking, washing up and refilling for the next days journey. I need to be more careful when wild camping however, so I might take slightly more water or refill my bottles for a second time on the same day. There’s a really handy UK wide free water bottle filling service that’s been set up over the last few years. Download the app and it will show you the nearest place to refill your water bottle for free! If you're really looking to stay off the beaten track then you might want to consider collecting and purifying your own water on the way. Typically you'll be looking either to add a bacteria killing chemical in the form of a liquid or tablet or strain the water through a filter. There are plenty of good instructional articles or vlogs explaining how this is done, so do some research and find the best solution to suit your trip. Food quantity There’s heaps of information readily available on the internet regarding what and how to eat when you’re exercising. However for completeness I’ll add a few pointers which hopefully will assist. I typically burn twice as many calories in a day cycling than a normal (inactive) day, therefore I need to consume more to keep my energy levels up. I always build up my carbohydrate reserves a day or so before I set off on my adventure. I find it better to graze throughout the day in between meals to keep energy levels up rather than overeating breakfast, lunch and dinner. Trail mix – nuts, dried fruit, seeds etc. is a great grazing food. I sometimes add chocolate chips and jelly babies for a treat. I regularly use products from the Science in Sport (SIS) range to help me top up my energy levels without having to consume more meals. Stoves and eating equipment In terms of stoves, there are so many types and brands on the market that suggesting one becomes very much opinionated. Therefore, I’ll simply offer a few pointers and guidelines: In the real world I’ve found that there is no difference to the time you eat when heating food via a Trangia taking ten minutes to boil a litre of water verses a Jetboil taking three minutes. It’s more about when I start to cook my food relative to what I’m doing at the time. I ensure I have a stove which has a fuel source readily available in the country I am travelling. (Be aware of the restrictions on stoves and fuel canisters when flying.) A windshield and a lid help preserve fuel and speed up cooking. Remember to pack something to light the stove with! In terms of cutlery / crockery, I tend to only carry a spoon, a mug and a single small pot. Kit and Equipment It goes without saying that you'll need a certain level of equipment in order to go on a cycle adventure – a bike being the obvious one. However after reading this blog, please don’t rush out and spend thousands of pounds on all the latest equipment thinking it’s going to facilitate an epic adventure as it probably won’t! You'll need a bike and for it to be in good working order. Gravel, Touring, Hybrid or Mountain Bike's are all great choices as they can tackle the type of terrain you're likely to cross in the UK. They also tend to have the type of fitment points for bags or panniers required when attempting longer rides. Road bikes are great but don't have the tyres or gearing needed for tackling most routes, including even parts of the National Cycle Network. Also don't underestimate how much slower a fully loaded bike is when covering distances, so do adjust your daily mileage expectations accordingly. Borrow equipment or use what you already have first and see how you get on. You can have just as good an adventure on a well maintained budget bike as you can on one costing five times as much. When you know what you like then spend as much as you can afford that suits your personal taste. With that in mind, the list below is pretty much what you’ll need but kept in very generic terms: A bicycle. In good working order and suitable for the terrain, ideally with a minimum of a 35mm wide tyre with a degree of grip. Go for as lower gears as you can get. You'll normally find that an older, 3x chain ring set up has a better gear selection than more modern 2x or 1x systems. Kit bag. A rucksack would work for a short trip staying at a Youth Hostel, B&B or hotel. Anything longer and you'll probably want to get the weight of your kit onto your bike. Consider bike-packing bags or panniers. Cycling clothes. Something to cycle in, different from your spare clothes: Helmet, shoes, socks, underwear, t-shirt, shorts, fleece or jumper and a waterproof / showerproof jacket. I also take cycling gloves, cycling glasses and padded cycling shorts. Avoid anything that may chafe or restrict your movement. Spare clothes. A second set of clothes that you can wear in the evening or if your cycling clothes get wet or damaged. Depending on the length of trip I may take a spare pair of shoes or flip-flops. Wash kit and towel. Toothbrush and toothpaste as a minimum, hand sanitiser gel is handy, deodorant if you're planning on staying close to your friends! I always take a small pack-towel. The rest is up to you. First aid or medication items. A handful of plasters and some painkillers are helpful. Also consider other items such as insect repellent or tweezers. Take sun cream as arms, knees and the back of your neck all get maximum exposure when sitting on a bike for long periods. Food. Snacks as a minimum, more if you’re not planning on buying on the way. Water. At least a couple of litres of water in some kind of bike mounted water bottles should be considered a minimum. Water bladders are great but are a little less practical, particularly when you’re asking a pub landlord to fill up your water bottle. Mobile phone. Obvious uses but can also be used to hold a digital copy of your route. Paper map and / or GPS. With the route clearly marked or downloaded electronically. You may choose to carry a paper map and use your phone to navigate. Just watch for battery life. Portable power bank / battery, charger and cables. For charging your electronic devices on the move and at the end of the day. Bike lock and bike lights. Failing to secure your bike could bring the trip to an abrupt end! And always take lights just in case you end up riding after dark. Bike tools and spares. A basic set of tools to maintain the bike, spare inner tube, puncture repair kit, chain lubrication, cable ties etc. I also find it really handy to carry a Leatherman / Swiss Army type multitool and a disposable glove. In addition to this, you'll also need the following items if you're camping. Cycle bags (and cycle rack). Dedicated bike bags such as panniers or bike-packing bags are better for larger / heavier loads. Your local bike shop will be able to advise what rack will fit your bike. The internet provides a great source of knowledge and opinion on the pros and cons of all types of bike bags. My advice would be to minimise the amount of kit you carry in the first place then look to balance the load across a number of bags at the front and back of the bike to maintain safe handling. Tent or shelter. Travelling with at least one other person is great when it comes to tents. Generally, a two person tent split between two people is lighter than a one person tent carried individually. Again, the internet is great for thoughts and opinions. You don’t have to spend much here at all. I used a £40 one-person tent for a 5 day cycle tour in early Spring, sleeping in campsites, and it was perfectly adequate. Sleeping bag and sleeping mat. It’s necessary to take a sleeping bag and inflatable mattress /sleeping mat if you want any degree of comfort when camping. Also consider an inflatable pillow. The time of year will influence your sleeping bag's “season rating” – summer being the lightest / thinnest bags, winter being the thickest. Down filling is great as it packs down small and it’s warmth to weight ratio is superior to synthetic fillings. However, it’s more expensive and doesn’t perform well if it gets wet. Cooking and eating equipment. A stove, fuel, a pot and a spoon is really all you need. Check your food / cooking requirements against the equipment you’re taking. Don't forget some thing to light your stove with. Food. If you’re planning to cook your own breakfast and an evening meal then don’t forget to pack these as well. There’s more detailed information in the “Eating” section of this blog. Collapsible seat / sit mat. It's only when you start cooking or want to relax that you realise a noticeable lack of seating on campsites. I take a small collapsible seat on practically every adventure, whether that’s cycling, walking or canoeing. Highly recommended. Head torch. Great for camping and far easier than trying to use your bike lights. These are a couple of other items I carry if I’m a little more off the beaten track: Wet wipes / baby wipes. Excellent for a quick freshen up if you’re nowhere near a shower for a few days. Rubbish bag. Something to contain my rubbish until I can dispose of it safely. Top tip! Put all your kit into plastic (waterproof) bags to avoid your equipment getting wet if it rains. Where should I spend my money to give me the biggest value? For me versatility is the key. An item that can double up to do more than one task removes the need to carry two separate items. Also reducing bulky or heavy kit is a good place to spend money. Equipment that makes the ride more comfortable is also worth while for obvious reasons. If you don’t maintain your bike yourself then perhaps take it for a service at your local bike shop. A functioning bike with good brakes and gears that work well , doesn’t cost much and makes a huge difference to your adventure. Equally I would thoroughly recommend getting a good quality saddle that fits . There’s plenty of great advice on the internet on types of saddles and saddle sizing. You could consider upgrading your tyres if they’re looking a little worn and fitting puncture proof innertubes save time and frustration from annoying punctures. A helmet is a must for obvious reasons but padded cycle shorts and gloves can avoid sores and blisters if your prone to them and a pair of glasses can avoid the all too frequent “fly in the eye”. If you're camping then this is where I would also spend my money: A good night’s sleep gives you the energy to get back into the saddle the next day. Spend your money on a good quality sleeping bag and inflatable mattress . Insulation from the ground is important as not only will it keep you warm, it will cushion you from the hard and invariably lumpy camping ground. As these items are being improved year after year, search for the latest internet reviews to see what the best products are to suit your budget. Buying wisely on these two items alone can double your comfort and halve the physical space taken up in your bike bags. The sleeping bag and inflatable mattress on the right are significantly smaller, lighter, warmer and more comfortable than the larger items on the left. Food is covered in the previous section but if you don’t have, or can’t get access to a stove, why not consider self-heating meals. They’re delicious, pre-cooked food that rely on a chemical reaction sachet in a heating pouch to heat them up without the use of a cooker or any of the associated cleaning up afterwards. I frequently use these for overnight mini adventures. Consider replacing your standard towel with a microfibre version. You can pick one up in most good camping stores for a few pounds, significantly reducing the size and weight of a traditional towel. A thought on bikepacking clothing Wearing a set of lycra cycle clothing on a bike is comfortable and functional, after all that’s what it’s been designed for. However when I’m cycle touring, I go for a more casual look. I still wear my padded cycle shorts but perhaps a pair of walking shorts over the top and a short sleeve shirt over a wool t-shirt. Wool is great as it doesn’t retain body odour and can still look like an item of casual clothing. Muted colours work well as they tend to hide the trail dust (or mud!) and I carry a cap which I can quickly put on covering my “hat hair”. This is a good idea if I decide to stop in a public place, perhaps for a pub lunch, and is better than sitting in pongy lycra accentuating parts of my anatomy! Double check the itinerary A couple of days before hand I’ll double check my adventure itinerary. This will include telephoning or an email to all my pre-booked locations to ensure they are still expecting me when planned. Bookings can get lost, a location has closed down or a train / bus timetable changed. Checking your itinerary a few days before hand gives you the time to re-arrange your plans to suit and still have a great adventure. I'll have the whole route programmed into my GPS and use this for navigation and I also carry the route on my mobile phone. I also find it handy to pre-programme my accommodation telephone numbers into my phone for easy access. A few final tips Please don’t spend a huge amount of money on kit and equipment if this is your first adventure. Borrow what you need and see what works best for you first. When it is time to buy something then go for the item that gives you the most overall value. Go out for a few longer rides on your bike before your main trip to get used to being in the saddle for greater periods of time. Learn how to fix a puncture and carry out basic bicycle maintenance before you go. Learning how to fix a damaged part in the pouring rain next to a busy road is not fun! YouTube has a huge amount of really useful “How to” videos on this kind of stuff. Check over your bike before you set off each day. Check brakes, tyre pressures and lubricate your chain as a minimum. Take advantage of the small moments whilst you're on the go, perhaps dry your tent during your lunch or strap a portable solar charger to your bike bags to charge your batteries whilst you’re riding. If there’s more than one of you on your trip, think about sharing equipment where possible and avoid duplication. Carry a paper or electronic copy of your itinerary with you and leave a copy with a friend or partner safe in the comfort that they have a rough idea where you're staying at any time during your adventure. So that’s it really, now it's just a case of picking which routes you want to tackle. You can read all about the trips I've done here , which also includes the full route details, overnight accommodation, where to eat and what to take. If you're still struggling to decide where to go then I'd highly recommend the Cantii Way as a first time trip. It's easy riding on great cycle paths, relatively flat with oodles of places for over night stays and eating along the way. What ever route you choose take, if you follow the advice here you’re sure to have a great adventure. Don’t get hung up on the details of which stove is the best or whether you've got the right bike shoes, just get out and enjoy the adventure and learn from the experience. Happy Adventuring!
- Traws Eryri
Cycling UK's, 120 mile Traws Eryri route had been everything I’d hoped for—wild, challenging, beautiful—and, at times, downright hard. A brilliant, tough route — the kind of ride that stays with you long after the legs stop aching. Click here if you want to navigate straight to the section on How I cycled Traws Eryri . Day 1 - Machynlleth to Penmaenpool There were three of us on this trip, each with our own mission. I was setting out to ride the full 120 miles of Cycling UK’s Traws Eryri route, James, my son, was taking on sections of the Snowdonia Way on foot, and my wife Louise was our ever-reliable logistics mastermind—choosing, wisely, to spend her nights in cosy rooms with crisp sheets rather than share our well-worn two-person tent. By the time we’d completed the long drive that morning, the sun was already well into its arc. It was past midday when I finally rolled out of Machynlleth, easing into the gradual climb north towards Corris. It was good to see the Millennium Bridge and extensive road works finally complete, formerly a scene of construction during my last trip cycling NCN 8 Lon Las Cymru. The route shadowed the gentle Afon Dulas, the water flashing silver between alder and willow as it picked its way over the shallow rocks. I passed the Dyfi Bike Park, the quietly intriguing Centre for Alternative Technology, and scattering of hamlets that felt as if they’d grown out of the hills themselves. Corris came and went in a blur of slate and stone, followed—rather unexpectedly—by the deafening roar of two F-35 Lightning fighter jets carving the sky, their shadows chasing each other down the valley. Soon after, I swung left, leaving the shelter of the trees to join the winding A487. Cresting a rise, the scene suddenly widened: Llyn Myngul lay shimmering below, cradled in the vast shadow of Cadair Idris, as if the mountain itself was standing guard. The descent to the lakeshore was a gift to tired legs, the trail hugging the water in a ribbon of smooth, easy riding. which continued for a while as I turned away from the lake heading west. I passed beneath the looming presence of Craig yr Aderyn - Bird Rock - its sheer, almost Jurassic looking crag, rising abruptly from the valley floor, home to nesting cormorants and swirling flocks of choughs. Beyond Abergynolwyn the gradient turned against me, and the climb into the high ground began. Here, the land shifted. Now wild and open with pot holed gravel tracks, shattered pine forests and disused heavy plant, it led me deep into the southeastern flanks of the Cadair. Two off-road motorcyclists, dripping with spray from puddles the size of bathtubs, roared past with a wave, leaving me to weave a careful line through the bracken where the ground offered some semblance of dryness. Then the forest began to thin, and the air smelt faintly of salt. Barmouth appeared in the distance, the sea flashing between the trees, before the track tipped down into the valley in a sweeping, glorious descent. By late afternoon the sky was sliding into gold. I joined the Mawddach Trail , a wide gravel path tracing the estuary’s edge, where the still water mirrored the clouds and the world felt unhurried. Graig Wen campsite was just ahead, perfectly placed with bike-friendly access straight from the trail. Tent pitched, kit stowed, I found James and Louise again, and together we wandered to the George III in Penmaenpool. A pint of Unicorn, a plate of hot food, and the glow of a day well-spent made the evening feel like the perfect prelude to the days ahead. Day 2 - Penmaenpool to Trawsfynydd The morning in Penmaenpool started cool, the air damp with the scent of the estuary, but the clouds were lifting and the warmth was already building—an unspoken promise of a hot day to come. I rolled away from the campsite and, before reaching the bridge, passed a pair of weathered old railway signals standing like sentinels from another age, relics of the Mawddach line. Then came the creak of the Grade II–listed wooden boards beneath my tyres, fifty pence lighter after dropping a coin into the honesty box for the toll. On the far side, the first climb of the day announced itself without ceremony—sea level to 350 metres in just over four miles. The gradient bit early, the route a shifting patchwork of tarmac and gravel, following the Afon Cwm-Mynach upstream into a hushed world of mossy banks and tall, dappled woodland. I found myself quietly grateful for the decision to fit extra-low gearing to the bike before the trip - a 46t rear cassette instead of the usual 11-40t. Without it, the slow grind up these early slopes would have been a far tougher test; in much the same way I struggled on the South Downs Way . Around Llyn Cwm Mynach, that prehistoric feel returned—the kind that makes you wonder how little this place has changed in a thousand years. Ferns unfurled between mossy boulders, purple heather spilled across the slopes, and tall foxgloves stood like sentries at the forest edge. The dark pines closed in, and for a while, the outside world felt very far away. Yet even here, hints of human history whispered through the landscape—the remains of old mine workings hidden just out of sight, silent echoes of the slate industry that shaped these hills for centuries. Beyond the lake, the trees thinned and the land rolled away in all directions, the climb at last surrendering. The descent on the other side was a mixed blessing—a loose, rocky surface that flattened out but demanded just as much focus as a steep drop. Every moment required careful balance between feathering the brakes and steadying the twitching front wheel down the loose stones, turning what should have been a relief into a test of nerve and skill. As unjust reward for the mornings efforts, Coed y Brenin MTB park's café shutters were firmly closed. I'd read about its uncertainty as an ongoing operation, but given the trails and bike shop are still open, I foolishly thought the cafe would be too. Lunch therefore became an impromptu picnic: the last of my trail mix, a handful of Jelly Babies, and a solitary Cliff Bar rescued from my bag. Hardly gourmet, but enough to quiet the appetite. Then came the second great climb of the day, and with it, history. Sarn Helen—an old Roman road running from Conwy to Carmarthen—pulled me northward. Its ancient line rose steadily through a changing palette: rowan trees heavy with blood-red berries, ferns arching like the ribs of some long-forgotten beast, and swathes of pink heather edging the orderly ranks of plantation pines. Higher still, the trees loosened their grip on the land and the ride took on a wilder, more open character. Here, the wind carried a different tone, sweeping over the hills as the narrow single-track road wound onward. And then, as so often in Snowdonia, the reward came in one slow, deliberate reveal: the long blue stretch of Trawsfynydd lake below, the town clustered at its edge, and on the far shore the unmistakable silhouette of the old nuclear power station—its concrete mass silent, almost contemplative against the water. Meeting up with James again, Cae Adda campsite welcomed us with a touch of unexpected luxury: a warm campers’ room with kettle, fridge, and microwave, all within earshot of gentle waves lapping the shoreline. Though today’s ride was relatively short, the two tough climbs felt heavier with the weight of a fully loaded bike—each pedal stroke a reminder that effort multiplies when carrying all you need. It was, in fact, a steady build-up, a quiet promise that tomorrow would demand twice the distance and climb twice as high. Day 3- Trawsfynydd to Betws-y-coed The first half of the day took me into the Ffestiniog mountains—a place I hadn’t been since early childhood. Back then, it was with my family on a wet, windswept afternoon, huddled in our Peter Storm cagoules, getting the full brunt of the Welsh weather. This time, I was back as part of the longest day on my Traws Eryri ride: 40 miles and around 1,400 metres of climbing. The day began with a loop around Llyn Trawsfynydd, where green ferns, gnarled trees, and moss-covered rocks framed the glassy black - onyx looking - water, set in stark contrast to the looming, dystopian silhouette of the old nuclear power station. After crossing the A470, the scenery shifted, and the ride doubled in effort. Steep, energy sapping, grassy hike-a-bike sections cut through sheep-filled fields. A short drop back onto the A470 offered a moment’s relief, before the landscape opened up again into wilder terrain. A single ribbon of tarmac carried me upwards into Ffestiniog proper, towards the junction at Ffynnon Eidda, with sweeping views all around. The descent alongside Cwm Hafodyredwydd felt more like somewhere in the French Alps— switchbacks and long fast lines. I hit 30 mph and with the weight of the loaded bike, managed to boil the hydraulic fluid in my front brake! (And that wouldn’t be the last time). Next came the second half of the route—two twisting legs weaving through managed forests on wide gravel tracks, each crowned with its now obligatory, soul-testing climb. The first weaving leg was a welcome respite—a peaceful, almost remote ride through quiet woods, where I paused for a simple lunch of oatcakes and Primula cheese, perched on a log with the valley stretching away beneath me. Along the way, a group of riders on scrambling bikes struggled up the ridiculously steep path I was also pushing my bike up. They all tumbled off, save for one (no harm done), proving that sometimes two unpowered wheels hold the upper hand. Crossing the charming bridge and passing the pretty waterfalls at Tan-aeldroch, I plunged onto the Sarn Helen road again for the second weaving leg. The terrain was tougher here, the climbs longer, and with the weight of my fully loaded bike wearing down my weary legs, the challenge deepened. But I pushed on through the remote mountain forest, circling the tranquil Llyn Elsi before descending into the postcard-perfect town of Betws-y-Coed. Knowing a warm welcome—and a well-earned burger—awaited at the Royal Oak later, I pressed on, climbing the old A5 north of the river, before finally meeting James and Louise at Dolgam campsite. That evening, while the burger hit the spot, it was the two pints of local ale that truly felt like a well-deserved reward for a day of hard-won adventure. Day 4 - Betws-y-coed to Conwy I'd enjoyed three days of near-perfect riding conditions—warm temperatures, a light breeze (even if it was mostly a headwind), and dry ground under the tyres. So it felt almost inevitable when we woke to the unmistakable sound of rain drumming on the tent fabric this morning. With my waterproofs going on and off in the first half hour, I pushed on towards Capel Curig and Plas y Brenin, the National Outdoor Centre—straight into a scene alive with runners and cyclists tackling a variety of local triathlons and duathlons. As the runners streamed past, I wound my way slowly along the Ogwen Valley, following the Snowdonia Slate Trail. My tyres skittered on wet rock and sank into boggy hollows, a 20 mph headwind funnelling straight into my face. However, even with my head bowed against the rain and low cloud, the jagged outlines of Tryfan, the Glyders, and the Carneddau loomed familiar—mountains I’d climbed and camped on in years past. I’d been looking forward to this stretch as I’d only ever explored this area on foot or rope before, and it didn’t disappoint. First though, a much-needed tea and flapjack at the Ogwen café, sheltering from the tail end of the rain. Then came the joy of the old A5, its thin ribbon of tarmac carrying me swiftly down the stunning Nant Ffrancon valley. The road gave way to track again, skirting the eastern flank of the Penrhyn quarries—a literal mountain of shattered slate—before spitting me out north of Bethesda. While navigating around Moel Wnion on the North Wales Path I met a fellow Traws Eryrion (a term I’d just coined on the spot). We agreed on two points: that Day 3 was tough, and that the whole route would be kinder without luggage on the bike. My brief riding partner peeled off to follow the A55 direct into Conwy, while I stuck to the guidebook route, climbing into the hills above Penmaenmawr. It was a stiff push, especially on day-four legs, but that near-the-end-of-the-route sense of achievement injecting a final boost of adrenaline to propel me on. With the clouds now lifted, the coast spread out below - framed by bursts of yellow gorse and patches of pink heather. I skirted the infamous Traws Eryri "boggy bit" then it was one last brake-boiling descent from the top of the Sychnant Pass, and moments later I was rolling along the Conwy seafront. A quick photo with the castle, a nod to the finish, and then on to collect James from his own epic adventure. Soft beds and home comforts awaited, but the Traws Eryri had left its mark—a brilliant route, and a tough one. How I cycled Traws Eryri Route 121 miles (200km) | 3,700m ascent | 16 climbs | max grade 13.4% The route is just over 120 miles (200km) long and features a leg sapping *3,700m (12,000ft) of climbing. I split the route into 4 days as suggested in the Cycling UK guidebook, and carried full camping kit. The route shares sections of the brilliant NCN 8 Lon Las Cymru, NCN 82 (the Lon Las Cymru off-road alternate) and Euro Velo 2 . For much of the route you'll find yourself in the mountains and in remote places without phone coverage. Pack suitable clothing, be prepared for wild weather and carry additional means of navigation. I also carried a paper map plus the route downloaded on OS maps on my phone. I've added some thoughts later on in this section regarding the amount of days to split the route over. You can skip straight to that here , although its probably worth reading on to understand the context behind the suggestions. *Figure as taken from Ride with GPS route planning software. Ordnance Survey mapping suggests the total ascent is nearer 4,380m of climbing, which is closer to Cycling UK's figures.. Clicking on the map (title) above takes you to the Ride with GPS route I used for this adventure. It's a very slightly modified version of Cycling UK's route, including the removal of the walk down the steep steps at Nant-y-Pandy and some corrections to minor blips in the original routing. The boggy area where the path crosses the stream at Ty’n-y-ffrith, just outside Conwy, has been left in, however the route cues detail the avoidable paths. Please feel free to download and modify to suit. Alternatively you can download the original Cycling UK route here Audax Card Day 1 - Machynlleth to Penmaenpool. 29 miles (47km) | 850m ascent | max grade 12.5% Machynlleth, Corris (6), Llyn Mwyngil (10), *Abergynolwyn (13), Craig Yr Aderyn / Bird Rock (15.5), Peniarth (18), Llyn Cregennen (25),Arthog / Mawddach Trail (27.5), Graig Wen Campsite (29). Day 2 - Penmaenpool to Trawsfynydd. 22 miles (35.5km) | 700m ascent | max grade 13% Graig Wen Campsite, Penmaenpool tool bridge (3.5), Llyn Cum-mynach (7.5), A470 / Coed y Brenin (13), Blaenau Ffestiniog Cemetery (17.5), A470 south of Trawsfynydd (20), Cae Adda Campsite (22). Day 3 - Trawsfynydd to Betws-y-coed. 41 miles (66km) | 1385m ascent | max grade 12.2% Cae Adda Campsite, A470 north of Trawsfynydd (5.5), Cwm Cynfal viewpoint (11), *Penmachno (18), National Trust - Ty Mawr Wybrnant (26.5), A470 / Bridge / Campsite at Tan-aeldroch (28), Rhiwddolion (31), Betws-y-Coed (37), Dolgam Campsite (41). Day 4 - Betws-y-Coed to Conwy. 32 miles (51.5km) | 800m ascent | max grade 11.7% Dolgam Campsite, Plas y Brenin / National Outdoor Centre (4), A5 / eastern end Llyn Ogwen (8.5), Start of old A5 / YHA Idwal / Ogwen Cafe (10), A5 crossing north of Bethesda (16), Abergwyngregyn (21), Ty'n-y-ffrith / "boggy bit" (27), Sychnant Pass (29), Conwy (32). * indicates locations just off the main route Getting to the start Given our combined family adventures we drove to the start at Machynlleth then Louise collected us both from Conwy and we drove home that night. It ended up being four days of cycling over four days of holiday. That said, during my original plans I had set out to drive and park the car at Machynlleth, complete the first day of the route on the same day, then catch the train from Conwy to Machynlleth on the fifth day and then drive home making the overall trip five days in total. There appear to be good trains that service both ends of the route, but for me they weren't direct enough resulting in potentially adding another day to the overall trip, making two days of travelling and four days of cycling. Terrain Approximately 55% paved & 45% unpaved Interestingly, I found I spent so much physical time on the the unpaved, off-road sections, that it almost felt as though the whole route was off-road. Even the tarmac sections were narrow and remote. As a result - and also due to the technicality of the off-road terrain - I'd whole heartely recommend a mountain bike - and a full suspension XC bike if you have one. In terms of comparison, the route is similar in intensity to the South Downs Way and then some! Rocky, undulating and remote. When to go Given two significant factors: the four-seasons-in-one-day Welsh weather and the fact you're in the mountains, I'd definitely go between the months of May and September. Not only does this give you the best weather opportunity, you'll have the benefit of longer days and hopefully dryer trails. Accommodation Day 1 - Graig Wen Camping , Graig Wen, Arthog, Dolgellau LL39 1YP, 01341 250 482 Day 2 - Cae Adda Camping , Trawsfynydd, Blaenau Ffestiniog LL41 4TS, 07783 873 532 Day 3 - Dolgam Campsite , Dolgam, Capel Curig, Betws-y-Coed, Snowdonia LL24 0DS. 07375 682 769 Eating The natural overnight locations suggested by Cycling UK, generally host a good selection of convenience stores, restaurants, pubs and hotels to cater for most requirements. Outside of this, the route gets very remote and its essential to cater for snacks and lunches in advance. If you're camping then considering breakfast would also be essential, albeit I found a number of cafe's serving breakfast within the first few miles of each day. In conjunction with self catering at the campsites on the way, I stopped for food at the following places: The George III pub - Penmaenpool, Dolgellau LL40 1YJ Coed-y-Brenin MTB centre - Coed y Brenin Forest Park, Dolgellau LL40 2HZ (CAFE NOT OPEN AT PRESENT) Royal Oak Hotel - Holyhead Rd, Betws-y-Coed LL24 0AY Outside of this, my original plans also considered the following locations: The Cross Foxes Bunkhouse , Restaurant & Bar - Trawsfynydd, Blaenau Ffestiniog LL41 4SE Canolfan Prysor Centre Cafe and Fishing Centre - Llyn Trawsfynydd Lake LL41 4DT The Swallow Falls Inn - Holyhead Road, Betws-y-Coed LL24 0DW Caffi Siabod - A5, Capel Curig, Betws-y-Coed LL24 0EL Caffi Alma - Abergwyngregyn, Llanfairfechan, LL33 0LD I didn't end up visiting any of these so I don't have first hand experience of their suitability. However they were researched and included based on other rider's feedback, reviews and positive recommendations. Convenience stuff The route is mainly offroad and in some places very remote, therefore any toilets will typically be located in towns, villages or cafe's. On the route itself there are plenty of secluded areas for a quick stop if you're comfortable with an outdoor view. There are a number of convenience stores in the towns and villages the route passes through, supplying food, drink and essentials. Bike repair and maintenance are relatively well catered for given the affinity of the area to mountain biking and cycling in general but again due to the remoteness of the route it may be a long trek to reach civilisation. Equipment Bike: Cycling UK describes the route as being best for MTB's and I'd wholeheartedly endorse this. Of course if you're intending to ride the route on a gravel bike or hybrid then fit the widest tyres possible with a good off-road tread pattern and the lowest gearing you can. I carried a full camping set-up and fitted gearing to hit the magic 20 gear inches - and was so grateful for it. The route is definitely not suitable for a road bike. I'd also suggest a good selection of essential bike repair tools and spare parts due to the remoteness of the route in some locations. In the forest south of Betws-y-Coed, I bumped into a rider that had lost a bolt from one of his SPD cleats on his cycling shoe. Luckily he had alternate sided pedals and could ride on the flats until he got back to his car. I now carry a spare SPD bolt in my bikepacking kit! Kit: Felt Edict, full suspension XC mountain bike, running Vittoria Mezcal tyres and 36T x 11-46t gearing (20 gear inches lowest gear). Bikepacking bags: Self-made bar roll/bag (13ltr), Topeak Backloader seat pack (10ltr), self-made frame bag (3ltrs), Tailfin (front) top tube bag (1.5ltr) plus a rear Topeak top tube bag (0.5ltr), Camelbak with 1.5 litre water bladder, 2 x bar/stem mounted water bottle holders. Accomodation: Vango F10 Nexus UL2 tent Sleeping: 2 season sleeping bag, Therm-a-rest NeoAir Xlite inflatable mattress and Sea-to-summit pillow, mini mattress inflater with light. Cycling clothes: Helmet, gloves, glasses, cycling shoes, cycling shorts (bibs), wool cycle jersey, windproof cycle gilet, arm warmers, neck buff, overshoes and waterproof jacket. Spare set of bib shorts, cycle jersey(s) and gloves. Casual clothes: lightweight trainers, Down jacket, zip off trousers, thin fleece, wool t-shirt, underwear, Wash kit, towel and first aid / medical items. Inc. chamois cream and sun cream Stove + gas, mug, spork Food 1.5ltrs water in camelbak + 0.5ltr water bottle in bar mounted water bottle holder. Mobile phone, Garmin 830 GPS, GoPro Hero 10, 240v charger, 10,000mAh battery, cables. Front and rear lights, bike lock, bell. Comprehensive set of bike tools, innertube, pump, CO2 gas, chain lubricant, tyre sealant, spare bike parts (derailleur hanger, bolts, cables etc.) How many days to split the route over As explained above, I set out to follow Cycling UK's suggestion for a more relaxing trip and opted to split the route into four days and to camp. I enjoy cycle camping and given I haven't bikepacked with my tent for a while I felt it was high time I based an adventure around it again. During the preparation, I was heavily considering completing the route over three days. My benchmark for this was based on my South Downs Way adventure, where I cycled 67 miles with just under 2000m of climbing on day one. It was a long day, I was in the saddle 12 hours, but it included all the riding back and forth I do to capture the photos and video, so I felt comfortable with the distance and elevation. The main difference though was that I didn't camp so I had a far lighter bike. During this trip, I was lucky enough to have Louise close to hand and off-loaded my overnight clothes, stove, tent and sleeping bag on the last day. And oh boy - it transformed the ride! Coincidentally, I met a rider on the last day and while sharing thoughts and stories of our respective adventures, he had also considered leaving his camping equipment at Betws-y-Coed and collecting it on the way back. He didn't, and as a result cut out the final hills above Penmaenmawr and went straight to Conwy via the A55 because of the weight of his bike. So if I ever tackled Traws Eryri again, I'd definitely ditch the camping stuff and use B&B's / hostel's for the entire route, with a commensurate minimal set of equipment. The weight of the camping equipment on the bike shouldn't be underestimated, particularly on this terrain and with a headwind (as I had) for the entire journey, it makes it very challenging. Coincidentally while the campsites are situated in good locations along the route, they don't always offer a great start or end point to break the route into four equal days. My third day was overly long due to this. If I was to tackle the route over three days, without deliberately cutting out any sections, I would pay close attention to the ascent rather than distance - and this would be my split: Day 1 - Machynlleth to Trawsfynydd. 49 miles (79km) | 1540m ascent | max grade 13% I'd stay at the Cross Foxes at the end of day 1 and cycle straight from the junction of the A470 and Sarn Helen just south of the town. I'd tackle the Trawsfynydd lake loop on day 2. Day 2 - Trawsfynydd to Betws-y-Coed. 40 miles (65.6km) | 1215m ascent | max grade 12% I'd undertake the lap of the lake on this day and stay as close to the centre of Betws-y-Coed as possible overnight. Day 3 - Betws-y-Coed to Conwy. 34 miles (55km) | 950m ascent | max grade 11% Starting in Betws-y-Coed, I'd simply follow the guidebook route, including the hills above Penmaenmawr all the way to Conwy. Final thoughts Traws Eryri was everything I’d hoped for and more—an unforgettable four-day adventure across the heart of Snowdonia, from Machynlleth to the medieval walls of Conwy. Each day brought its own rhythm: sweeping gravel trails through ancient woodlands, wild singletrack over exposed hills, and tarmac ribbons twisting between slate-scarred mountains. There were moments of quiet solitude, log-side lunches, and unexpected encounters—from scrambling motorbikes to fellow riders battling the same climbs. The landscape was endlessly varied, shifting from the soft greens of valley ferns to the stark, otherworldly silhouettes of slate quarries and proud mountains, all set beneath the ever-changing Welsh skies. While the fully loaded bike gave the trip a certain self-sufficient romance, it would definitely be more enjoyable with a lighter setup—swapping tent and cooking gear for the comfort of B&Bs, hostels, or hotels along the way. Without the extra weight, the climbs would sting less, the descents would flow faster, and there’d be more energy left for soaking up the scenery (and maybe one more pint at the end of the day). Still, the route was a tough, beautiful, and deeply rewarding ride—one I’ll remember for a long time. Happy Adventuring!
- The North Downs Way
In late spring, three of us cycled a shortened version of Cycling UK's North Downs Way from Farnham to Dover over three days. Tracing parts of the ancient Pilgrims Way, the route mixes chalk downs, woodland singletrack, historic landmarks and sweeping views. With almost 3,000m of climbing and more than half off-road, it’s a challenging but rewarding adventure through some of southern England’s most varied and historic landscapes. Click here if you want to navigate straight to the section on How we cycled The North Downs Way . Day 1 - Farnham to Merstham Rolling out of Farnham After the obligatory photo at the official North Downs Way start point in Farnham, we threaded our way past quiet lanes and well-to-do houses before ducking into the shade of the Surrey woods. The first ten miles offered a gentle bypass of the walking route, easing us in before we rejoined the ridge near Puttenham and the Hogs Back. Our first proper pause came at the Watts Gallery Artists’ Village, where sandwiches and cake made for an excellent early lunch. After a brief flirt with the River Wey, the trail turned sandy underwheel as we climbed towards St Martha’s Church, perched high above the Wey Valley. The church has stood here since the 12th century, an isolated landmark visible for miles around. The loose sand tracks were a test of balance, but the views more than repaid the effort. Over the Surrey Hills Beyond St Martha’s the trail carried us on to Newlands Corner, a popular viewpoint with a café and visitor centre – perfect for a water bottle refill and snacks. From this high ridge, you can look south across the Weald, and it’s easy to see why the North Downs formed a natural line of defence during the Second World War. The route still passes a number of concrete pillboxes and fortifications, part of a chain of defences known as the “GHQ Line,” constructed in 1940 to slow a potential German advance. From Newlands Corner we rolled across Ranmore Common, descended through the vines of Denbies Wine Estate, and then faced the most famous climb in the South East: Box Hill. Its twisting S-bends have long been a testing ground for local cyclists, but it was the 2012 London Olympic road race that put Box Hill firmly on the world map. For Marcus and Tim, this was their first time up the zig-zags – a rite of passage – so a celebratory stop at the summit café just before 3pm was non-negotiable. Singletrack, views, and home The afternoon continued over Headley Heath, where gorse and heather lined swooping trails, and on towards Colley Hill, with its wide views over Surrey. The long descent through Gatton Park signalled the day’s end, dropping us neatly into Merstham. Being so close to home, we had the luxury of dinner and a familiar bed before regrouping in the morning for day two. For now though day one was complete: a ride of varied trails, familiar climbs, and fresh perspectives on the Surrey Hills. Much of it was through areas we know well as it’s our mountain biking back yard. And while the route works on any bike, it’s brilliant fun on a full-suspension MTB, letting you really make the most of the oodles of swooping singletrack hidden along the ridge. Day 2 - Merstham to Maidstone We reconvened at Merstham train station at 9am, bikes loaded up for our overnight in Maidstone. The weather had blessed us again – another fine early summer morning, blue skies above and the promise of a long day’s riding ahead. The first climb out of Merstham, up towards Chaldon, was a rude awakening for legs still remembering yesterday. Steep and punchy, it was a reminder that the North Downs rarely give up their views without a fight. From the top the ridge opened up, with broad panoramas over the Weald once again. This was a stretch I’d only visited once or twice before, more often glimpsed from the busy M25 which passes beneath. The leeward side of the hill is dotted with disused chalk quarries, their gouged white scars like bite marks in an apple. To me they hold a certain adventurous curiosity, no doubt bolstered by their role as the setting for Saturday Adventure by John Pudney. Written in the 1950s, the story imagines two boys stumbling upon “Z Camp,” a secret research site where spies wield “Spy-Ray” — a kind of radioactive telepathy — against an unnamed enemy. Of course, we didn’t encounter Uncle George or any shadowy espionage facilities on our ride, but little did we know the next twenty miles of the North Downs Way would prove to be our own adversary. A tricky section east of Oxted This part of the cycling route is where the North Downs Way diverges most noticeably from the walkers’ path. The stretch from Marden Park, just south of Woldingham, all the way to Heaverham (north-east of Sevenoaks) is public footpath only, so the cycling trail has to detour around it. Either that or you take your chance on the mix of quite lanes and fast B roads that stick to the ridge. On the map the detour looks simple enough, but on the ground we found it a different story – a frustrating sequence of undulating bridleways, short sharp climbs, and constant twists. A total contrast to yesterdays fast, flowy trails. The upside is that the route drops into Oxted, a handsome little town and a good place to resupply. We stopped for lunch, coffee, and extra snacks – much needed for the miles to come. Still, progress was slow: the rollercoaster terrain, constant route finding and the still, airless forest made it hard going. By the time we reached the Ide Hill Community Shop & Café at 2:30pm, we were ready for a breather. Five hours of riding for only twenty miles tells its own story. Into Kent From Ide Hill the route turned north, briefly skirting the grounds of Ightham Mote, a 14th-century moated manor house now cared for by the National Trust. After weaving through farmland and woodland tracks, we finally rejoined the “true” North Downs Way at Heaverham, 35 miles in. The character of the ride changed immediately. The chalky downland trails returned underwheel, our speed picked up, and the familiar wide-open views across the Weald lifted our spirits. After hours of slow progress, we were finally making up time. The route carried us over the River Medway, a broad sweep of water once vital for trade and industry, now spanned by a cycle-friendly bridge linking old quarries and new housing at Peters Village. From here the trail would have turned skyward again, climbing steadily towards Blue Bell Hill, however tired of the mornings up and down roller coaster terrain, we foolishly decided to chop the hill climb from the route, only to substitute it with probably the most dangerous selection of road in the UK. Emerging just about unscathed from the carriageway-of-entrapment , we'd also missed Kit’s Coty House , a Neolithic chambered long barrow that has stood for over 5,000 years. As the sun was dipping low and we'd spied our pub and lodgings for the night, we rolled gratefully into The Lower Bell pub at 7:30pm – tired, dusty, and looking forward to a shower and rest. Evening at The Lower Bell A pint apiece in the pub was a decent reward. Food, however, proved trickier: the nearby diner was closed, and we’d missed the pizza cut-off back at the bar. Dinner ended up being a petrol station haul of Pot Noodles and other questionable delights – hardly the feast we’d been dreaming of all day, but in its own strange way a memorable end to a long ride. Thankfully, the pub lodgings more than made up for it: clean, comfortable, and right on the route. After ten hours in the saddle, it felt like luxury. Day two had been tougher than expected – a blend of slow, navigationally tricky miles and glorious fast chalk tracks once the Downs returned. A true test of patience and persistence, but one that set us up perfectly for the final push to Dover. Day 3 - Maidstone to Dover We rolled away from The Lower Bell early, setting off at 7:30am into fresher, cooler air than the day before. A light breeze and blue skies – perfect riding conditions for the final leg to Dover. Picking up National Cycle Network Route 17 , the riding was immediately rewarding: fast gravel tracks, chalk and flint underwheel, and wide views off to the right. At Detling, we crossed the busy A249, a reminder of modern England cutting across the ancient Downs, before settling back into quieter trails. This section of the North Downs Way flits in and out of the historic Pilgrims Way, and the sense of history is never far away. The trail itself feels tailor-made for gravel bikes: flowing doubletrack, woodland paths, and the occasional punchy climb. We passed the Dirty Habit pub at Hollingbourne (sadly closed for refurbishment), and soon after came across the Pilgrims Rest statue – a wooden friar carved on a bench, a nod to the countless travellers who have followed this route for centuries. Further on, the Lenham Cross, a giant chalk memorial cut into the hillside in 1922 to honour those lost in the First World War, stood stark against the Downs. Across Kent Lunch was a simple but satisfying stop, sitting on the grass outside the gatehouse of Eastwell House, once a grand estate and now a hotel. From here, our route diverged from the official Cycling UK line and away from NCN 17. Rather than looping north towards Canterbury, we'd planned for a straighter point-to-point ride, direct to Dover. Skirting north of Ashford, we picked up the reverse loop of the original route near Wye, also a convenient point to stop at the cycling friendly The Hub Cafe, for tea and cake. It was a perfect refueling stop before the toughest climb of the day: an impossibly steep bike push beside Round Down Wood at Stowting, dragging our bikes up to regain the ridge at the B2068 Stone Street. From there the ridge way riding continued again, carrying us south east through Lyminge and on towards the coast. The finish at Dover As we crested the Downs above Folkestone, the wind picked up and the town sprawled below us. The sea shimmered in the distance, drawing us onwards. Much of the run into Dover we already knew from riding the Cantii Way , though seeing it from the opposite direction gave the descent a new sense of momentum. Before the final roll down, we paused on Abbot’s Cliff, where the concrete curve of a sound mirror still faces the Channel. Built in the 1920s and 30s, these huge acoustic dishes were designed to detect approaching enemy aircraft long before radar existed. Standing here, it was easy to imagine the tension of those years, with the sea ahead not just a horizon but a frontline. From Reigate Hill and the pillboxes around Box Hill on day 1, we had in fact traced the line of England’s wartime defences eastwards. And then, at last, the trail delivered us to the seafront, to the official North Downs Way finish point overlooking the Channel. Three days, 137 miles, 3,000 metres of climbing – and the perfect conclusion to a route that mixes ancient history, chalk landscapes, and some of the South East’s best riding. A great day’s cycling, and a fitting end to the North Downs Way. How we cycled The North Downs Way Route 137 miles (220km) | 3050m ascent | 18 climbs | max grade 17% The walkers version of the North Downs Way is one of England’s great National Trails, tracing 153 miles of ancient trackways from Farnham in Surrey to a loop above Dover on the Kent coast. For those on foot, the route is a well-established classic, but thanks to Cycling UK, there is an official cycling version that follows much of the walking route, interspersed with linking bridleways, back lanes, and woodland singletrack. The version featured in this blog is a shortened, more direct version of the Cycling UK "riders route", cutting out the loop to Canterbury and travelling direct to Dover from Ashford. This route is 137 miles long, features just over 3,000m of climbing, which we split over three days. If you've already ridden the Cantii Way or are planning to do so, then this particular variation of the Cycling UK riders route avoids some of the overlap. It also makes for an achievable three day trip of roughly 45 miles per day and enjoys a satisfying end right on the Dover sea-front. Clicking on the map (title) above takes you to the Ride with GPS route I used for this adventure. Other than the obvious differences from the original described above, it largely follows the same route and uses the same trails. The start of the route is located at the walkers North Downs Way trail marker in Farnham, next to the train station, in contrast to the start at Farnham Castle. And being a Dover finish the route again ends at the North Downs Way trail marker as opposed to the village of Wye. Please feel free to download and modify to suit. Alternatively you can download the original Cycling UK route here Audax Card Day 1 - Farnham to Merstham. 41 miles (66km) | 825m ascent | max grade 12.2% Farnham, Puttenham (10), Shalford (16), Newlands Corner (21), Ranmoor Common (25), Boxhill (30), Headley Heath (34), Colley Hill (38), Gatton Bottom / Merstham (41) Day 2 - Merstham to Maidstone. 48.5 miles (78km) | 1330m ascent | max grade 17% Merstham, A22 / Godstone Road (5), Oxted (9), Toys Hill (16.5), Ide Hill Cafe (19), A21 Sevenoaks Bypass (23.5), Ightham Moat (28), Wrotham / M20 (36), Halling (42), Burham (46), Lower Warren Road / A229 / Lower Bell Inn (48.5) Day 3 - Maidstone to Dover. 47.5 miles (76.5km) | 840m ascent | max grade 14.5% Lower Warren Road / A229 / Lower Bell Inn, Detling (3.5), *Lenham (11.5), *Charring (16), *Ashford (20), Wye (24.5), Stowting / Bike push (32), Lyminge (35), *Folkestone (34), Dover (47.5) * indicates locations just off the main route Getting to the start Both the start at Farnham and the finish at Dover are well connected with road and train links. However being a one way journey some consideration is needed for both ends of the route. In general the rail links run in and out of London so getting from Dover to Farnham may involve at least one trip into and out of London to get from one line to the other. Also be aware that if you choose to undertake the route over a weekday, many of the train companies operate cycle policies that preclude bikes between rush hour times times as they are mostly London commuter trains. Parking is fairly good at both ends, Farnham being slightly easier. Using two cars, and leaving one at the end ready for the return, is a viable option, albeit the driving time between Farnham and Dover is around 2 hours. Due to living very close to the route, we all used a combination of trains to get to the start, albeit we had to be creative with the timings to avoid the commuter periods. We had the luxury of the use of Tim's car at Dover to get us home. Terrain Approximately: 56% paved | 44% unpaved The route has a pretty even split of on and off-road sections and with the 3000m of climbing - if taken over three days - makes for a manageable adventure. There are a few climbs at Newlands Corner, Boxhill, Burham and Wye Downs that could test the legs, but all doable with low gearing. The terrain really splits itself into two halves. While most of the geology is chalky flint, the first half is quite wooded so is more hard packed dirt/mud and plenty of swooping singletrack. There is a small section of sand around St. Martha's Church and the surrounding area but it is fairly short overall. The second half of the route opens up onto chalky downland, similar to the South Downs Way albeit not as exposed. If you have the time (and the legs) you could take a detour off the route on day 1 to head over to Holmbury Hill and Leith Hill to take in some of Surrey Hills finest MTB trails , the likes of Summer Lightning, Barry Knows Best and Yoghurt Pots. The first two thirds of day 2, where the route diverts away from the ridge proper (Woldingham to Heaverham) is a little faffy. It's a zig-zag route that avoids the roads but manages to encompass a whole bunch of short, sharp - up and down terrain - which isn't particularly flowing. But stick with it and accept the slower progress as the route will open out again and you'll have an opportunity to pick up the pace again later in the day. When to go Given the routes general elevation and mostly free draining chalky surface it could be a route to enjoy late into the year as well as the popular summer season. However, having ridden most of the trails from Farnham to Merstham over many years and in all seasons, the first part of this route can turn into a real mud-fest in late Autumn, Winter and Spring - and chalk gets incredibly slippery when wet. Aim for dry weather between late April and early November. The Surrey Hills are also very popular with all trail users - from cyclists & horse riders to young families out for a short walk. They can get very busy in good weather particularly at the weekends. Take a bell and say hi! Accommodation Due to living close to the route we only stayed over on the second day: Day 2 - Lower Bell Inn , 201 Old Chatham Road, Bluebell Hill, Aylesford, Kent. ME20 7EF . +44 (0) 1634 861 127 Eating The route is never far from civilisation at any point along its length. Being a mecca for all things cycling, the Surrey Hills section is well blessed with cafes and bike shops in most of the towns and there's plenty of convenience shops to stock up on supplies throughout. You're also never far from a pub if you fancy pub grub or a cheeky pint and at the weekends there's a number of pop up coffee and ice cream vans at popular car parks which coincide with the route. The eastern section of Kent is a little less catered for, and you'll need to come down off the ridge, but again it's generally well serviced. If you choose to stay over in Maidstone town on the second night then there's plenty of pubs and restaurants to choose from. However if you want to stay closer to the route, as we did, then do thoroughly check food arrangements before hand. We stopped for drinks or food at the following places: Watts Gallery Cafe - Watts Gallery, Down Lane, Compton, Surrey, GU3 1DQ Newlands Corner Cafe - Newland's Corner, Albury, Guildford. GU4 8SE Box Hill Cafe - Zig Zag Rd, Tadworth KT20 7LB Little Waitrose - 159 Station Rd E, Oxted RH8 0QE Ide Hill Community Shop - Ide Hill, Sevenoaks TN14 6JG Shell Petrol Station - A229, Northbound, Aylesford ME20 7EZ The Hub - Wye - Riverside House, Wye, Ashford TN25 5BX Convenience stuff In much the same vein as finding somewhere to eat along the route, bike shops, toilets and local shops are well catered for throughout. On the route itself there are plenty of secluded areas for a quick stop if you're comfortable with peeing in the woods (leave no trace!). A quick Google anywhere along the route will generally show close proximity to general amenities. Equipment Bike Between us we had two full suspension XC bikes and a flat bar gravel bike. For me, given my affinity to the MTB trails over the Surrey Hills, I'd always take my full susser, but a hardtail MTB, gravel bike or suitably equipped hybrid is fine. Marcus did struggle with the jaring terrain a little on the first half of day 2 on his fat tyre hybrid, but given his bike sports a 3x crankset, he benefited from the lowest gearing out of all of us - a definite plus for the steeper climbs. General equipment We chose to keep kit to a minimum, share tools and find food along the way. As a result we all carried a variation of my kit list below: Kit list: Felt Edict, full suspension XC mountain bike, running Vittoria Mezcal tyres and 36T x 11-40t gearing (24 gear inches lowest gear). Bikepacking bags (8 ltrs total): Wizard Works Lil Presto bar bag (1.8 ltr), no-name water bottle handlebar bag (o.5 ltr), Tailfin top tube bag - zip (0.8 ltr), Topeak top tube bag, between top tube and seat post (0.5ltr), self-made frame bag (3 ltr), Topeak seat pack (0.5 ltr). Camelbak with 1.5 litre water bladder. Cycling clothes: Helmet, gloves, glasses, cycling shoes, cycling shorts (bibs), wool cycle jersey, windproof cycle gilet, arm warmers, neck buff, overshoes and waterproof jacket. Spare set of bib shorts, cycle jersey and gloves. Overnight clothes: Sports shorts, long sleeve thermal top, grippy toe socks. Wash kit, towel and first aid / medical items. Inc. chamois cream and sun cream. Snacks. 1.5 ltr water in camelbak. Mobile phone, Garmin 830 GPS, GoPro Hero 10, 240v charger, 5,000mAh battery, USB cables. Front and rear lights, bike lock, bell. Comprehensive set of bike tools, innertube, pump, CO2 gas, chain lubricant, tyre sealant, spare bike parts (derailleur hanger, bolts, cables etc.) Is there an alternate route for day 2? Specifically, is there a back lane / road cycling route that better mimics the walkers North Downs / Pilgrims Way route between Woldingham and Heaverham, to avoid such a big detour? I guess the good people at Cycling UK wrangled over that question for some time before deciding on the route that extends so far south. They probably did their research, drew a blank at gaining shared use of the footpaths for cyclists and the final incarnation was the best available option. Before the ride, I'd had a couple of goes at finding a route myself. It was a desk top exercise, via OS mapping and Google Street View, and it yielded a fair number of quiet back lanes that stick nicely to the ridge. However, they're interspersed with sections of fast B road and less than ideal places to bridge the myriad of motorways that criss-cross the area. Although I suggest a number of types of bike being suitable for the route, in its current form it's definitely best for a hardtail mountain bike with fast rolling tyres. While on paper there are plenty of road sections to tempt away from this choice, the trails on day 1 and the undulating, rough terrain on the first half of day 2 more than justify its use. However, if a back lane / road section could be found on day 2, when coupled with the fast gravel tracks of day 3, any slight underbiking on day 1 from using a Gravel bike (or better still an Adventure Bike ) would be more than compensated. Final thoughts The North Downs Way by bike turned out to be a route full of contrasts: ancient stone churches and concrete wartime defences; shaded woodland singletrack and chalky gravel tracks with panoramic views. Riding it in late spring meant long days, dry trails, and wildflowers lining the chalky paths. And splitting the journey into three stages gave us time to absorb more than just the miles, it allowed us to enjoy the cafés, landmarks, and quiet moments along the way. For us, the North Downs are our home turf – our mountain biking back yard – yet linking Farnham to Dover gave the familiar trails a new sense of purpose. It’s a route that works on any off-road bike where you’ll get the most out of its endless variety: chalk and flint descents, woodland singletrack, farm tracks, and the odd steep push. Most of all, the ride reminded us what makes the Downs special: history woven into every mile, a sense of journey across the landscape, and the satisfaction of finishing with the Channel at your wheels. A fitting conclusion to a classic English trail, and a ride we’d recommend to anyone looking for a multi-day adventure close to London. Happy Adventuring!
- The South Downs Way
The South Downs Way had been my nemesis since a dreary trudge along its chalky ridge in my mid-teens. Now, some thirty five years later, it was time to put that experience behind me and give this well ridden and much loved route, the respect it deserves. Day 1 - Winchester to Truleigh Hill It was a spur of the moment decision to ride the South Downs Way that had me stepping off the train at Winchester at 8:05am on a bright sunny August morning. The official start to the route is marked as the centre of Winchester so, in the same fashion as the King Alfred's Way , I made the imposing statue the start point for another cycling adventure along the South Coast of England. Being a national trail, the route is well signposted throughout. I picked up the first acorn symbol just out of town and within a few minutes I was over the M3 motorway and into the Hampshire countryside. The first twenty five miles to Queen Elizabeth Country Park are a mix of bridleways and quiet backroads, threading a route eastwards through fields, over Cheesefoot Head, Beacon Hill and Old Winchester Hill Fort, with a convenient pass through the village of Exton. The approach to Butser Hill from the west provides an almost roller coaster descent down its well manicured grassy slope to the A3. Despite not being on the ridge propper, this section of the route is still hilly and ending here would make a great first day if you'd chosen to split the route into four days. The Queen Elizabeth Country Park is, as you would expect, a wooded expanse of downland chalk with ancient trees, well marked circular walking routes and some brilliant mountain biking trails of varying difficulty. It has a good cafe / restaurant, a water point and a bike tool station. The Shipwrights Way passes through here and my route briefly ventured onto it as I continued east and up onto the chalky ridge. The next twenty miles to Amberley, I would say, were the prettiest. Although the route sits on the ridge, the surrounding landscape is a well manicured patchwork of crop fields and sheep filled greenery. It alternates between open woodland and heath with occasional glimpses of the Weald to the left and the South Coast to the right. The climbs are still steep with big ascents at Cocking Hill and Bignor Hill which is on the Slindon Estate. Both added to the constant undulation but the Cadence Cycle Club Cafe provided a much needed rest and refuel at around half way. The climb up to Rackham Hill was too steep for tiring legs but the reward for pretty much all of the remaining ten miles was an unmatched horizon-bending view in all directions. Time was pressing and aside from general weariness I felt good and was looking forward to dinner at the YHA. I'd taken the drone and the GoPro to capture this trip and in hindsight spent far to long setting up shots, riding back and forth to capture the moment. Accordingly my overall average speed for the day was around five miles an hour. That lead to being seven miles short of the YHA, which stops serving food at eight o'clock, and only three quarters of an hour to get there. I managed a brief wave at a bunch of mountain bikers out for an evening ride as I flew past at just under twenty miles per hour along the flint strewn path, and unnervingly more on the downhills! With the sun touching the horizon I propped my bike against YHA Truleigh Hill's minibeast signboard and ran upstairs to order a pizza. It was one minute past eight. I'd ridden sixty miles from Newbury to Bath earlier in the year in an afternoon. They say two off-road miles are worth one on road so after taking almost twelve hours to do sixty five miles (and 30 gates!), I'd endorse that, one hundred percent. Day 2 - Truleigh Hill to Eastbourne After day one's exhaustion and a less than full nights sleep in the communal YHA room, I wasn't in any rush to depart this morning. The impending rain storm was the conversation between residents the night before and I was using it as my own barometer for the day. But at nine AM it hadn't materialised so I strapped on my last bag and pushed off into the clearing hilltop mist. Looking back, I think the photos capture the second day quite well, or the first part at least. Brooding with a sense of anticipation, quiet urgency and stoic resignation to another day of slow overall progress. I put the progress part down to gear selection. I knew I should have swapped the thirty six tooth front chainring for something smaller but pre-ride bravado relegated that thought to the "nah, it'll be fine" box. The scenery once again was stunning, much the same as the last ten miles of the previous day. Expansive views across the Weald to the left, the English Channel to the right and a rolling strip of green stretching out in front and behind. Apart from the North East coast of the UK, I don't think anywhere else evokes the same emotion. The storm had been rattling around behind me for the last hour or so and it was only when I looked back from Firle Beacon to the West that I realised its intensity. The sky had turned orange under a thick black cloud and a solid screen of white rain obliterated any further visibility past a mile or so. The pre storm urged me on. With the hair on my arms standing on end and new found leg energy, I sped past hikers hurrying to their parked cars as the storms electricity crackled in the air. I needed to get off the ridge. Images of Eric Langmur's hiker sitting on a coil of rope sheltering from an impending lightning strike, illustrated in his book Mountain Craft & Leadership, flashed through my mind. Pushing twenty five miles per hour down flinty chalk paths is not a wise choice at the best of times, but the Felt is a cross country race bike at heart and when you crank up the speed, it flies. And fly I did. It only took a smattering of rain drops, an off camber corner and a bald section of chalk and I found myself making my way down the hill on my thigh and elbow. Three hundred metres later I was sheltering under two large chestnut trees on the outskirts of Alfriston licking my wounds, the torrential rain hammering down around me. By some miracle, the bare chalk that caused the front wheel to slide out was devoid of flint and apart from a couple of bloody grazes, I was ok. Elbow and knee wounds tended, I donned waterproofs, switched on my lights and headed out into the rain for the final ten miles. Two hours later I was standing on Warren Hill overlooking Eastbourne. There had been a brief respite in the rain, enough to dry out my jacket and shorts, and the sun was doing its best to melt a hole through the storm clouds. I propped my bike against the official trail sign at Helen Garden, wet, cut, bruised and the bike smelling of sheep s****. But, much like the beginning of any new trip, the end of an adventure always has its own special feeling. Achievement, pride, experience and relief. As we journeyed back in the car, the storm in full force again, it occurred to me that it's always the weather that defines my adventures and also why adventuring in the UK is so special. How to ride the South Downs Way Route Just to avoid any confusion, this is the cyclists version of the South Downs Way and not to be confused with the walking route. That said, unlike the North Downs Way, the walking and cycling routes are very similar, which ensures the allure of the original ridgeway route is still captured when you're in the saddle. It's a challenging route, both in terms of fitness and technical trail riding ability. The chalky, flinty surface can get treacherous when wet and the constant climbing and descending requires a good level of fitness and trail riding skills. The route is generally undertaken over two or three days but can be completed in one day if you're exceptionally fit. (Or you could have a go at doing the whole thing twice in 24 hours !) Clicking on the map title above takes you to the Ride with GPS route used for this adventure. Please feel free to download and modify to suit. There's some really good advice and the official route on the National Trail website (GPX downloads tab - Cycling GPX). There's also another brilliant resource on the South Downs Way website, in particular how to split the route over two, three or four days. Route split I chose to undertake the trip over two days with the first day being longer than the second. My first day included getting from London to Winchester by train and the second day back into London from Eastbourne. Day 1 - Winchester to Truleigh Hill YHA. 63 miles (101km), 1,950m ascent Winchester, Exton (13), Meon Tap (17.5), The sustainability Centre + Tap (20), Queen Elizabeth Country Park visitor centre + tap (24), Caydence Cycle Club Cocking + tap (37), Caydence Cycle Club Upwaltham (42), Amberley tap (48), Washington tap (55), Botolphs tap (62), Truleigh Hill YHA + tap (63) Day 2 - Truleigh Hill YHA to Eastbourne Pier. 37 miles (60km), 1,100m ascent Truleigh Hill YHA, Saddlescombe tap (4), Pyecombe (5), Housedean Farm Tap (13.5), Southease Tap (20), YHA Southdowns (20), Alfriston (27), Jevington Tap (31), Cadence Cycle Club Eastbourne (Helen Garden) and official route end (36), Eastbourne Pier (37) Getting to the start This is a one way route starting at Winchester and ending at Eastbourne. Train links to both are good, particularly out of London. Winchester train station is 1 mile from the King Alfred's statue and the start of the route. Eastbourne Train station is about 1.5 miles from the official end point or just under a mile from the pier. Leaving cars at either end is, of course, possible but it's a good two and a half hours one way by car so factor in plenty of time if this is your only option. Terrain 80% Unpaved - 20% paved The route was originally designed for mountain bikes and I'd wholeheartedly support this. A full suspension XC bike with 29" wheels would be ideal. A hardtail would equally be at home albeit slightly less comfortable. Go for a 2.3" tyre upwards, with good carcass strength and plenty of offroad grip. Personally, I wouldn't tackle the South Downs Way on a gravel bike, but plenty of people do. Go for the best weather possible, the widest tyre you can fit and the lowest gearing you can. Apart for around 2o miles of tarmac / unsurfaced roads, the surface consist of three main types: short grass single tracks; rough, flinty, chalky tracks, and loose single / double track paths. Apart from the possibility of the flint being razor sharp, the lumps can be quite large, typically golf ball size although it can increase to apple diameter in places. Be prepared for a few sidewall dinks! The route also has around twenty significant climbs between 3% and 8%, which coupled with the loose surface makes for slow climbing (or sketchy descents!). A wide knobbly tyre really comes into its own on this type of surface. Gearing wise, get as close to 20 gear inches as possible. And if that wasn't enough, there are approximately one hundred gates to open and close along the route, many at the bottom of a long descent, just when you need the momentum to take you up the next incline! When to go This is really a ride for taking the views of the Weald and the English Channel on warm, cloudless, summer days with a period of good weather forecast. I think the flora and fauna are at their best at this time of year and so too are the trails. It can be quite bleak when the cloud is down, rain makes the chalk very slippery and the exposed ridge leaves little in the way of shelter when the weather turns worse. Aim for May to August. Accommodation I stayed at YHA Truleigh Hill , S Downs Way, Shoreham-by-Sea BN43 5FB. (OS Grid TQ 220 105) Eating Food and particularly water, are well catered for along the entire route. The Caydence Cycle Club (CCC) has a number of brilliant cycle cafe's along the latter part of the route and there are around twelve water taps, free for use, located from start to finish. The YHA provides food at Truleigh Hill and at Southease The Sustainability Centre. Droxford Rd, Petersfield GU32 1HR, United Kingdom Queen Elizabeth Country Park . S Downs Way, Waterlooville PO8 0QE YHA's YHA Truleigh Hill , S Downs Way, Shoreham-by-Sea BN43 5FB. (OS Grid TQ 220 105) YHA South Downs . YHA South Downs, Itford Farm, Beddingham, Lewes BN8 6JS. (OS Grid TQ 433 055) YHA Eastbourne . 1 E Dean Rd, Eastbourne BN20 8ES. (OS Grid TV 582 986 Caydence Cycle Clubs Cocking Hill . The Old Dairy, Hilltop, Cocking, Midhurst, West Sussex, GU29 0HTh Upwaltham . Chichester, West Sussex, GU28 0LX Eastbourne . The Helen Garden, King Edward’s Parade, Eastbourne BN20 7XL There are further CCC cafe's at Litlington and Beachy Head, both of which are a few miles off the South Downs Way route. Water taps http://bikebible.co.uk/water.html https://www.southdownsdouble.co.uk/taps/ Convenience stuff As the route is mainly offroad and away from civilisation, any toilets will be located in the villages, cafe's or YHA's en-route. Away from the open ridge there are plenty of wooded areas for a quick stop if you're comfortable with an outdoor view. There are a number of convenience stores in the towns and villages the route passes through, supplying food drink and essentials. The Caydence Cycle cafe's have bike repair stations and so do the YHA's. Cycle shops are few and far between given the route is mainly on top of the South Downs. You'll need to drop into one of the big coastal towns if you're in need of something more than a trail side fix. Equipment Given the tough nature of the route, coupled with the well serviced water and food points plus a YHA for overnight accomodation, I opted for the bare minimum of kit. The first day was hot and although I drunk around 6 ltrs of water throughout the journey the regular water points meant I only needed a one litre bottle. You only really need shorts, t-shirt and socks to be comfortable in the YHA and they can also supply towels if required. All my kit fitted neatly into a number of frame and bar bags across the bike. Felt Edict, full suspension XC mountain bike, running Vittoria Mezcal tyres. Bikepacking bags (10 ltrs total): Wizard Works Lil Presto bar bag (1.8 ltr), Wizard Works Go-Go top tube bag (0.8 ltr), self-made frame bag (3ltrs), Topeak top tube bag, between top tube and seat post (0.5ltr), Topeak seat pack (0.5 ltr), EVOC waist pack (3ltr) for carrying the drone. Cycling clothes: Helmet, gloves, glasses, cycling shoes, cycling bibs, merino wool jersey. Arm warmers, neck buff, windproof / water resistant smock. Spare / overnight clothes: Sports shorts, long sleeve thermal top, grippy toe socks. Wash kit and first aid items Mobile phone, GPS, GoPro, Drone, battery(s), charger, cables Bike tools, innertube, pump, lights, bell 800ml water bottle Final thoughts The South Downs Way is a brilliant route, fully serviced with strategically placed water stops along its length, decent signage and trails built for bikes. It's undulating, rough and steep, pretty much all the way along it's 100 mile length. The surrounding countryside views are amazing - expansive and beautiful. Like a hearty soup on a winters night, completing this route is wholesome and satisfying. Save it for when you're feeling fit and the weather and trail conditions are at their best. It won't disappoint. Happy Adventuring!
- The Cantii Way
This was going to be our third Cycling UK route over the last couple of years and this time Tim and I were looking forward to sharing our Autumn adventure with a couple of other friends. At 140 miles and an almost flat elevation profile, plus the opportunity to stop for ice-creams en-route, the Cantii Way looked to be a viable contender. Day 1 - Wye to Sandwich It was a typical start to any adventure. An early morning pickup from various parts of Surrey before briefly hitting the M20 and then finding a secure parking spot in Wye. Bikes unloaded, bags strapped on and water bottles filled we were quickly winding our way north for the start of our long weekend. We'd chosen to divert away from the "official" route, avoiding the leg through Kings Wood and Chilham Village. The guide book route takes a very pretty ride along a mix of lumpy single and double tracks. However, being the start of our expedition, we didn't fancy a puncture or lost pannier early on, so stuck with the Olantigh Road joining the route proper at Shalmsford Street some seven miles later. And being National Cycle Network 18 anyway, we didn't feel it detracted from the overall adventure at all. Next stop Canterbury, which for some unknown reason is by-passed by the guide book route. We had planned to take a straight line through the middle to ride its cobble streets and take a brief look at the world famous Cathedral. The Crab and Winkle Way (NCN 1) took us out of Canterbury, through the University of Kent and onto the pretty town of Whitstable, the first of our tick-list of quintessential sea-side towns we'd be passing through over the three days. What followed was a fantastically scenic jaunt round the coast, first west - passing through Hearn Bay, Reculver and Margate - then turning south towards Broadstairs and Ramsgate. Twenty five miles later, and with a horizon bending pink sky on our left, we switched on our lights as Ramsgate harbour did the same. I don't think I've ever visited this part of the world before but we all agreed it was pretty special. Boats bobbing in the marina, the ornate brick arches forming three tiers to the cliff side route and beautiful art deco lights illuminating our way up Royal Parade. The sun had set by the time we reached The Viking Ship Hugin near Pegwell Bay and from there it was three miles to our over night stop in Sandwich. Beers, Burgers and three in a Travelodge room for the evening finished the first day perfectly. Day 2 - Sandwich to Lydd We set off reasonably early, pausing to gather supplies from the local Spar and obligatory sausage rolls from Greggs. It was a cool Autumn morning, the sun not quite strong enough to take the chill out of the air as we wound our way back towards the coast at Sandwich Bay. Our first sight of sand and sea was approaching the Royal Cinque Ports Golf Course and rolling into Deal. We passed the pier on our left and castle on our right as we slipped once again onto the familiar dedicated sea-front cycle paths. The route crops off St. Margaret's at Cliffe and South Foreland Lighthouse, our direction being the first of only two real ascents on the entire journey via NCN 1. We were quickly topping the hills above Dover, the imposing castle in the foreground, recounting scenes from Ian Fleming's novel "Moonraker" where Bond drives his Bentley 4 1/2 litre to investigate Hugo Drax's rocket research establishment at Kingsdown. The Pedaler on the Port @theindiepedaler was a brilliant spur of the moment find, delivering coffee and cake while watching holiday makers board the channel crossing ferries. Refueled, we dived inland again for the last big ascent of the trip, this time round the back of Samphire Hoe towards Folkestone. We stumbled upon the Battle of Britain memorial on the cliff above The Warren, and as we still had a couple of hours before meeting our forth team member, we wandered around the mock Spitfire and German Junkers aircraft, understanding a little more about this decisive Second World War air campaign. Rather than cycle through Folkestone, our route stayed on the cliff behind, allowing us a brilliant view of the sprawling port town and Euro Tunnel terminal below. We'd been blessed with beautiful autumn sun the day before and it was same today as we stripped off layers before scooting down the hill to meet Paul in Peene. It was lunch time, so once again one of the multitude of cafes and restaurants on the route delivered. This time it was cans of Tango and fish finger baguettes in the Lazy Shack. Hythe. We diverted away from the busy coast road to follow the Royal Military Canal inland before heading south to pick up 7 miles of stunning coastal sea walls all the way to Dungeness for a cheeky half pint in the Pilot Inn over looking the alien landscaped bleakness. With dusk now on us and our front lights blinking our way out of the marshes, we took a straight course for Lydd and our over night stop at The George Hotel. The hotel restaurant was closed but the Guljar Tandoori next door wasn't. Chicken Tikka Masala and Cobra beers all round - could we have asked for a better end to the day? Day 3 - Lydd to Wye We stepped out of the hotel into a bright but chilly Autumn morning having already decided to buy a quick snack from the local convenience shop and then breakfast in luxury in Rye. Our route there was via NCN 2 heading towards the coast at Jury's Gap. It's was a pretty route, flat marsh land mainly, home to a number of bird species in the Walland Marsh on our right bordered by the no-go Lydd (firing) Range Danger Area on our left. An hour and a half later we were rolling through Rye's mediaeval "Landgate" arch and into The Old Grain Café for an obligatory, and fantastic, Full English breakfast, It's definitely worth a quick spin round the town if you have the time. Away from the general one-way-system the town is mainly olde-worldy cobbled streets and mediaeval houses. Mermaid Street perhaps being slightly reminiscent of Gold Hill in Dorset that starred in the famous Hovis bread advert. As Whitstable was the first, Rye was the last of our sea-side towns on this trip, as we now turned in land to head north towards Ashford and Wye. Our route joined the Military Road parallel to the southern part of the Royal Military Canal, an almost straight line all the way to Appledore. The road to Appledore was quite busy and a little uninspiring given our sea-view overdose over the last two days. We munched through the miles ticking off Woodchurch and Shadoxhurst, again choosing to cut out the official route that dog legs into some local woods. Ashford was upon us, its urban sprawl requiring slightly more attention to the GPS than the last fifteen miles and after that Wye and our waiting cars. We'd been blessed with perfect Autumn weather over the entire three days, particularly for early October, and we'd just caught the tail end of the tourist season so shops, accommodation and amenities were all still just about available. This is definitely one of our top Cycle UK routes so far. It's a brilliant adventure around some of England's finest Victorian sea-side towns. The easy riding coupled with lungful's of sea air, expansive horizons, architectural grandeur and a whiff of exuberant past times just makes it a perfect adventure. How to ride the Cantii Way Route The Cantii Way primarily uses a collection of National Cycle Network routes and local cycle trails to form a 140 mile (225km) circular route starting and finishing in Wye in Kent. It's more of a cycle touring route than an off-the-beaten-path bikepacking trip. and would be perfect as your first foray into multi day cycling adventures. We modified small sections of the journey to take in local landmarks and to cut out, what we felt, were needless detours into terrain more suited to a mountain bike. We felt the modifications enhanced our route - and of course CyclingUK encourage diverting away from the guidebook to suit your own adventure. We all thoroughly enjoyed the mix of coastal views, quiet back lanes, busy towns and the shear quantity of places to eat and drink on the way. It made for a brilliant adventure with plenty of opportunity to ride four abreast along many of the sea wall cycle paths. There are no public signs specifically for the route but if you take note of the NCN numbers and local cycle trail names before hand you can navigate a good percentage of the journey without being glued to your GPS. Clicking on the map title above takes you to my Ride with GPS route used for this adventure. It was created from scratch and checked against Ordnance Survey maps for accuracy and access rights at the time. It has also been tuned for turn by turn directions as best as possible. As mentioned above, we made minor modifications to the official route following feedback from previous route users and to include local attractions plus cut out some of the off-road terrain better suited to a different bike type. Please feel free to download and modify to suit your own adventure accordingly. Alternatively you can download the official route from CyclingUK here. We chose to undertake the trip over three days with the first two days being slightly longer than the last. Our journey by car started from London which still fitted into the overall three day window. Day 1 - Wye to Sandwich. 51 miles (82km), 570m ascent Wye, Chilham (4), Canterbury (10), Whitstable (19), Herne Bay (24), Margate (36), Broadstairs (42), Ramsgate (44), Sandwich (51). Day 2 - Sandwich to Lydd. 54 miles (87km), 55om ascent Sandwich, Deal (6), Dover (15), Folkstone (22), Hythe (30), Dymchurch (39), Lade (44), Dungeness (47), Lydd (54) Day 3 - Lydd to Wye. 33 miles (53km), 295m ascent Lydd, Rye (9), Appledore (15), Woodchurch (19), Shadoxhurst (22), Ashford (27), Wye (33). Getting to the start Being a circular route, you can start at any point around the 150 mile circumference. We began our trip in Wye, the official start, where there was plenty of free on street parking on Churchfield Way next to the green. There's also public toilets and a small Co-op store for pre or post ride convenience. Wye train station is a few hundred meters from the start, which is an hour and a half train journey from London Charring Cross. If you were traveling in towards Kent, you could equally start in Rye, Canterbury or Ashford, all with good train links or parking. Terrain 86% paved... 14% unpaved If you choose to follow the Ride with GPS route above, which cuts out the short rough sections of the official route, what's left becomes classic touring bike terrain, echoing much of the National Cycle Network routes. It's best suited to a hybrid, gravel or touring bike, running something around a 35mm tyre. When to go Naturally, the best months are from May to September, when the weather is best and all the local attractions and facilities are open. It can of course be ridden at any time but do check the weather as much of the route is around very exposed coastal sections which would be severely impacted by strong winds or heavy rain. Accommodation Day 1 - Travelodge Sandwich. Spitfire Way, Discovery Park, Sandwich, Kent, CT13 9FR Day 2 - The George Hotel Lydd. The George Hotel, 11 High Street, Lydd, Kent, TN29 9AJ Eating Given the amount of towns and villages the route passes through you're really spoilt for choice on where to eat. We stopped at the following places, outside of what our accommodation provided: The Pedaler on the Port, Dover (Indiepedaler). https://www.instagram.com/theindiepedaler/ Lazy Shack, Hythe. https://www.thelazyshack.co.uk/ The Pilot Inn, Dungeness. http://www.thepilotdungeness.co.uk/ Guljar Tandoori, Lydd. https://guljartandoori.com Old Grain Store Rye Convenience stuff There are plenty of public toilets along the route. A quick Google search at any point should bring up a number within a reasonable riding distance. Check for opening times if possible as toilets do tend to get locked up overnight and for the winter as soon as the main summer season has ended. Local food shops are in abundance given the amount of towns the route passes through. We struggled with cycle shops and did in fact have a minor mechanical when Tim's cassette decided to work its way loose. Nothing that a Leatherman multitool couldn't fix but we had tried two cycle shops in the mean time, both without success. Equipment The route is best suited to a touring, hybrid or gravel bike but as it's not particularly demanding any bike in good working order would suffice. The firm surface lends itself to a road bias tyre. Given our group dynamic, we chose not to camp, significantly cutting down on the kit we carried, and allowing sharing of common tools and equipment. We all carried a variation on the list below; this was my personal kit: Specialized CrossTrail "Adventure Bike", running Schwalbe Marathon Mondial 700 x 35 tyres; a 40T x 11-46t drive train and solid front forks. Bikepacking bags (22ltrs total): Self-made rear bag system (2 x 8 ltrs), Topeak Compact Handlebar Bag (2ltr), self made frame bag (3ltr), Topeak top tube bag (0.5ltr), Specialized seat pack S, Evoc Hip Pack Pro (3ltr) Cycling clothes: Helmet, gloves, glasses, cycling shoes, cycling shorts (bibs), overshorts, wool cycle jersey, cycle gilet, arm warmers, neck buff, windproof smock. Spare clothes: Down jacket, light weight fleece, zip off trousers, socks, underwear, light weight trainers Wash kit, towel and first aid items Mobile phone, GPS, GoPro, Drone, battery(s), charger, cables Bike tools, innertube, pump, lights, bike lock, bell 1.5 ltrs (2 x water bottles) carried on the bike, snacks Final thoughts The Cantii Way is definitely not a wild camping bikepacking trip, but it is one of my all time favorite routes. If you're new to bikepacking or cycle touring and looking for your first multi day trip, I'd definitely pop this one towards the top of the list. With it's almost tick-list quantity of amazing towns, villages, castles and sea views, and terrain that's not too challenging, it makes for a simple ride which feels like a propper adventure. Happy Adventuring!